
Winter often brings a chill that makes many of us retreat indoors, but that doesn’t mean we have to give up on fresh food. In fact, growing fruits and vegetables inside during the winter months can be a game changer for your health and your meals. Imagine stepping into your kitchen and grabbing a handful of crisp greens or fragrant herbs, grown right at home! This isn’t just about green thumbs; it’s about taking control of what you eat, especially when grocery store shelves might not always meet our needs in colder months. This guide is here to walk you through the basics of winter indoor gardening—from choosing the best plants to know-how on setup—making it easier than ever to provide yourself with a nutritious emergency food supply all season long. So, let’s dig in!
The Winter Indoor Growing Guide: Emergency Food aims to provide essential information and practical steps for successfully cultivating fruits and vegetables indoors during the winter months, ensuring a steady supply of nutritious food even in challenging conditions. This guide covers indoor gardening techniques, necessary equipment, and best practices to sustain food production throughout the winter season.
Choosing the Right Plants for Winter
When winter rolls around, it can be tempting to think that your gardening days are over until spring. However, with the right selection of plants, you can continue to grow fresh produce indoors even during the chillier months. The key lies in choosing hardy plants that thrive under lower light conditions and can handle cooler temperatures. This enriches your diet with essential nutrients.
Types of Plants
-
Leafy Greens:
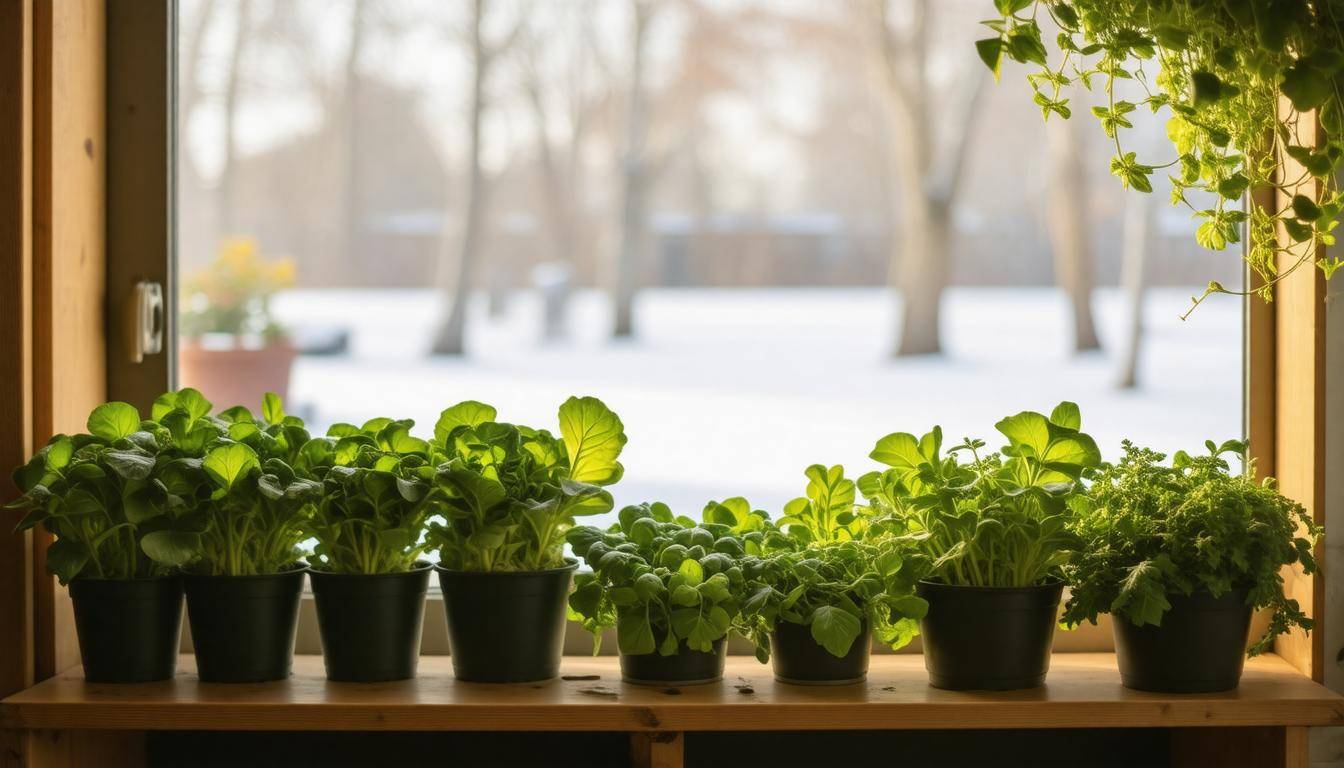
Lettuce, spinach, and kale are among the most rewarding greens to grow indoors. These plants not only grow quickly but are also packed with nutrients and flavor. They tolerate lower light levels compared to other crops, allowing for vibrant green leaves just two to four weeks after planting. They thrive in cooler temperatures too—perfect for indoor growing during winter. -
Herbs:
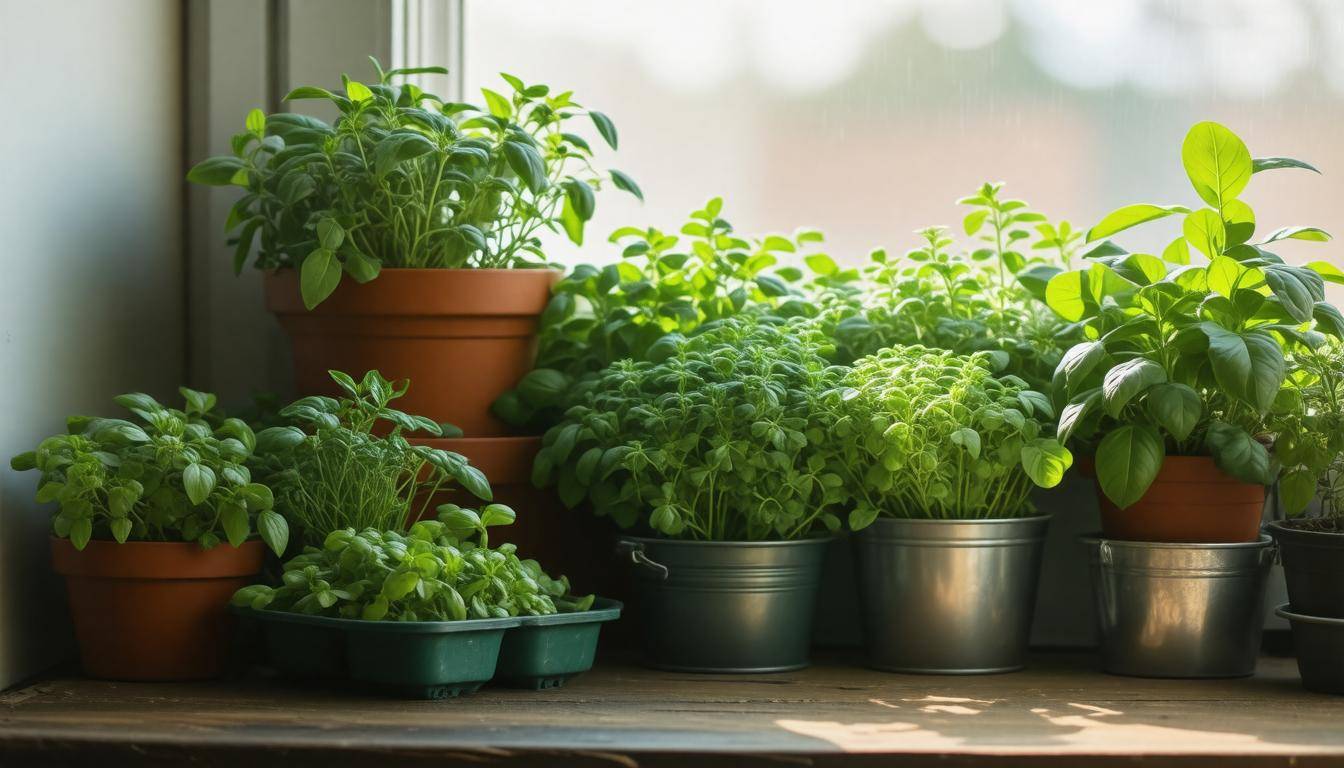
Herbs like basil, parsley, and cilantro enhance culinary creations without demanding too much from you as a gardener. They grow efficiently in small spaces and require little maintenance once established. A window sill can often suffice for these herbs to flourish with minimal fuss, providing a constant supply of fresh flavor throughout the season. -
Root Vegetables:
Root vegetables such as radishes and carrots are slightly less conventional for indoor gardens but can be quite successful when planted in deeper containers. They utilize space well and allow you to explore a different dimension of vegetable growing that many overlook indoors. Root vegetables develop well with less light than you’d expect; just keep their soil adequately moist and ensure they have room to grow down deep.
As you consider which plants to incorporate into your indoor garden, remember that combining leafy greens, herbs, and root vegetables will provide variety while supporting your nutritional needs during the cold months ahead. Next, we’ll discuss the essentials for choosing the right seeds to bolster your emergency food supply.
Selecting Seeds for Emergency Supply
When it comes to winter indoor growing, the seeds you choose are vital to your success. A well-thought-out selection can significantly improve your chances of producing robust crops during those harsh months. My own experiences have taught me that opting for heirloom or non-GMO seeds tends to yield plants that embody resilience, showcasing vitality in fluctuating indoor conditions. These varieties not only thrive better but also provide peace of mind knowing they’re free from genetic modifications.
Seed Selection Criteria
One of the first things to do while selecting seeds is to closely examine the seed packet. This treasure trove contains crucial information such as germination time, mature height, and specific light requirements. For example, certain lettuce varieties can spring from seed to plate in as little as 30 days, making them an ideal fast-growing option for those impatient for fresh produce.
Germination times vary widely between different types of seeds; knowing this can direct your planting schedule and help ensure a constant supply of fresh greens.
Additionally, awareness of the mature height influences container choice and placement within your indoor setup. Keeping plants that spread too wide or grow too tall away from low-light areas can make all the difference as they vie for those precious rays from your grow lights.
Moreover, consider where you purchase your seeds. Buying from reputable sources like local nurseries supports community businesses and typically guarantees fresher products. Online retailers can also be a goldmine, especially if they have reviews highlighting their seed quality. However, just remember—always verify their shelf life!
Keep it Fresh
- Storage: After buying your seeds, store them in a cool and dark place to maintain viability.
- Test Germination: Performing a simple test by planting a few seeds from an old batch can save disappointment later on. If they germinate effectively, you’re good to go!
- Rotation: Rotate old seeds into your planting schedule sooner rather than later; this ensures nothing goes to waste while keeping your garden stocked with fresher options.
With these guidelines on seed selection in mind, you’ll be ready to make informed choices that will enhance your indoor gardening experience and yield nutritious crops even in the toughest winter conditions. This thoughtful approach lays a solid foundation for mastering the next steps in establishing a fruitful garden space.
Setting Up Your Indoor Garden
The setup of your indoor garden plays a pivotal role in determining its success and sustainability. Choosing the right space may sound simple, but it often sets the tone for your entire gardening journey.
Ideally, look for a location with ample room and access to natural light; a sunny window can provide that much-needed boost for your plants. But what if you live without ideal conditions? Basements are a viable alternative since they maintain consistent temperatures—even during those chilly winter months! Just remember, you’ll need to augment this setting with artificial lighting.
Now that you’ve pinpointed a suitable location, it’s time to prepare that space. A clean start sets the foundation for healthy growth, so go ahead and thoroughly clean and sterilize the area. This proactive measure minimizes the risk of mold and pest infestations; after all, you want to create an environment where your plants can thrive, not just survive.
Once the cleaning process is complete, consider arranging shelves or tables to keep your plants organized and make maintenance easier. Utilizing vertical space through shelving can also be beneficial as it allows for more plants in less area.
An often-overlooked aspect of preparing your indoor gardening area is protecting surfaces from water runoff. Having protective coverings laid out—think plastic trays or old towels—can help catch excess moisture and prevent any water damage to your floors or furniture over time. These small inconveniences can add up quickly if you don’t address them early on.
Finally, as tempting as it might be to skip straight to planting, taking the time to assess and adjust your lighting situation should be a priority next step. Without adequate light—natural or supplemented—your plants won’t reach their potential. Remember: most plants require at least 12 hours of light each day to flourish, especially during winter when sunlight is scarce.
With your space selected and prepared, you’re laying down a solid groundwork for a successful indoor garden. The next focus will be on understanding the specific containers and types of pots that will facilitate optimal growth throughout these cold months.
Essential Containers and Pots
The type of container you choose is paramount; it’s not just about aesthetics but also functionality. Containers come in various materials, each with advantages and disadvantages that may impact your gardening success. Selecting the right size according to your plants’ needs and ensuring proper drainage will lead to healthier growth. A good rule of thumb is to think of the pot as the “home” for your plants—just like we need the right conditions for living, so do our green friends!
Types of Containers
-
Plastic Pots: These are popular because they are affordable and lightweight. However, ensure they have sufficient drainage holes to avoid overwatering, which can lead to root rot—a common issue that indoor gardeners dread.
-
Fabric Pots: Known for promoting excellent root health, fabric pots allow air circulation around the roots while preventing overheating. This breathability helps maintain a healthier root system that encourages robust plant growth. Keep in mind that these pots can dry out faster than others, so regular monitoring of soil moisture is essential.
-
Self-Watering Pots: Ideal for those who might forget to water their plants regularly, self-watering pots have a reservoir at the bottom that allows the soil to draw water as needed. While they may require a slightly higher initial investment, the reduced maintenance often makes them worth it.
If you’re thinking about growing leafy greens, a 3-gallon fabric pot is a fantastic option. It provides ample room for roots to spread while maintaining an optimal environment, ensuring that your greens stay happy and healthy throughout winter.
The size of the container matters too! Smaller pots (4-6 inches) are great for herbs like basil or parsley while larger ones (12-16 inches) suit fruiting plants such as tomatoes and peppers perfectly.
When choosing containers, consider adding drainage trays underneath to catch any excess water. This not only prevents mess but protects surfaces from water damage. Additionally, you can experiment with different sizes based on what you’re growing; vibrant plants need space to thrive, after all!
Keeping in mind both container type and size prepares you for successful indoor gardening, ensuring your plants flourish in any season. As you select the right vessels for your greenery, it’s essential to ensure they receive adequate light for optimal growth.
Providing Adequate Light
Light is essential for photosynthesis, which is how plants make their food. During the winter months, natural sunlight can be limited due to shorter days and cloudier skies. Consequently, choosing the right lighting becomes vital for your indoor garden’s health. Understanding the various types of lights available can significantly influence your plant’s growth and productivity.
Types of Lighting
When selecting grow lights, opting for full-spectrum LED options with a Kelvin rating between 5,000-6,500 is often the best choice as they closely mimic natural sunlight. This allows your plants to thrive indoors, even in less-than-ideal conditions outdoors. Brands like GE with their 36-watt LED grow lights and Sansi offering 35-watt versions are recognized among seasoned growers for providing efficient lighting that promotes healthy growth.
| Light Type | Features | Approx Cost |
|---|---|---|
| Full-spectrum LED | Mimics natural sunlight, energy-efficient | $50-$100 |
| Fluorescent Lights | Good for seedlings, less efficient than LED | $20-$50 |
| High-Pressure Sodium | High efficiency, ideal for flowering stages | $70-$150 |
Among these options, full-spectrum LEDs stand out because they tend to last longer and consume less energy compared to other types of lighting. They emit a broad range of wavelengths that support various growth stages. Investing in quality parts from trusted brands ensures you have reliable equipment for a sustained growing environment.
Consider it an insurance policy on your harvest; investing now pays dividends later.
Another factor to keep in mind while setting up your grow lights is placement. Properly positioning your lights can maximize exposure without causing stress or burns to your plants.
The general rule of thumb when placing grow lights is to keep them at least 12-24 inches above the plants. This distance prevents heat stress while ensuring your plants receive enough light for photosynthesis. You might need to adjust this distance based on the specific needs of your plants or their height as they grow. Rotating your plants occasionally will help ensure all sides receive an equal amount of light.
Considerations for Optimal Growth
To maintain optimal growth conditions, consider incorporating timers into your setup. Plants require a cycle of light and darkness just like they would naturally experience outdoors. Many indoor gardeners maintain a schedule of 14-18 hours of light per day during the growth phase and reduce it slightly as the flowering stage approaches if applicable. Utilizing timers ensures consistency and eliminates the worry of keeping track manually.
By taking these steps—selecting quality lights, positioning them correctly, and adopting a reliable lighting schedule—you create an inviting environment that enhances plant health and productivity throughout the bitter winter months. Regular monitoring is key; observe how your plants respond to the lighting conditions so you can make necessary adjustments.
As we continue exploring indoor gardening techniques, understanding how to manage moisture levels will be crucial for successful growth.
Proper Watering and Nutrition
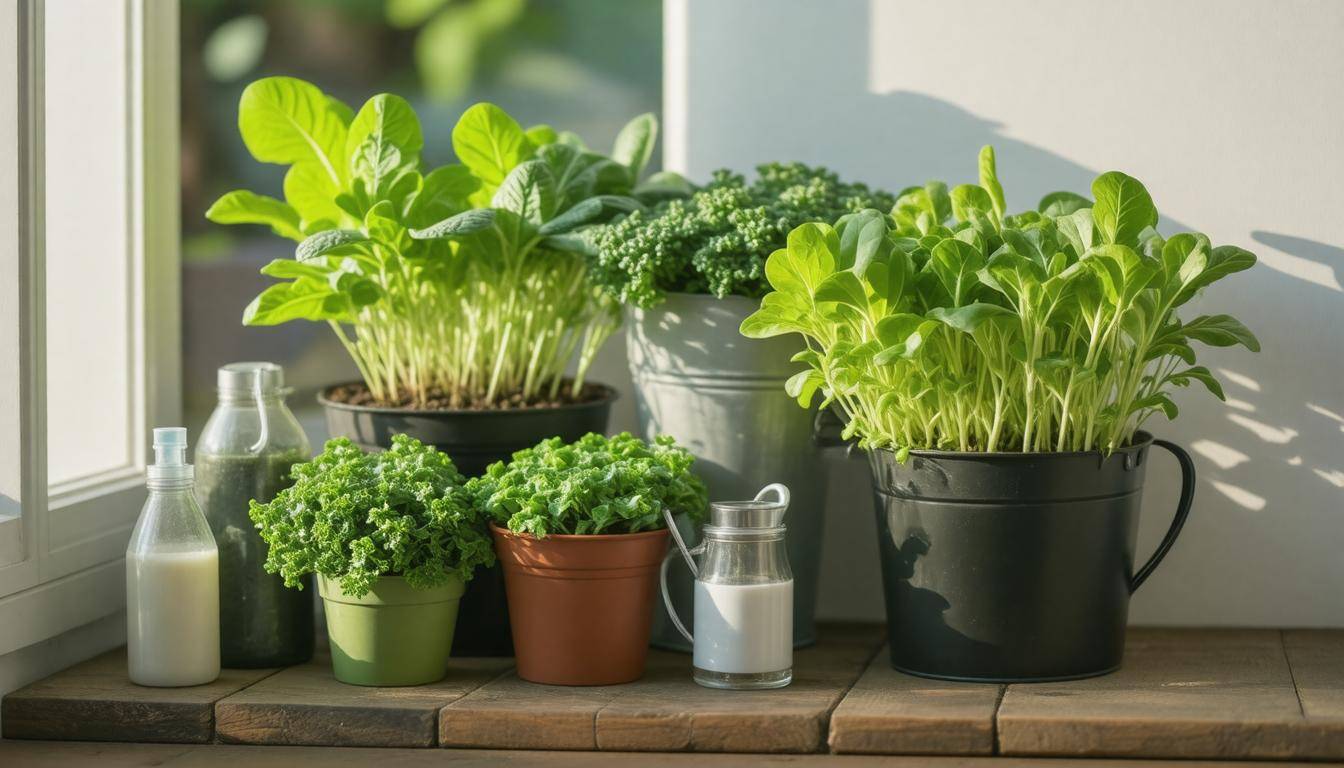
To provide your plants with the best chance of thriving indoors, the first step is mastering the art of watering. Always use room temperature water for your orchids to prevent shocking their delicate roots. Colder water can create stress that ultimately stunts their growth or damages them. A soil moisture meter can be a helpful investment to gauge whether your plants actually need watering, as it helps prevent the all-too-common pitfalls of overwatering or underwatering. Remember, a little excess water can lead to root rot, while too little means your orchids will simply dry out and fail to flourish.
Beyond just water, understanding nutrient solutions is essential for vibrant plant health. Investing in organic fertilizers, like fish emulsion or compost tea, can significantly enrich the soil with vital nutrients needed for growth. For instance, Neptune’s Harvest Fish Fertilizer has gained popularity among indoor gardeners because it is both organic and effective at promoting lush leaf development and vibrant blooms. When using fertilizers, apply following the manufacturer’s guidelines; less is often more when it comes to feeding.
Regularly checking the NPK ratios—which stand for nitrogen, phosphorus, and potassium levels—of these fertilizers ensures that you’re providing balanced nourishment tailored to your specific orchid species’ needs. Each fertilizer will have its unique ratio printed on the label; for example, an MSU Orchid Fertilizer with a ratio like 13-3-15-8-2 is known for being particularly beneficial across various species.
During winter months when growth slows down, reducing the amount of fertilizer is key. Orchids usually enter a sort of dormancy where they require fewer nutrients. This adjustment mirrors their natural growth cycle and prevents issues associated with over-fertilization, such as salt buildup in the soil which can be toxic for your plant. Additionally, seasonally adjusting your feeding schedule allows you to stay aligned with their active or resting growth phases—ensuring you’re providing exactly what they need when they need it.
Each feeding should also take into account water quality; ensuring that your water’s pH and total dissolved solids (TDS) are within optimal ranges can drastically affect how well nutrients are absorbed by your orchids. Monitoring these parameters leads to healthier plants that are more resilient against stressors common in indoor environments.
With proper watering techniques and rich nutrient solutions adjusted to seasonal needs, you’re setting the stage for success in indoor gardening. As you embrace these practices, it’s important to consider how maintaining vitality will play a crucial role in their long-term health.
Maintaining Plant Health
Keeping your plants healthy involves more than just providing them with water and nutrients; it requires regular attention and a keen eye for detail. One of the most crucial aspects of fostering healthy plants is ensuring adequate air movement. In closed spaces, stagnant air can lead to excessive humidity, increasing the risk of mold and fungal infections. This is why using a small fan to create gentle air circulation within your growing area is highly recommended. Not only does this keep the environment fresh, but it also helps strengthen your plants by mimicking natural wind conditions, making their stems robust and resilient.
When you notice yellowing leaves or wilting, it’s essential to act quickly. These signs often indicate underlying problems that require immediate attention. It could point to nutrient deficiencies, issues with light exposure, or inconsistencies in watering habits. If you see yellowing leaves, check whether your plants are receiving enough light or if they’ve been over or underwatered. By monitoring these visual cues and adjusting your care accordingly, you’ll prevent minor issues from escalating into more significant problems.
Regular inspections play a pivotal role in maintaining plant health. Make it a habit to closely observe your plants at least once a week. Early detection of pests or diseases can save you considerable time and effort in the long run. Don’t hesitate to gently inspect the undersides of leaves for any unwanted visitors like aphids or spider mites. If pests are found early, they can often be addressed with simple solutions like insecticidal soap or neem oil rather than resorting to drastic measures.
Furthermore, creating a consistent routine for monitoring moisture levels will help maintain healthy soil conditions. Overwatering can lead to root rot, while underwatering stresses plants significantly. To achieve this balance, use finger tests: stick your finger into the growing medium about an inch deep; if it feels dry, it’s time to water! This proactive monitoring approach ensures that you catch any problems before they spiral out of control.
Maintaining plant health requires diligence and mindfulness. Your thriving indoor garden reflects how attentive you are to its needs. By prioritizing air movement, regularly observing visual cues from your plants, and establishing a solid watering routine, you’ll enhance their growth and enjoy nurturing fresh produce right in your home.
As we focus on caring for our indoor gardens, we now turn our attention to the crucial aspects of safely bringing in the harvest without compromising quality or safety.
Harvesting Safely
Harvesting plays a crucial role in maintaining plant health while also providing fresh ingredients for your meals. The best time to harvest is during the morning when plants are lush with hydration. This simple choice has profound effects on flavor and texture, preserving the freshness of your greens like crunchy lettuce or fragrant herbs. By avoiding the heat of midday, you’ll minimize wilting and maintain the best possible quality of your harvest.
Harvest Techniques
When it comes to techniques, precision is everything. Using sharp, clean scissors or garden shears allows you to make precise cuts without damaging the plant. Tearing leaves can harm delicate stems, so it’s best practice to cut rather than yank. If you’re following a “cut-and-come-again” harvesting method, trim outer leaves while leaving the inner ones intact. This encourages continued growth and allows the plant to regenerate easily for future use, thus extending your harvest season.
It’s equally important to ensure cleanliness during the harvesting process. Before you start snipping away at your greens, sanitize your tools with rubbing alcohol or soap and water. This helps prevent potential diseases from spreading among your plants—a simple step that yields significant benefits for keeping your indoor garden flourishing longer.
After harvesting, handle your produce gently—rinsing leafy greens under cool water immediately helps remove any dust or pests that may have collected on their surface. This not only enhances freshness but also ensures safety before consumption.
Post-Harvest Handling
Once rinsed, delicately dry your greens using a clean cloth or paper towel. You want them damp enough to retain moisture but dry enough not to rot quickly in storage. For optimal results, store them in a breathable container in the refrigerator—wrapping them loosely in a damp paper towel can help keep them crisp for about five to seven days.
By following these careful practices, you not only enhance your indoor gardening experience but also maximize the health benefits of your homegrown produce while ensuring a steady supply for those cold winter meals ahead.
As winter approaches, utilizing these harvesting and handling techniques will empower you to enjoy fresh food year-round and bolster your survival preparedness strategy effectively.