
Family photos aren’t just snapshots; they’re windows into our past, capturing the joy of birthdays, the love during holidays, and the laughter from family gatherings. In these moments are embedded stories that define who we are. However, without proper care, these memories can fade away, making it essential to create a Family Photo Preservation Emergency Plan. This may sound daunting, but with a few simple steps—like digitizing old images and organizing them thoughtfully—you can protect your precious memories for future generations. Let’s explore how to safeguard your family’s visual history together!
A Family Photo Preservation Emergency Plan should include strategies such as digitizing physical photos using high-resolution scans, organizing the digital files with a systematic naming convention, and having multiple backups stored securely both on-site and off-site. Additionally, consider utilizing cloud storage solutions or photo preservation services to safeguard irreplaceable memories against unforeseen disasters.

Assessing Your Current Photo Situation
The first step in preserving family memories is to take a good look at what you already have. Begin by making a comprehensive inventory that captures both physical and digital photos. It’s akin to taking stock before a big move; you want to ensure nothing gets lost along the way.
Think about every nook and cranny—the attic, closets, or even that forgotten box under the bed. You might be surprised at what you’ve accumulated over the years!
Physical Photos Inventory
When it comes to physical photos, it’s helpful to approach the task systematically. Try to sort through old boxes, albums, and any random collections you find tucked away. As you go through each item, make note of key collections: maybe there’s a set from a family reunion or baby pictures from those early years. Capture essential details—years, events, or specific people associated with each group of photos.
This assessment can be elegantly organized using a simple spreadsheet or just a notebook. For instance, list out entries like “Family Reunion 2015” or “Grandma’s 80th Birthday,” along with any key dates or notes that help to contextualize them. This organization not only aids in retrieval but also holds sentimental value as you recount those cherished moments.
Once you’ve tackled the physical side, it’s time to turn your attention to digital photos.
Digital Photos Inventory
Completing the evaluation of your photo collection involves checking all devices where digital images may reside. Start with smartphones—how many hundreds of snapshots have you taken in the last few years? Next, check computers where images from vacations or holidays may be saved. Don’t forget tablets and cloud storage services such as Google Drive or Dropbox; these platforms can house countless treasures waiting to be rediscovered.
As you gather these digital files, create a central directory on your computer for better management. This unique folder will serve as your launching pad for organization—sort photographs into subfolders based on year or event if you’re feeling ambitious.
With everything collected in one place and properly labeled, you’ll have greater ease in sorting through and organizing them later on. This is vital because once you’ve obtained your visual history firmly in hand, you’ll be able to decide which images matter most, thus ensuring that those precious snapshots remain safe for future generations.
Taking the time now to assess both your physical and digital collections lays an important foundation for effectively preserving your family’s rich tapestry of memories. The next step involves diving deeper into the practical aspects of organizing and categorizing these treasured images.
Sorting Physical and Digital Photos
With a comprehensive inventory of your photos, it’s time to sort them effectively. For physical prints, create broad categories that resonate with your family’s history, such as “Family Vacations,” “Holidays,” and “Birthdays.” Organizing physical prints may sound straightforward, but it truly requires a thoughtful approach.
Lay out all your prints on a large table or floor space where you can see everything at once. Consider grouping them chronologically, as well as by event or person, which will facilitate the organization process.
As you get started, keep in mind that temporary storage solutions are vital while sorting. Ziplock bags work wonders here; they not only keep your prints safe from dirt and damage, but they’re also transparent, allowing you to peek inside without needing to open each bag. Alternatively, binders can be effective for keeping photos organized by categories—just make sure they are acid-free to avoid deterioration over time. Make labeling a priority; using sticky notes to mark years or events can prevent confusion later.
- Use Sticky Notes: Mark years or significant events on sticky notes placed on top of each photo pile.
- Separate by Event or Individual: Create clear groups based on holidays, vacations, or individuals so that retrieval becomes easier.
- Sturdy Boxes Temporarily: Invest in sturdy, acid-free boxes for temporary storage once categories are established.
Now that we’ve tackled the physical side of things, let’s turn our attention to organizing your digital photos, as they require just as much care and thoughtfulness.
Sorting Digital Photos
For digital photos, employing photo management software can save you countless hours of frustration later. Programs like Adobe Lightroom offer powerful tools to help you sort images according to specific dates, events, or people. Additionally, Google Photos provides a free option with ample features for categorization and easy retrieval.
While sorting through your digital library, it’s essential not only to organize but also to eliminate clutter. This means quickly identifying and deleting duplicates or low-quality images that add no value. Imagine scrolling through thousands of pictures only to find duplicates eating away at precious space—by addressing this as you sort, you’ll maintain a cleaner digital library from the start. Implementing consistent naming conventions is another great way to ensure that you can easily track down a specific image later on.
A suggestion: Store your photographs within folders labeled by year followed by specific events (e.g., “2025 > Family Reunion”); this simple act adds clarity and facilitates quicker access down the line.
After sorting both physical and digital photos, the focus now shifts toward ensuring these cherished memories remain safe for years to come. Let’s explore effective methods to safeguard them against unforeseen circumstances.
Creating a Backup Plan
1. Backup Principles
Having a reliable backup plan is no longer just an option—it’s a necessity in our increasingly digital world. The 3-2-1 rule is an essential guideline to follow: maintain three copies of your photos, on two different mediums, with one copy securely stored off-site. This diversified approach helps mitigate the risk of losing all your precious memories due to accidents, device failures, or disasters.
To illustrate, consider the tragedy faced by many families who have lost everything in fires or floods—lost not only material possessions but irreplaceable family moments encapsulated in photographs. Knowing that you have an extensive backup plan can significantly alleviate concerns over potential loss, offering peace of mind.
2. Implementing the Backup
To get started with your backup plan, think of it as layering your safety nets. Begin by creating local backups on an external hard drive—like the Toshiba model I mentioned earlier, which offers ample space to store years’ worth of images and videos. Connecting this drive to your computer allows you to transfer files efficiently while taking advantage of its portability.
Using high-resolution scanning for digitizing physical photos enhances detail preservation and prepares them for effective storage across devices. As technology evolves, higher resolutions become vital for ensuring compatibility with future formats.
Then, elevate your security by utilizing cloud services such as Google Drive, Dropbox, or iCloud. These platforms offer another layer of protection; they keep your data accessible across multiple devices while safeguarding against local disasters. With cloud services, you benefit from remote access and often built-in redundancy systems that protect against accidental deletions.
As a final touchpoint in your backup strategy, consider placing a physical drive at a different location—a safety deposit box at your bank can serve this purpose well—or perhaps ask a trusted friend or family member to hold onto a copy for you. This way, even if your home were to be affected by unfortunate events, you’d still have those cherished memories safe elsewhere.
Having structured your backup plan effectively, we now turn our attention to various options designed specifically for storing digital memories securely and efficiently.
Digital Storage Solutions
When it comes to selecting the right digital storage solution for your family photos, the options can be overwhelming. Each type serves a unique purpose and presents distinct advantages. Understanding these options helps you keep your memories safe while ensuring they’re easily accessible when you want to relive them.
External Hard Drives
One of the most comprehensive solutions is an external hard drive. This method provides local storage that keeps photos physically close at hand without relying on the internet. A reliable external hard drive should have robust capacities—think 1TB or even larger—so you won’t run out of space too soon. Brands like Western Digital and Seagate are often praised for their durability and reliability, embodying the qualities you want in a device tasked with safeguarding cherished moments.
Think of it this way: an external hard drive is like a safety deposit box for your photos. Just as you wouldn’t store valuable documents in a flimsy container, you shouldn’t skimp on quality when allowing memories to live here.
Cloud Storage Services
On the other hand, cloud storage presents a modern approach to photo preservation by offering redundancy and remote access. With services like Google Photos, you get unlimited storage with an eye toward accessibility. However, it’s important to note that while convenience comes at no cost with compression applied, some users prefer paying for more stringent photo preservation options through platforms like Google Drive.
Imagine having all your photos stored online, ready for access whether you’re on vacation or simply at a friend’s house. It provides peace of mind that if something were to happen to your local device—the dreaded “device failure”—you could still recover precious memories.
Here’s a quick overview of some popular cloud storage services:
| Cloud Service | Storage Capacity | Cost/Year | Compression |
|---|---|---|---|
| Google Drive | 100GB to 2TB | $19.99 – $99.99 | None |
| Dropbox | 2TB | $119.88 | None |
| Apple iCloud | 50GB to 2TB | $11.88 – $119.88 | None |
| Amazon Photos | Unlimited with Prime | $119/Year | None |
Having established effective digital methods for preserving your images, it’s essential to shift focus towards safeguarding physical copies of those cherished memories.
Physical Protection Strategies
Just as we safeguard our digital images, physical photographs require diligence to ensure their longevity and integrity. Physical protection is all about creating an environment that shields your photos from potential harm, mainly due to environmental factors like light, moisture, and temperature. Without proper care, these beloved images could fade or ultimately deteriorate beyond recognition, leaving you with nothing but memories.
Protective Storage
One of the most effective ways to protect your physical photographs is by utilizing acid-free storage options. Acidic materials can slowly deteriorate the paper in which your photos are stored. Therefore, investing in acid-free photo albums and storage boxes is fundamental. Brands specializing in archival supplies, like Pioneer Photo Albums, provide quality products designed precisely for safeguarding your memories. When purchasing these items, always opt for trusted sources to ensure you’re getting the best protection available.
Think of it this way: Just like food needs appropriate packaging to remain unspoiled, your photographs deserve a protective barrier against the elements.
However, it’s not just about using the right materials; environmental conditions play a crucial role in maintaining the vitality of your photographs.
Climate Control
To take your preservation efforts a step further, recognize that storing your photos in a climate-controlled environment can significantly impact their lifespan. Ideally, find a cool and dry place that maintains a consistent room temperature and low humidity levels—aim for around 60-70°F (15-21°C) with humidity between 30-40%. Attics and basements may seem like convenient storage spots but typically expose your photos to drastic temperature changes and moisture fluctuations associated with those areas, increasing the risk of mold growth and damaging effects.
Keeping your photos away from direct sunlight is critical because UV rays can cause fading over time. If you do display any photographs, consider using frames made from UV-filtering glass or acrylic to shield them from damage. This simple step can help maintain their vibrancy for years to come.
By combining thoughtful protective storage with careful attention to climate control, you significantly enhance the chances of preserving your family’s visual history.
With these strategies in place for safeguarding tangible memories, let’s now explore how to best arrange and catalog those precious images for future enjoyment.
Organizing Your Albums

Well-organized albums ensure easy access to cherished memories. Grouping photos chronologically is effective and creates a visual timeline of family history. Starting with the oldest photos and slowly working towards the present allows you to see not only milestones but also how your family has evolved over time. Think of it as weaving a tapestry, each photo representing a thread in the rich fabric of your family’s journey.
Chronological Order
One way to get started is by establishing a chronological order for your albums. Begin with the oldest photos, preserving the narrative of your family’s past. As you handle each picture, consider placing dividers for decades or significant life events, creating natural breaking points that make flipping through the album enjoyable. This method encourages storytelling moments each time you revisit the album.
Just imagine gathering around with loved ones and reminiscing about those early family vacations captured on faded film. That shared laughter and warmth cannot be replaced.
However, it’s vital to remain flexible within this structure. Some families may have standout events worth showcasing regardless of their timeline—birthdays, graduations, or anniversaries might deserve special acknowledgment. You can also use smaller sub-albums for landmark events that will continue to evoke emotions even years later.
Theming
Alternatively, thematic organization can also be a good approach, carving out specialized spaces within your collections. By separating albums into themes like “Family Vacations,”, “Holiday Celebrations,”, and “Weddings,” you add a personal touch that reflects shared values and experiences unique to your family. A vacation album can become a cherished saga of adventure and exploration, showing not only where you’ve been but also who you were at those moments in time.
For example, envision an album filled exclusively with images from snowy mountains and beach sunsets that document your annual family trips. It’s a delightful treat for any visitor flipping through pages—turning ordinary memories into collective treasures. Additionally, labeling these themed sections clearly will enable easy access and furnish casual followers of your story with clear navigational cues.
After determining how you’ll arrange your albums, it’s crucial to consider the tools necessary to maintain organization effectively over time.
Safe Photo Printing
Printed photos are a precious asset, but they are not immune to the elements; they can easily suffer from wear and tear. Over time, exposure to sunlight and humidity could lead to fading or discoloration, which slowly erodes the memories they hold. To preserve these memories for generations, it’s essential to choose high-quality printing services that use durable materials. Investing in archival-quality papers and inks can make all the difference.
Printing Services
When looking for photo printing services, opt for reputable vendors renowned for their quality and reliability. Companies like Shutterfly and Snapfish have garnered trust among photography enthusiasts. They provide archival-quality options that keep colors vibrant and ensure durability against the test of time. However, don’t simply settle for name recognition. It’s prudent to check each provider’s specific archival ratings as well as customer reviews; these ratings indicate how well their products resist degradation over the years. After all, it’s your family memories on the line—safeguarding them deserves careful consideration.
If choosing a professional service isn’t feasible for you, consider printing at home, which can also yield fantastic results if done right.
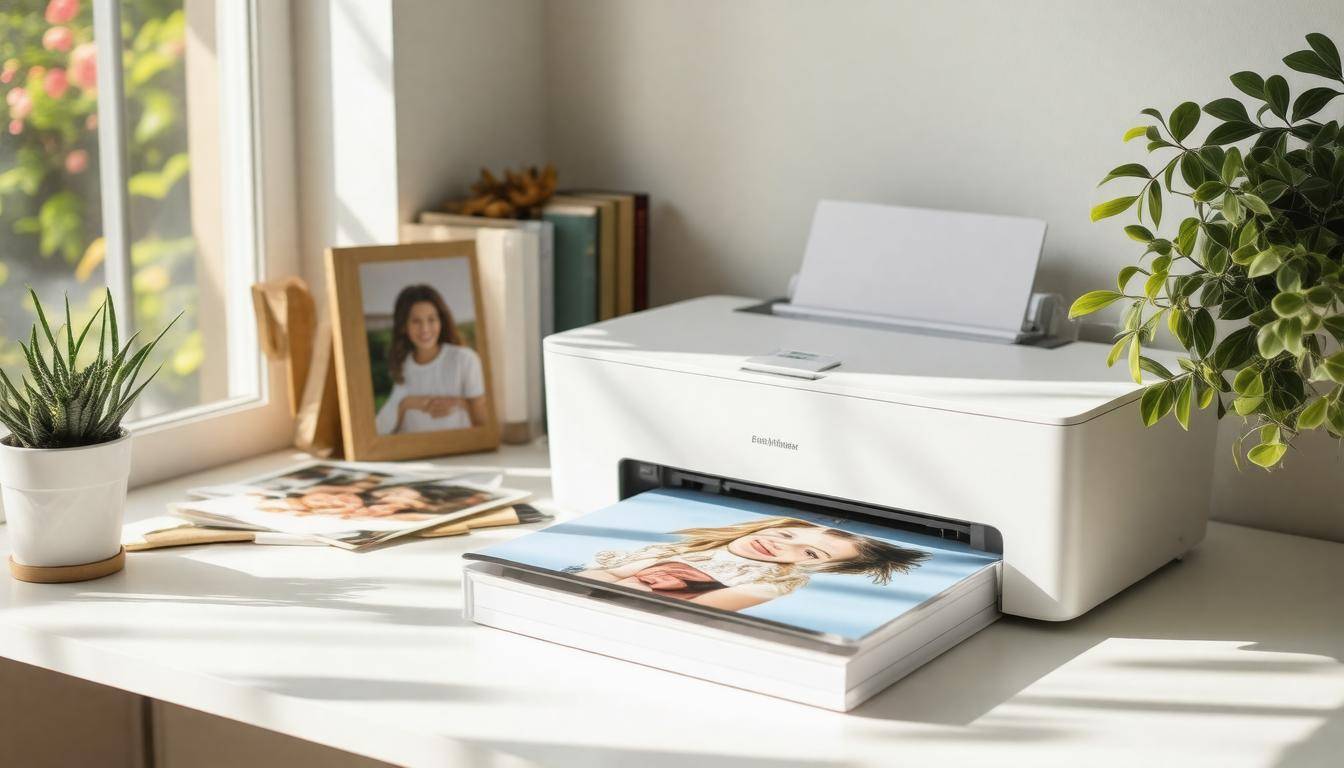
Home Printing Best Practices
For those who prefer the comfort of home printing, investing in a printer known for its photographic output quality is crucial. The Canon PIXMA series is one such example, recognized for producing vivid images with excellent color fidelity. When printing at home, ensure you use archival inks specifically designed for long-lasting results.
Additionally, using photo paper that matches your printer’s specifications is vital to maintaining color accuracy and ensuring that your memories last as long as possible. The difference between standard paper and high-quality photo paper can affect not just the look but also the longevity of your prints significantly. Remember to perform regular maintenance on your printer to prevent any printing defects caused by clogged nozzles or low-quality ink cartridges.
Every little detail counts when you want to maintain those cherished family photos, so treat your printing process as more than just hitting “Print”—consider it an investment in your family’s legacy.
Taking the time to ensure your printed memories look good today only adds value to their future significance as family heirlooms. As we explore how best to create a strategy around preserving these prints for emergencies, let’s shift focus to incorporating other key elements into our overall safety plan.
Regular Emergency Drills for Memories
To truly protect your cherished family memories, implementing regular emergency drills should become a key part of your family routine. These drills prepare everyone for unforeseen circumstances like fires or floods and foster a sense of teamwork and awareness about where important photos and backups are located.
Imagine this: whenever disaster looms, having the ability to quickly retrieve digital backups or secure physical copies can mean saving years of treasured memories and irreplaceable moments.
Involving all family members in these drills enhances their effectiveness. It’s crucial that children understand their roles in the preservation process too. By familiarizing them with the locations of physical photo albums and digital storage devices, you empower them to act if an emergency arises. Ideally, these drills should occur at least twice a year, allowing enough frequency without overwhelming the family. Each exercise can last around 30 minutes, providing ample time to cover necessary procedures while keeping it engaging.
To keep things organized, create a checklist before each drill. This list can include identifying physical storage locations, reviewing backup methods like cloud storage and external hard drives, and practicing how to quickly retrieve and secure photos in an emergency situation. Having a written guide available helps keep the process thorough and efficient.
After each drill, consider having a feedback session where family members can discuss what went well and identify any areas for improvement. A simple 10-minute debrief provides valuable insights and strengthens the family’s commitment to memory preservation. This is also an excellent opportunity to update safety measures or enhance your emergency plan based on experiences gathered through practice.
To illustrate this further, one idea could be organizing a simulated rescue scenario wherein family members must “race against the clock” to save their favorite photographs from various parts of the house. Not only does this build excitement, but it also reinforces important memory preservation practices in an enjoyable manner.
By establishing a culture of preparedness centered around your family’s unique historical archives, you preserve those precious moments while instilling values of teamwork and responsibility in ensuring they remain safeguarded for future generations.
Creating memories is just as important as protecting them; regular drills elevate that safeguarding process into a collective family effort that ensures resilience against unexpected events.
What materials are best for storing physical photographs to prevent damage?
The best materials for storing physical photographs to prevent damage include acid-free folders, archival-quality boxes, and polyester sleeves. Acid-free products help neutralize harmful acids that can deteriorate photo paper over time, while polyester is inert and protects photos from dust, moisture, and physical abrasion. According to the American Institute for Conservation, proper storage can significantly extend the lifespan of photographs by up to 200 years when using these appropriate materials.
What environmental conditions should I consider when preserving physical photos?
When preserving physical photos, consider environmental conditions such as temperature, humidity, and light exposure. Ideally, photos should be stored in a cool, dry place with a consistent temperature between 65-70°F (18-21°C) and relative humidity around 30-50%. High humidity can lead to mold growth, while low humidity may cause brittleness. According to the Image Permanence Institute, photographs can deteriorate at alarming rates; for instance, fading can occur within years if exposed to direct sunlight. Thus, controlling these conditions is crucial for safeguarding your memories over time.
How do I handle damaged photographs during an emergency situation?
In an emergency situation, prioritize the preservation of damaged photographs by carefully handling them to avoid further deterioration. Use clean, dry hands or wear cotton gloves to touch the photos, and assess the extent of damage—if corners are slightly bent or there is minor water damage, place them in a cool, dry area away from direct sunlight. For more serious damage such as mold or severe warping, consider consulting a professional photo conservator; statistics show that 90% of photographs can be restored with proper care if addressed promptly. Remember to digitize your images as soon as possible for long-term preservation.
What steps should I take to digitize my family photos for long-term preservation?
To digitize your family photos for long-term preservation, start by organizing your physical photos by date or event, then clean them gently to remove dust. Use a high-resolution scanner or a smartphone scanning app to capture each photo clearly; aim for at least 300 dpi to ensure quality. It’s crucial to save your scans in a lossless format like TIFF or uncompressed PNG, and back them up in multiple locations—consider using cloud storage alongside an external hard drive. According to a study by the Library of Congress, digitizing your photos can extend their lifespan significantly, helping preserve memories that may otherwise degrade over time.
How can I create a backup system for my digital family photo collection?
To create a robust backup system for your digital family photo collection, start by implementing the 3-2-1 rule: maintain three copies of your photos, on two different media types, with one copy stored offsite. For instance, you can keep your primary collection on your computer, a secondary copy on an external hard drive, and use a cloud storage service for the offsite backup. According to a 2022 survey, about 30% of families report losing their digital photos due to device failure or accidental deletion, highlighting the importance of having multiple backups to safeguard these irreplaceable memories.