
When you find yourself in a survival situation, the first thought that often crosses your mind is how to protect yourself from the elements. Whether you’re lost in the woods or exploring a new terrain, building a makeshift shelter can be one of your most important skills. A good shelter not only keeps you safe but can also provide comfort and warmth during challenging times. In the following guide, we’ll walk through everything you need to know about constructing effective temporary shelters—from choosing the right tools and materials to finding the best location. With these practical tips, you’ll be better equipped to turn your surroundings into a safe haven, no matter where you are. So let’s get started on your journey toward mastering shelter construction!
The Makeshift Shelter Construction: Illustrated Guide offers step-by-step instructions, supported by illustrations, on various techniques for building effective and temporary shelters using readily available materials. Users will learn about materials needed, construction methods, durability considerations, and strategic placement for maximum concealment and utility in survival scenarios.
Tools and Materials Needed
When embarking on building an improvised shelter, having the right tools is invaluable. A sturdy knife is your primary go-to tool—it’s perfect for cutting through branches or trimming down excess material. Alongside your knife, a multi-tool can be a lifesaver; it typically encompasses features like saw blades, screwdrivers, and pliers, enabling you to tackle various tasks with one compact device.
Similarly, having a hatchet or small axe allows for more robust chopping actions, especially when dealing with thicker branches that form the backbone of your structure.
Another essential tool is a saw, which can efficiently cut larger logs or branches. Opting for a hand saw or a folding saw can save space in your pack while ensuring you’re equipped for heavier-duty tasks. Don’t forget about cordage, such as paracord, which is crucial for tying everything together and securing your shelter. Furthermore, a shovel or trowel may come in handy for leveling the ground or digging out a base; without it, the stability of your shelter could be compromised.
As you select these tools, keep in mind that their quality greatly impacts effectiveness. A high-quality multi-tool or sturdy axe not only will make your work easier but also ensure they last throughout many builds.
Now let’s consider the materials required for constructing your shelter. The most fundamental components are short sticks and long sticks that serve as the skeleton of your structure; think of these as the bones that give form to your creation. Larger branches are vital structural supports—they can take more weight and offer stability against wind or rain.
Supplementing your framework with materials like:
- Leaves or pine needles can be utilized for insulation and roofing, helping to keep warmth in and rain out.
- Tarps or emergency blankets provide waterproofing and can be draped over the frame to create an effective barrier against the elements.
- You might even consider using bark for flooring, adding some extra comfort beneath you.
Remember to gather these materials based on what’s available in your immediate environment. Natural fibers such as grass or vines can also help bind components loosely together if you’re short on rope.
With the right tools and materials at hand, the focus now shifts to ensuring you pick an ideal spot that enhances both safety and utility for your temporary refuge.
Choosing the Right Location
Picking the right spot to build your shelter is critical for safety and comfort. When venturing out to construct a makeshift shelter, you’ll want to think strategically about its placement. Your decision can either enhance your experience or create unnecessary challenges. Aim for areas that are naturally sheltered from wind and rain, such as close to a rock face or tucked into a grove of trees. These natural barriers can create a buffer against harsh elements you’d rather avoid during chilly nights or storms.
Additionally, consider the elevation of your chosen site. Shelters built at higher elevations are less prone to flooding; however, they may expose you to harsher weather conditions. A balance must be struck—higher ground can mean better drainage but might also mean more exposure to wind and cold.
Proximity to Water Sources: Ensure your location is near a water source but not too close because this increases the risk of flooding. The sweetest spots for camping often lie within 100 meters of freshwater; however, be cautious. Too many campers fall prey to the allure of nearby streams only to wake up in soggy sleeping bags after a night of heavy rain leads to unanticipated rising waters.
Beyond just water access, consider these points:
- Steer clear from stagnant water pools where insects flourish.
- Check for animal trails; slightly elevated areas tend to be safer from wildlife encounters.
- Look for existing natural clearings; they usually indicate stable ground and fewer roots or rocks beneath.
However, it’s not all about proximity to resources like water; pay close attention to the ground upon which you plan to set up camp. Uneven terrains can cause discomfort during sleep, leading you to wake up groggy and unrested. Instead, try seeking flat areas with soft soil or sandy patches that promise comfort and insulation.
In addition, don’t overlook how the sun’s position impacts temperature and comfort inside your shelter throughout the day. A south-facing site warms up faster in winter months and remains cozy when evening chills arrive—vital for those long nights when every ounce of warmth counts!
Being thoughtful about where you choose to build your improvised shelter ensures not just immediate relief but can make all the difference in an unexpected survival situation. The foundation you establish provides essential advantages as you continue on your journey into materials that will be fundamental in constructing your safe haven.
Natural vs. Man-Made Materials

The debate between utilizing natural and man-made materials for constructing shelters often centers around availability and convenience. Natural materials—like sticks, leaves, grass, and even stones—are typically abundant in forested or wilderness areas. Their availability makes them a go-to option for anyone who finds themselves in a survival scenario. However, while these materials are accessible, they can vary significantly in size, shape, and durability. For instance, a sturdy branch might serve well for structural support today but could become compromised if exposed to rain or wind for any length of time.
Besides variable durability, creating a sound shelter using natural materials may require considerable skill and time. Yet there’s an undeniable charm about crafting something from nature, and for those willing to invest the effort, it can lead to a more authentic survival experience.
On the other hand, man-made materials such as tarps, ropes, aluminum foil, and thermal blankets come with their own set of advantages. They are engineered for durability and ease of use, making them much easier to manipulate when constructing a shelter. For example, tarps are lightweight yet weather-resistant; they can repel rain effectively while providing a shield against the wind. This reliability makes them an excellent choice for rapid shelter setups in inclement conditions.
But which option is better for your needs?
Weighing Your Options
To help you figure that out, let’s break down some key attributes each material offers.
| Criteria | Natural Materials | Man-Made Materials |
|---|---|---|
| Availability | Readily found in the outdoors | May require prior procurement |
| Durability | Varies based on environmental factors | Generally more durable |
| Ease of Construction | Might require advanced skills | Typically easy to manipulate |
| Biodegradability | Completely biodegradable | Varies; some are recyclable |
| Cost | Often free or minimal cost | Range from low to moderate cost |
The choice often depends on your circumstances—where you’re located, the urgency of your situation, and what you can access efficiently. It’s a calculated decision that requires considering both immediate needs and long-term sustainability.
By evaluating these factors, you’ll be better equipped to make informed decisions about your shelter-building strategy. With this foundation laid out, we can now explore practical steps to construct effective shelters tailored to your specific environment.
Step-by-Step Construction Guide
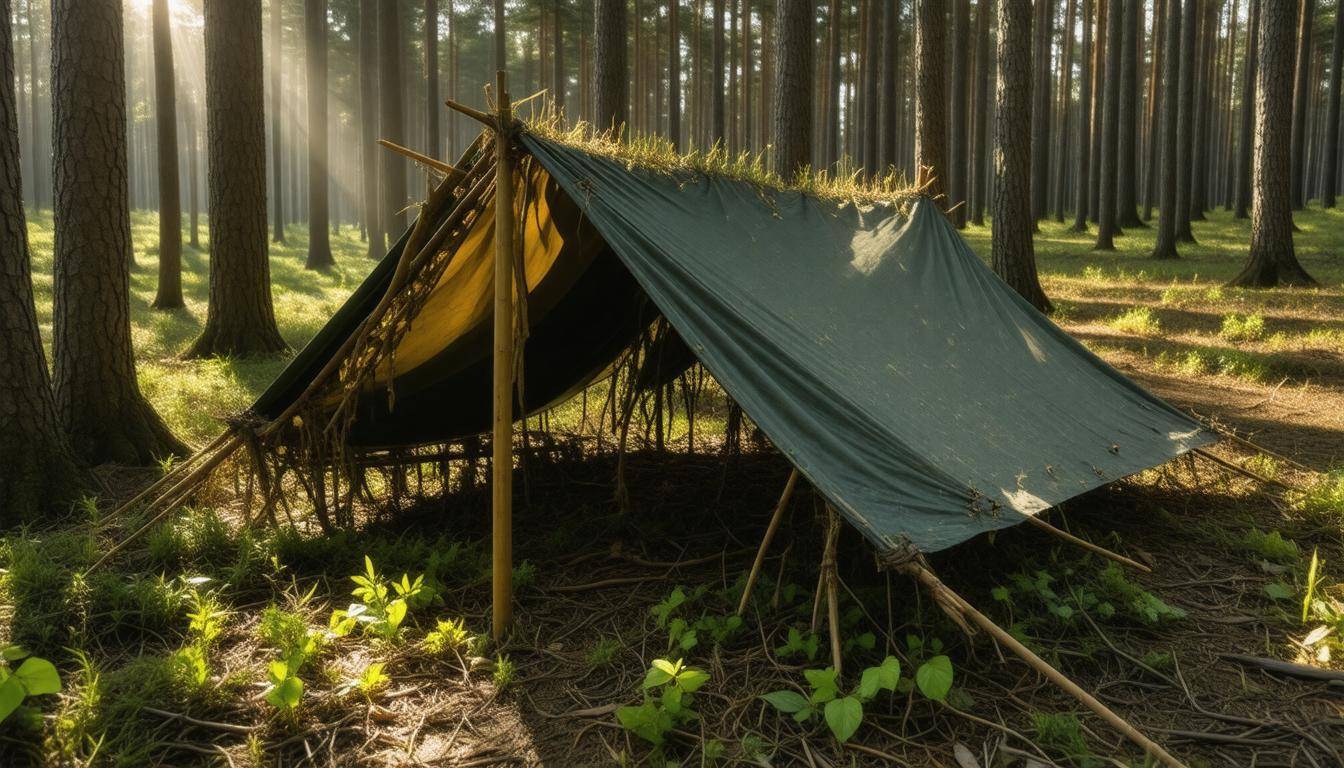
Step I – Simple Lean-To Shelter
The first step in building a simple lean-to shelter begins with finding a suitable base. Look for a sturdy tree or large rock; they provide the essential support needed for your structure. Imagine it like giving your shelter a strong backbone.
Once you’ve chosen your spot, take a long, robust branch and lean it against the tree at an angle, ensuring it’s securely positioned. Next, gather shorter sticks and lay them at angles between the ground and the top of the main support branch. This will create a triangular frame—think of it as forming the walls of your shelter—all while providing structure and stability.
After setting up the frame, you’ll want to cover it effectively to ensure protection from the elements.
Step II – Adding Cover
With your frame established, it’s time to add cover to shield yourself from rain, wind, or chilly temperatures. Begin draping leaves, branches, or even a tarp over the framework you’ve created. A variety of materials can work here; however, leaves are excellent because they allow water to drip off rather than pooling.
Use rope or vines to secure these materials tightly so they don’t shift or blow away with the wind. Picture this part as putting on a roof—your coverage needs to be waterproof and snug enough to protect against any unforeseen changes in weather.
Don’t forget about comfort; thus, it’s critical to insulate your sleeping area properly.
Step III – Insulating the Ground
An often-overlooked but vital step is insulating the ground beneath your shelter. The earth can radiate cold at night, which is why adding a layer of natural insulation is crucial for comfort. Collect leaves, pine needles, or even grass clippings and spread them out evenly across the floor of your shelter.
Think of this as laying down a soft mattress that keeps you warm and cozy during your rest. Not only does this help retain body heat, but it also provides some cushioning from hard ground surfaces that could otherwise be uncomfortable.
As you build your shelter, always remember that ongoing maintenance will enhance its longevity and effectiveness. Next, we’ll explore techniques that will help keep your temporary refuge safe and dry from unpredictable weather conditions.
Weatherproofing Techniques
Weatherproofing your shelter is not just a luxury; it’s a necessity for survival, especially when you’re exposed to the elements. Whether you’re camping in the wilderness or navigating through a challenging outdoor survival situation, staying dry and warm can be the line between comfort and danger. Creating a robust weatherproof haven requires clever strategies, including rainproofing and windproof measures.
Rainproofing Your Shelter
One of the first actions to consider is how to effectively channel rain away from your shelter. This is where positioning becomes critical. Placing leafy branches or a tarp at a downward angle ensures that when raindrops fall, they slide off and away from where you sleep.
However, it’s vital to double-check that this drainage design doesn’t inadvertently direct water straight into your sleeping area—a misstep that can lead to an uncomfortable night and potential health risks.
Remember, when using a tarp, it should always be taut; loose tarps can sag and create puddles that may drain right into your cozy space instead of away from it.
While rain can dampen spirits, wind can rattle even the most steadfast camper. Therefore, understanding how to shield yourself against gusts is equally important.
Windproofing Measures
To effectively combat those biting winds, thick walls made from leaves or even snow are excellent solutions that provide natural insulation. The key here is to construct these barriers around your shelter while ensuring you maintain an opening for ventilation.
Too often, people overlook the need for airflow only to find themselves dealing with condensation buildup inside their shelters, which negates all their hard work in creating a comfortable space.
Just like how wisely positioned furniture enhances comfort in a living room, strategic placement of natural materials around your makeshift shelter can prevent harsh winds from turning your refuge into a frigid box.
Furthermore, building your shelter behind natural windbreaks such as boulders or clusters of trees adds another layer of protection against the elements. These simple adjustments significantly enhance your overall comfort and safety while out in nature.
Finally, small details can make all the difference when constructing a reliable and weatherproof shelter. Regular maintenance checks after heavy rains or storms will allow you to catch any potential leaks early, ensuring that your makeshift refuge remains secure throughout its lifespan. With these strategies in mind, adjusting the interior environment for added coziness is the next step in optimizing your shelter experience.
Enhancements for Comfort
The difference between just surviving and truly feeling at ease can be found in a few thoughtful enhancements to your makeshift shelter. These easy additions elevate comfort levels and contribute to better rest, keeping morale high during adverse conditions.
Starting with a door is a game-changer; it keeps out pesky insects and frigid air that might invade your haven. You can simply use a spare tarp or even construct a makeshift door using branches and leaves arranged thoughtfully to block the entrance when you’re inside. This small barrier becomes your first line of defense against the elements.
Imagine settling into your cozy shelter after a long day, knowing that you’ve minimized outside disturbances; that peace is worth the effort.
Bedding Improvement
Think about bedding improvement because a good night’s sleep can make all the difference when you’re away from home. Crafting a thick bed of natural materials cushions your body and insulates you from the cold ground underneath. Consider layering:
- A solid layer of leaves or grasses as your primary bedding.
- Incorporating a reflective emergency blanket as a liner helps trap warmth while also providing an additional layer of moisture protection.
- Adding an extra tarp for ground cover can create further insulation and safeguard against dampness.
These small upgrades facilitate not only physical comfort but also psychological well-being. The more like home your shelter feels, the easier it becomes to find solace in nature. Even mentally, knowing you have made provisions against the elements boosts your confidence and allows you to focus on other survival strategies.
Beyond bedding, consider adding elements that promote well-being—like proper ventilation and privacy—which can enhance your overall shelter experience. As we explore further, let’s look at various forms and styles of shelters that illustrate these concepts in action.
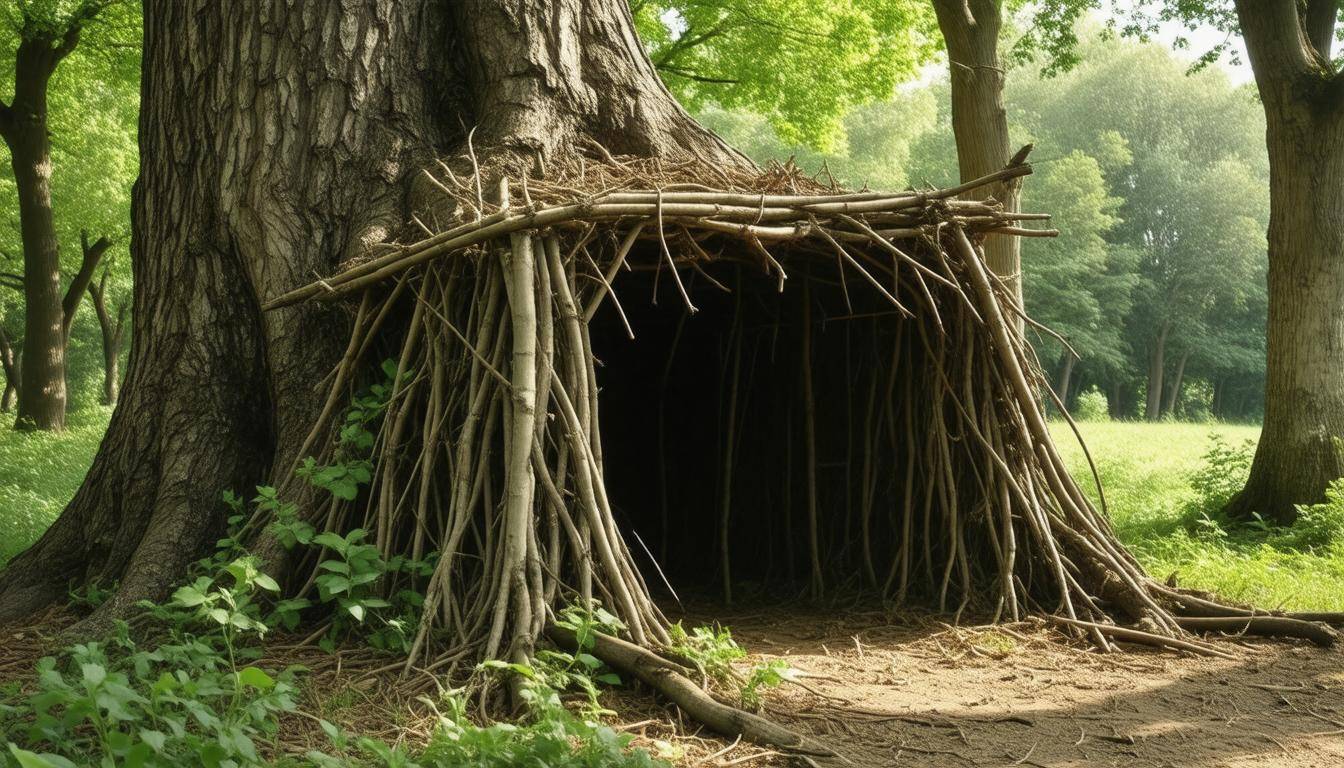
Illustrated Shelter Examples
Among the simplest yet most effective structures is the A-Frame Shelter. Picture this: two sturdy branches are propped against each other, forming a slanted roof over a space just big enough for you to fit snugly inside. By incorporating a central ridge pole, the design achieves stability and provides ample overhead coverage. This shelter shines in forested areas where materials are abundant; just gather short sticks and long sticks, and you’re ready to start assembling. An A-frame can be erected quickly, making it ideal when time is of the essence.
When you need a bit more room and height without increasing complexity, consider the Teepee-Style Shelter.
The teepee-style shelter combines both efficiency and charm. Think of it as a conical structure wherein long sticks are arranged upright and meet at a peak at the top while being secured together with rope or twine. Cover the frame with leaves, branches, or even an old tarp for additional wind protection. Not only does this design allow for warmth retention—thanks to its height—but it also facilitates the easy flow of smoke if you’re using a small fire for cooking or warmth inside. This kind of shelter isn’t just practical for camping; it’s a classic nod to survivalists who want to connect with nature through traditional methods.
As you explore these different types of shelters, remember that each involves unique construction requirements. The durability of these makeshift dwellings often depends on how well they’re assembled and what materials you choose to use. Therefore, having an eye for practicality combined with creativity is essential when crafting your own shelter. Experimenting with sizes and shapes based on available resources adds to the fun—and can help you discover what works best in your specific environment.
Gaining hands-on experience by constructing these shelters will sharpen your skills and build your confidence for any wilderness adventure or survival scenario ahead.
Practical Survival Tips
When venturing outdoors, understanding the environment and having essential tools can make a world of difference. It’s not merely about finding a place to rest your head; it’s about maximizing your chances of survival and ensuring that every aspect of your makeshift shelter serves a purpose.
For instance, always identify a clean water source close to your shelter before you need it. Water is essential for hydration, and without it, even the best-made shelter won’t help you survive long-term. Although it may seem obvious, in the heat of the moment, it’s easy to overlook such fundamental needs.
A good rule of thumb is to look for streams or springs that flow year-round. Avoid collecting water from stagnant ponds, as they can harbor bacteria and other harmful organisms. Instead, keep a method for purification, like water purification tablets, handy.
Equally important is your fire with backup strategies; keeping waterproof matches or a magnesium fire starter can save you in many situations. Fire provides warmth, signals for help, and allows you to cook food or purify water. Sometimes nature tests our resolve with rain or wind; being prepared with reliable ignition sources means you’re ready for whatever comes your way.
Additionally, maintaining an emergency kit within your shelter can provide vital resources when unexpected needs arise. This kit should include a first aid kit—because safety is paramount during outdoor adventures—as well as high-energy foods like granola bars or dried fruits for quick energy boosts. You never know when you might face unplanned scenarios requiring immediate energy restoration.
| Survival Tip | Description |
|---|---|
| Water Source Location | Always identify a clean water source near your shelter |
| Fire Starting Kit | Pack waterproof matches and a fire starter |
| Emergency Signals | Keep a whistle or flare for emergency signaling |
| High-Energy Foods | Pack granola bars or dried fruits in your survival kit |
| Multi-Tool Utility | Carry a multi-tool for various survival tasks |
Beyond these basics, consider carrying a multi-tool that combines various functions into one handy device. This utility can assist with everything from cutting rope to opening cans or fixing gear—a true game-changer in any survival situation.
Remember, being well-prepared might require extra effort upfront, but it pays off exponentially when you’re out there in the wild relying on your instincts and resources. Mastering these practical survival tips transforms not just how you build your shelter but also how effectively you navigate challenges in the great outdoors.