
When a storm is on the horizon, ensuring the safety of your home can feel overwhelming—after all, the last thing you want is to risk damage from wind-blown debris or shattered glass. Window board-up procedures might seem daunting at first, but they are essential steps toward protecting your property and loved ones during severe weather. Whether you’ve experienced a storm before or this is your first preparation attempt, knowing how to secure your windows can help mitigate potential damage and create peace of mind. In this guide, we’ll break down step-by-step procedures for boarding up your windows, so you can approach the task with confidence and clarity.
The essential steps in window board-up procedures include measuring each window frame accurately, cutting 1/2-inch plywood sheets to fit those dimensions, pre-drilling holes to prevent wood splitting during installation, and securely fastening the plywood with non-corrosive screws around each window frame. It is advisable to start these procedures at least 48 hours before an expected storm to ensure thorough preparation and safety.
Benefits of Window Board-Up
First and foremost, let’s talk about reduced property damage. When a storm approaches, the last thing you want is for your windows to become vulnerable points in your home’s defense. Research shows that homes with properly boarded-up windows experience up to 80% less storm damage compared to those left unprotected. This protective measure not only minimizes the risk of glass breakage but also prevents interior water damage caused by driving rain. Think of those boards as your home’s first line of defense against nature’s fury.
With secured windows, homeowners can save on potential repairs which often range into hundreds or thousands of dollars after major storms. This proactive approach diminishes the stress that comes with unexpected emergencies while maximizing safety. You might even say it acts as an insurance policy: one that doesn’t require monthly premiums but rather a little bit of effort upfront.
Now, it’s not just about protecting property; there is also the concern of personal safety during severe weather events.
Enhanced personal safety is a critical advantage of boarding up windows. Imagine being caught in a storm where debris is flying—without proper boarding, shattered glass could easily turn into dangerous projectiles. By securely boarding windows, you significantly reduce the risk of injuries caused by glass shards. The statistics support this notion: it is estimated that proper preparations can reduce injury risks by up to 80% during severe weather events.
In coastal regions prone to hurricanes, boarding up is not merely advice; it’s an integral part of safety drills recommended by emergency management officials. Families routinely go through the motions of securing their homes, reinforcing the importance of being prepared and ensuring that every member understands their role. This highlights another layer of benefit: peace of mind. Knowing that your home is secure allows you to focus on more immediate concerns like your family’s safety and well-being during a storm.
Preparation leads the way to these benefits, but understanding what materials and tools you’ll need can greatly enhance both effectiveness and efficiency throughout this process.
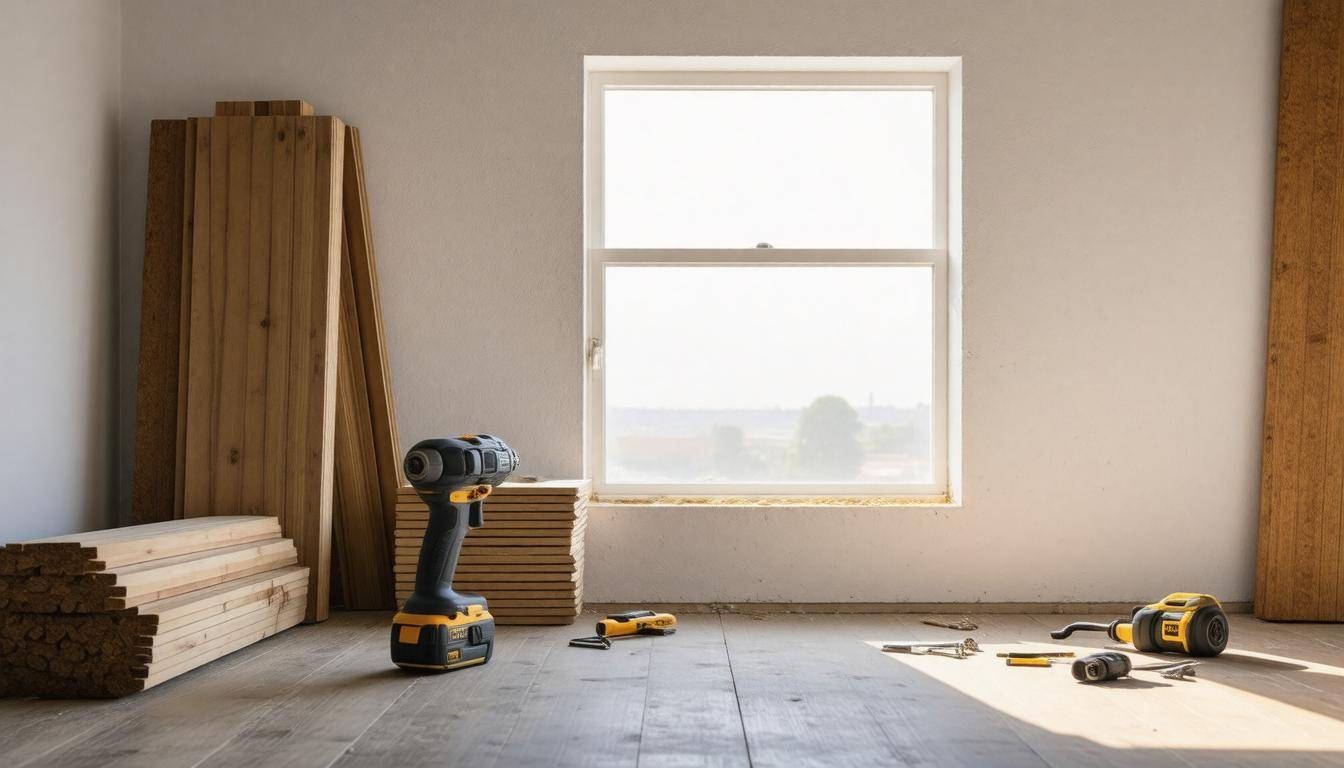
Essential Materials and Tools
To board up windows efficiently, you’ll need specific materials and tools that help protect your home from extreme weather. First on the list is plywood. While 1/2-inch thick plywood is a common choice, opting for a thicker option—perhaps 5/8-inch or even 3/4-inch—can provide additional strength against high winds and debris. This added thickness significantly enhances your home’s resilience during storms.
Next, gather non-corrosive screws and washers to secure the plywood tightly against the window frames. It’s crucial to choose screws designed to withstand harsh weather conditions to avoid worrying about rust developing over time. A rubber mallet or hammer will come in handy as well, enabling you to easily drive in the screws without risking damage to your boards.
Now that we have our basic materials sorted out, let’s talk about the essential tools required for this project.
Tools Required
The first tool you’ll need is a drill equipped with appropriate bits. A power drill makes it much easier to drive screws into the plywood efficiently. You may also find it helpful to have a measuring tape on hand; accurately measuring each window frame ensures that your plywood fits snugly without leaving gaps that could allow wind or rain in.
You’ll likely also require a saw for cutting the plywood sheets down to size. If you’re less experienced with saws, consider using a utility knife instead for safer handling—just be sure to cut through multiple layers of ply at once for clean edges. Additionally, have a pencil on hand for marking measurements; making precise marks will save you both time and frustration later in your installation process.
With the materials gathered and tools at your side, it’s essential to remember why quality matters in this process.
Why Quality Matters
Using high-quality materials ensures durability and effectiveness when boarding up windows. For example, opting for pressure-treated plywood offers superior resistance against moisture, which is particularly vital during stormy seasons when heavy rains can occur. Low-quality plywood might warp or delaminate after just one season of exposure, while more durable materials can last several years if properly maintained.
Investing in quality tools not only makes the job smoother but also contributes to the overall safety of your home during severe weather events. When everything fits snugly together with solid screws and durable boards, you’re setting your home up for success amid nature’s fury.
Having identified the key components for securing your windows, it’s time to focus on getting everything ready before beginning this important task.
Preparing Your Home for Board-Up
The initial step in preparing is to clear the area around any windows that will need to be boarded up. This means removing furniture, potted plants, and any decorations that could become obstacles during the process or at risk of being damaged. Imagine the chaos of scrambling to secure a window while navigating around a coffee table; it’s best to eliminate such distractions beforehand. Clearing these areas not only creates a safer workspace but also minimizes the likelihood of accidents or breakage.
Once you’ve made way in your house, it’s important to shift focus toward finding vulnerable areas that may need extra protection.
Take a moment to walk through your home and carefully identify every window and glass fixture, including patio doors. Keep in mind that even small windows can become entry points for storm-related hazards. By keeping a notepad handy, you can jot down which windows require board-up and which ones can be left unprotected based on their location and size. This attention to detail will help ensure you’re well-equipped when it comes time to make decisions about what needs securing.
A crucial consideration here is that organizing this information in advance saves time and stress when a storm approaches.
Having assessed your vulnerable areas, it’s time to think about safety when preparing for an emergency, specifically crafting an emergency escape plan.
In the event evacuation becomes necessary, clear exit routes are critical. Therefore, while boarding up windows, ensure that you leave at least one entrance accessible. By doing so, not only do you protect your property through the boarding process but also maintain safety for yourself and your loved ones. It might feel counterintuitive to leave certain exits unprotected, yet doing so establishes peace of mind during turbulent times.
Compiling these preparations creates a comprehensive safety net; ensuring every step is thought through can significantly improve your overall readiness as severe weather looms near. Each precaution offers tangible protection against chaos and promotes a sense of control during the unpredictability of storms.
With the groundwork laid out for safety and preparation, we now turn our attention to the next vital steps: accurately measuring and cutting plywood for optimal window coverage.
Measuring and Cutting Plywood
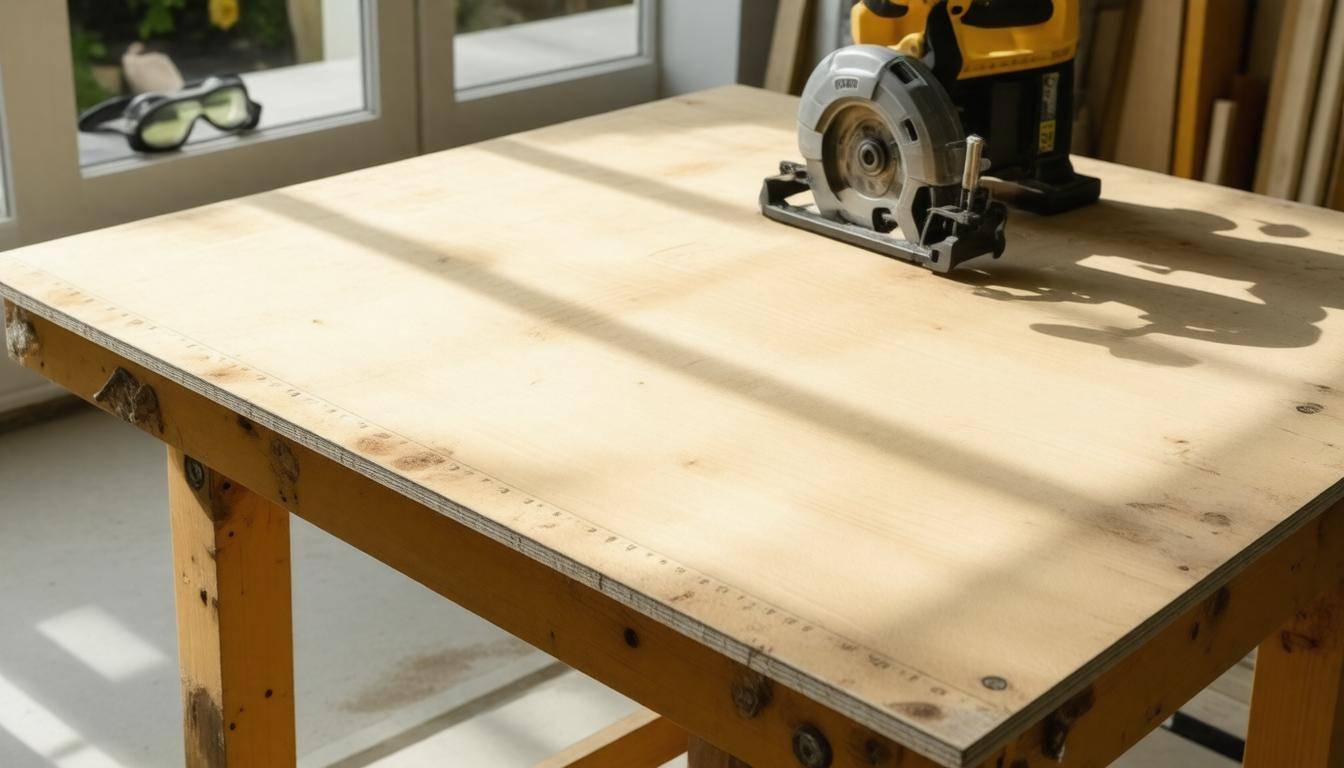
Accurate measurement and cutting are fundamental steps in ensuring effective board-ups. This may seem like a straightforward task, but taking the time to get it right can ensure your safety and protect your property during severe weather events. To start, grab your measuring tape—this is one of the most important tools in your toolkit. When measuring, cover every window that needs boarding up.
Begin by measuring the height and width of each window frame carefully. A common mistake is to overlook subtle variations in window sizes; therefore, double-checking these measurements will save you from unnecessary headaches later.
It’s essential to remember to subtract an inch from both the height and width measurements to ensure a snug fit. This extra inch provides a bit of wiggle room, essential for easy installation and adjustment. So if you’re working with a window that measures 36 inches tall and 24 inches wide, you’ll want to plan for a piece of plywood that is 35 inches tall by 23 inches wide.
Once you have gathered those precise dimensions, it’s time for marking.
Now that you’ve got your measurements down, the next step is marking the plywood itself. Using a pencil, carefully draw out the dimensions on the plywood sheet, allowing yourself some room for error—not too much though! If you’re feeling particularly meticulous, consider using a straightedge or level as a guide to get straight lines. It’s crucial that this step is done accurately because any errors here will result in wasted material or ill-fitting boards.
Step-by-Step Guide
Once everything is correctly marked out on the plywood, transition smoothly into cutting. Take your time here; use a quality saw, ideally a circular saw for efficiency and precision. You could also turn to jigsaws if you’re more comfortable with them or need to navigate around curves or irregular shapes.
There are some key tips to remember while cutting: start with slow, steady cuts rather than forcing the blade through too quickly. This not only helps preserve your plywood but enhances safety throughout the entire process. Always wear protective eye gear; you don’t want any flying debris getting into your eyes while focusing on this job!
Ensuring accurate measurements mitigates gaps but remember: the plywood needs to be secured correctly to be truly effective.
After cutting out all pieces for each designated window, preparation for installation requires careful thought about how best to secure these boards against strong winds or flying debris.
Drilling and Securing the Boards
Securing the boards properly is not just a final touch; it’s the most critical step in the boarding-up process. Ensuring that your window boards are firmly attached can significantly minimize damage risks from high winds and flying debris. To start, you’ll want to use a power drill with an appropriate bit for creating pilot holes to help guide your screws without splitting the wood.
Pre-Drilling Holes
As you prepare your plywood, take a moment to pre-drill holes before installation. This small prep step can make all the difference. Aim to keep your holes at least two inches away from the edge of the plywood to prevent splitting. Not only does this preserve the integrity of your material, but it also allows for better grip on the screws when they’re tightened.
Space these drilled holes approximately 12-16 inches apart; this helps distribute pressure evenly along the board and ensures stability.
It’s worth mentioning that using a drill with adjustable speed settings makes this task more manageable. A lower speed is optimal for creating precision holes without damaging the plywood, while a higher speed will help you drive in screws more efficiently later.
Placing the Boards
Align the Plywood: Now with your holes ready, it’s time to align the plywood against each window frame. Make sure that there is an equal overlap of at least two inches on all sides around your window frame; this overlapping acts as extra protection against those gusty winds. Taking a moment to ensure proper alignment saves you from having to reposition everything once you start securing it.
Secure with Screws: It’s time for the screws! Utilize high-quality, non-corrosive screws—these materials are crucial, especially in areas prone to moisture or storms. A typical recommendation would be using 3-inch exterior-grade screws, ensuring they’re long enough to hold tightly into the window frame while also staying resistant to rust and corrosion over time.
As you drive the screws through those pre-drilled holes into your window frame, remember to place washers under each screw head for added stability. Washers act as pressure distributors and help prevent damage to the plywood over time by spreading out the load evenly.
Following these steps accurately ensures a robust setup; however, it’s essential to consider potential pitfalls in DIY projects that could affect your overall effectiveness during installation.
Common Mistakes and How to Avoid Them
One of the most frequent missteps in window board-up procedures is using incorrect tools. Opting for nails rather than screws may seem like a small choice, but it comes with significant consequences. Nails can easily loosen under pressure or during heavy winds, putting your home at risk. Instead, use screws, specifically non-corrosive types, which provide stronger and more reliable fastening.
Moreover, employing a drill with a clutch setting is vital as it prevents stripping screws, ensuring you create a secure fit without damaging the wood.
Another mistake often made during this process is failing to overlap plywood effectively. Many homeowners cut plywood sheets too small, missing an essential element of storm preparedness: overlap. This overlap not only provides additional support but fortifies the board against strong winds that could rip it away from the window frame. Aim for at least a couple of inches of overlap on all sides for maximum security.
Consider this scenario: a neighbor boards his windows just hours before a storm hits, using ill-fitted plywood. As the winds whip through his neighborhood, he watches in dismay as debris begins smashing against his inadequately covered windows—while yours remain intact due to diligent preparation.
Aside from physical errors, there are also oversight-related pitfalls that can be detrimental during this crucial time.
Neglecting to measure windows accurately is another common faux pas when preparing for extreme weather conditions. When measurements are rushed or taken superficially, it’s easy to encounter poorly fitting boards that leave gaps where wind and debris can enter. Always remember to measure each window frame individually, accounting for any obstructions like handles or locks that might interfere with your installation.
Additionally, some homeowners disregard the importance of sealing edges with weatherproof tape. This last-minute step can make all the difference between a fully protected window and one susceptible to moisture damage. A properly sealed edge helps keep water out and prevents potential rot in your window frame or underlying structures.
Lastly, those unfamiliar with local building codes may inadvertently commit violations while boarding up their windows. Each community has specific guidelines that need to be followed—ranging from aesthetics to safety protocols—so it’s prudent to familiarize yourself with these regulations ahead of time.
Awareness of these critical mistakes not only prepares you better but also supports more effective strategies for safeguarding your home from upcoming weather challenges.
Cost-Effective Long-Term Solutions
For homeowners in hurricane-prone areas, the recurring need to board up windows can create a cycle that becomes both labor-intensive and frustrating. This makes it essential to consider alternatives that not only save time but also help ensure safety during severe weather events. One popular option is investing in hurricane shutters, which can serve as a practical and durable solution. Initially, these shutters come with a higher price tag; however, their longevity and ease of use make them a worthy investment. Once installed, hurricane shutters can be easily deployed or secured without the repetitive hassle of measuring and cutting plywood each storm season.
While hurricane shutters offer convenience, another effective solution lies in the realm of reusable plywood panels. Imagine this: rather than buying new sheets of plywood every time, you could pre-drill holes and label these panels for specific windows. This thoughtful approach allows for quicker installation while creating a sustainable strategy. With careful maintenance, these panels can last for years, effectively reducing costs in the long run while still providing reliable storm protection.
| Solution Type | Initial Cost | Durability | Installation Ease |
|---|---|---|---|
| Hurricane Shutters | High | High | Easy |
| Removable Plywood | Medium | Medium | Moderate |
| Temporary Board-Up | Low | Low | Hard |
The table above highlights the differences between these various solutions—most notably their initial costs and installation ease. Using removable plywood takes extra steps and requires organization; however, it combines affordability with practicality, making it an appealing choice for many homeowners.
No matter which route you choose, leveraging community resources can enhance your preparation efforts. Many local organizations offer free or subsidized window boarding kits during severe weather events, making protective measures even more accessible. By checking in with neighborhood groups or local government platforms about available resources ahead of storm season, you may discover valuable options that lighten the load while promoting safety within your community.
Community Resources and Assistance Programs
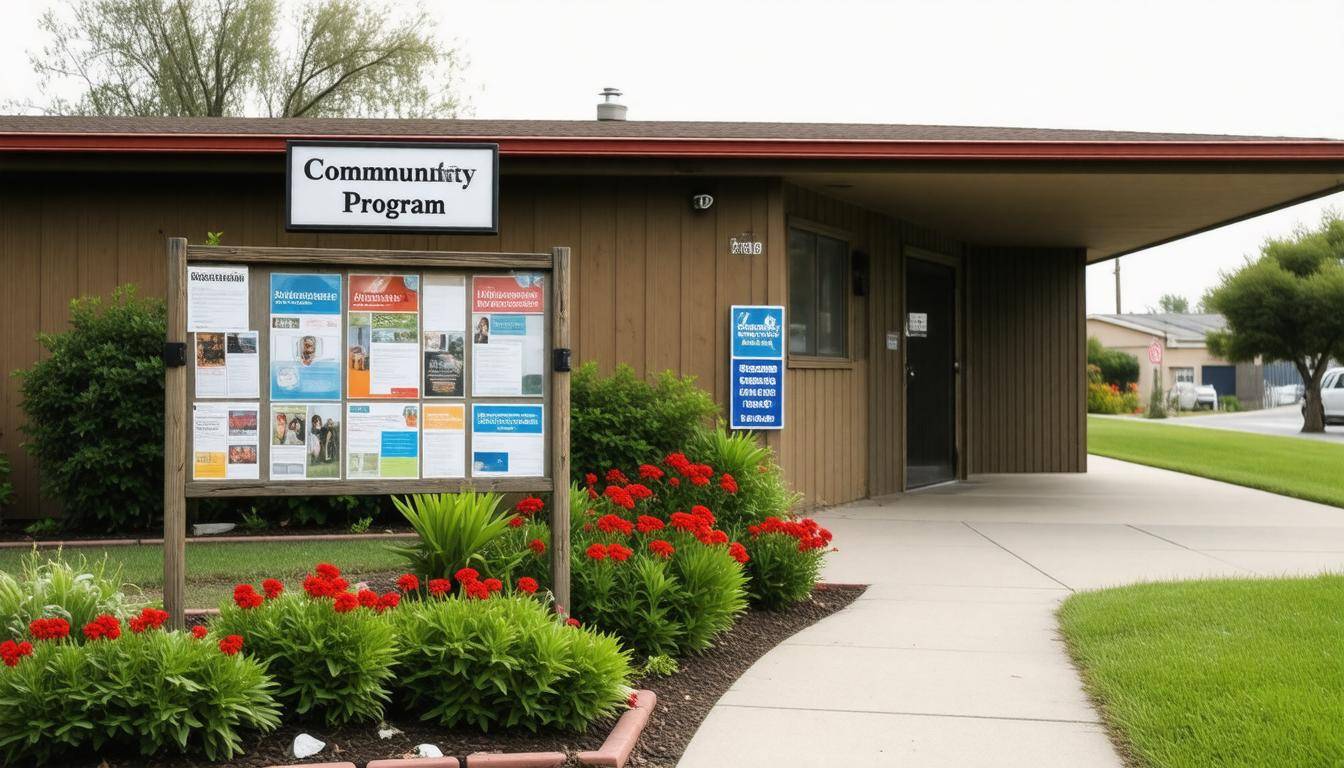
Many communities offer valuable resources to help residents prepare for severe weather events. Local government programs assist those living in high-risk areas. For example, some municipalities provide free or subsidized materials like plywood and screws, allowing residents to secure their windows without financial strain.
Checking your local government’s emergency management website is crucial to finding detailed information about these opportunities, as available resources can vary widely between different regions.
Local Government Initiatives
Moreover, many towns and cities engage in proactive outreach to educate their citizens about preparation methods for extreme weather. Some have developed emergency kits that include essential tools needed for boarding up windows, which not only save you time but also ensure you are well-equipped with quality materials. These initiatives often come with workshops or training sessions offered prior to anticipated storms, where residents can learn best practices on how to protect their homes effectively.
Volunteer Programs
In addition to governmental assistance, volunteer programs play a critical role in community preparedness efforts. Many organizations focus on aiding residents who are elderly or may face mobility challenges, offering hands-on help with window boarding and other protective measures. Participating in these initiatives enhances safety and fosters a sense of community, creating bonds among neighbors during trying times.
Moreover, community events centered around this preparedness effort allow newcomers to integrate into the neighborhood while boosting morale through cooperative engagement.
It’s always advisable for homeowners to reach out and inquire about available non-profit programs that may assist in securing homes ahead of a storm.
While utilizing these resources is paramount, homeowners must take the initiative to act proactively. Engaging with local officials or joining volunteer efforts is essential; being prepared involves collaboration and community spirit. Preparation is not just an individual endeavor; when neighborhoods unite, they become more resilient against severe storms and challenges alike.
By being aware of available resources and actively participating in community efforts, you can significantly enhance your safety preparations for extreme weather events.