
Hurricanes can turn our homes into disaster zones in just a matter of hours, leaving us feeling overwhelmed and vulnerable. As the storm clouds clear and you step outside, it’s crucial to take a deep breath and get ready to assess the damage. After investing countless hours making your house a home, the last thing you want is to miss hidden issues that could worsen over time. By following a simple checklist for your post-hurricane home inspection, you not only protect your investment but also ensure your family’s safety. Let’s dive into this essential DIY guide to inspect your home methodically, ensuring it’s secure and sound in the wake of nature’s fury.
Your DIY Post-Hurricane Home Inspection Checklist should include the following key areas: assess the roof for any visible damage or leaks, inspect the foundation and basement for cracks or water intrusion, check gutters and downspouts for blockages, and evaluate windows and doors for proper sealing. Additionally, ensure to look at outdoor structures and trees that could pose risks to your home, and always consider calling in professionals for complex assessments.
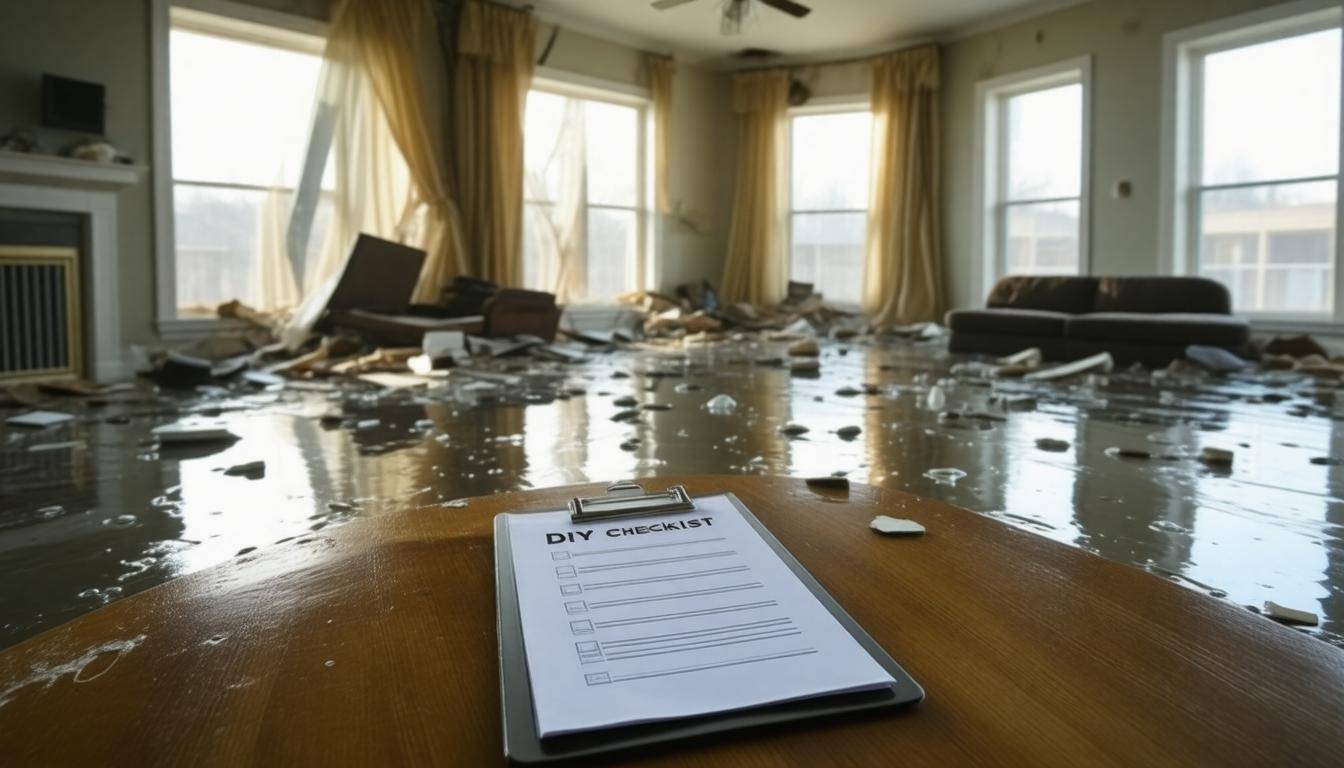
Post-Hurricane Home Inspection Checklist
Step I – Safety First
Before you even step outside, it’s paramount to ensure that the surrounding area is safe. Wear protective gear such as sturdy boots, gloves, and perhaps even a hard hat. This isn’t just precautionary; hidden dangers like fallen branches or sharp debris from damaged structures may be lurking about. If there are downed power lines nearby, maintain a safe distance and report them immediately. Your safety must always come first!
Step II – Start from the Outside
With safety in mind, begin your inspection from the exterior of your home. Stand at a reasonable distance to take in the overall condition. Inspect for visible damage like missing shingles, cracked walls, or malfunctioning gutters. According to reports, approximately 60% of hurricane damage occurs to roofs alone, so climb up with caution or consider using binoculars if necessary.
Pay attention to windows and doors as well; about 30% of homes experience window damage during hurricanes due to high winds.
As you inspect, be mindful of any signs of flooding around your foundation. Look for cracks or shifting soil which can indicate compromised structural integrity. Remember, a storm doesn’t just affect what you see; sometimes the most significant issues lie beneath the surface—literally!
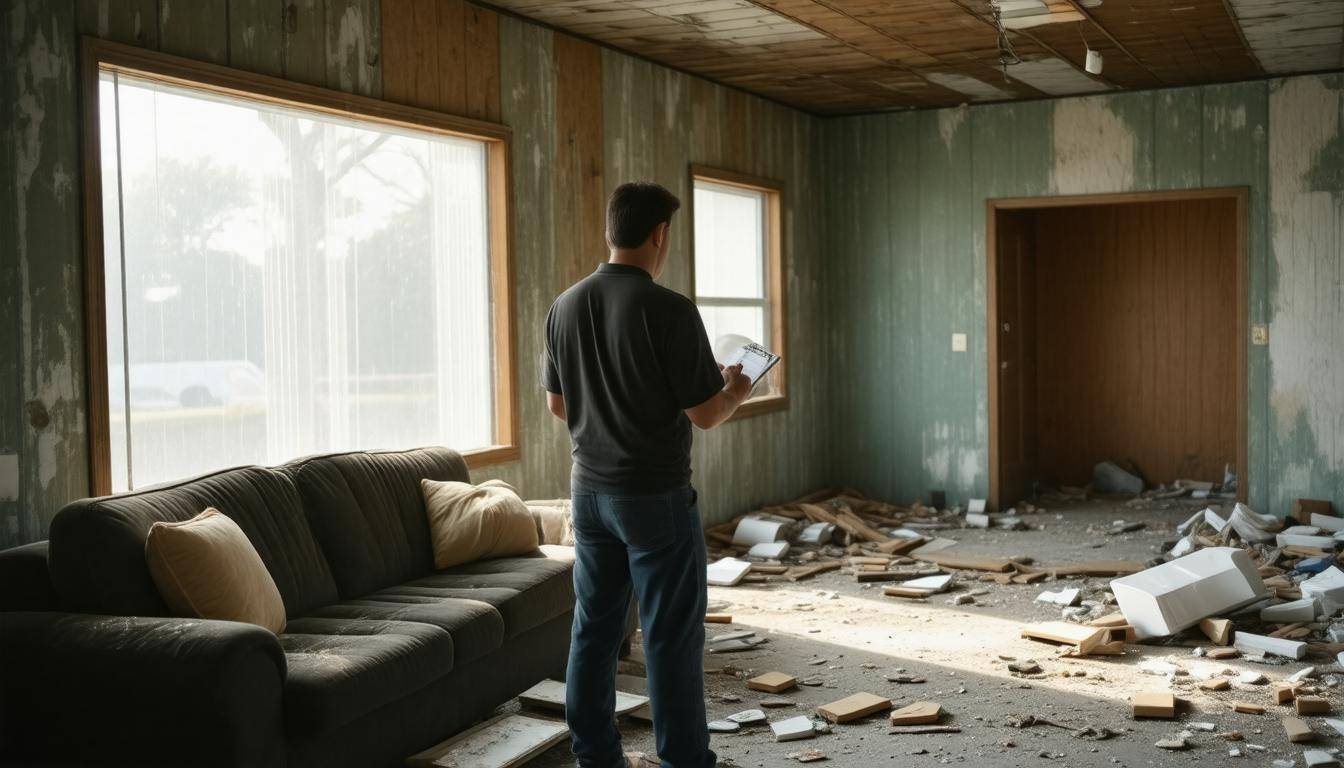
Step III – Move Inside Cautiously
Transitioning to the interior now requires extra caution. Before entering, check for any signs of structural damage from outside first; if you noticed serious roof issues or water pooling around your foundation, delay entry until a professional can assess the risk.
Once inside, start from the top—examine ceiling areas for water stains and sagging which indicate potential leaks. 40% of homes show signs of interior water damage post-hurricane and mold can develop quickly if lingering moisture isn’t addressed promptly. Keep an eye out for strange odors too—if they seem musty, it’s worth investigating further.
Make sure to inspect corners thoroughly since they often hide problems such as mold growth or pest activity that could worsen over time if neglected. Look into spaces like attics and basements where water tends to accumulate unnoticed.
Step IV – Document Everything
As you navigate through each space in your home, it’s critical that you document every detail. Use your smartphone or a camera to capture high-resolution photos and videos of any damage you encounter. This visual documentation will prove invaluable when it comes to filing insurance claims or coordinating repairs later on.
Being thorough in this step could save you time and money in disputes regarding what was previously damaged or overlooked by estimators later. Make sure it’s clear where each photo corresponds with its location in your home.
This checklist not only prioritizes immediate safety but also helps you comprehensively assess all areas of your property following a hurricane’s impact. With this foundational understanding established, we’ll explore specific inspections that will further protect your investment as you evaluate the condition of your home.
Assessing Structural Damage
Structural damage can severely compromise the safety and integrity of your home, making it crucial to identify and address these issues promptly. After a hurricane, your property could experience various forms of damage that may not be immediately visible. Thorough inspections are necessary; being proactive can save you from costly repairs down the line.
Cracks and Shifts
Start your assessment by inspecting the walls for any signs of cracks, particularly around windows and doors. These areas are critical because as the shifting foundation settles, they often reveal weaknesses first. Pay close attention to horizontal and diagonal cracks, as they can signify serious structural stress. Even small fractures can lead to water intrusion over time if left unattended.
It’s also important to observe door frames and window alignments—if your doors suddenly stick or your windows won’t open smoothly, it might indicate that the foundation has shifted significantly.
Walls and Beams
Next, make sure to examine load-bearing walls and beams. These components are essential for maintaining the stability of your house. Look for any signs of stress such as bowing, bending, or unusual gaps where walls meet ceilings or floors. Sometimes a visual inspection isn’t enough; if you feel a wall is pushing against its integrity, consult a structural engineer who can provide a more comprehensive evaluation.
Remember that even minor deformations seen during these inspections can compound over time if unchecked, leaving an increased risk for long-term deterioration.
Foundation Issues
After assessing cracks in the walls, shift your focus to the foundation itself. Inspect for visible cracks or shifts along its surface. If they exceed 1/2 inch in width or appear unevenly settled across different sections, this issue usually requires professional evaluation. Foundation problems can affect plumbing systems and lead to internal or external flooding scenarios.
Some foundation issues may need immediate attention—especially those indicating potential weaknesses—so it’s wise not to delay seeking help if you’re uncertain about what you’re seeing.
With careful attention given to structural details like cracks, wall integrity, and foundation conditions, you’re already equipped with knowledge vital for moving forward. Now, let’s turn our attention to examining another critical aspect of your home’s resilience after a storm.
Examining Roof and Exterior

Roof Inspection
The roof is one of the most vital defenses your home has against the elements, and after a hurricane, it deserves extra scrutiny. When climbing up onto the roof isn’t an option due to safety concerns, grab a pair of binoculars. From the ground, carefully look for signs of trouble. Missing shingles are easy to spot as they leave patches of exposed underlayment.
Look for damaged or misaligned flashing around chimneys and vents—this can lead to serious leaks if not fixed promptly. If you notice any debris, such as branches or shingles dislodged during the storm, remove these carefully; they can create more problems than just being an eyesore.
Now that we’ve focused on assessing the topmost protective layer of your home, let’s shift our attention to the siding and windows.
Siding and Windows
Moving down from the roof, inspect your siding closely. Look for cracks and warping that could indicate water has infiltrated the material. Pieces that may have come loose should be reattached or replaced to prevent heat loss and pest entry.
Windows are equally important during this inspection; examine each frame for shattered glass or broken seals. Pay special attention to potential water leakage—check for damp spots inside around window frames, as these could signal a problem needing immediate addressing. For safety’s sake, if you find broken glass, wear gloves when handling it and consider professional help for repairs.
With these exterior areas under review, it’s now essential to ensure that water drains effectively away from your structure.
Gutters and Downspouts
The next step involves checking your gutters and downspouts, as they play a crucial role in safeguarding your foundation from flooding damage. Make sure they are securely attached to your home and free from debris like leaves and twigs, which can obstruct water flow. This may seem like a small detail, but neglecting it can overwhelm your drainage system during heavy rain or when snow melts.
Clear out what’s inside using a sturdy ladder—while being cautious—and ensure that downspouts direct water far enough away from your foundation to minimize pooling.
Regular inspections of these exterior components are not just about compliance; they’re about peace of mind. By taking these proactive steps now, you’ll not only preserve your home’s appearance but also its overall integrity against future storms.
Having ensured the exterior is primed for protection against impending weather changes, it’s crucial to turn our focus inward to assess living spaces for additional safety measures.
Checking Interior Spaces
Water intrusion and wind damage can compromise various interior components of your home. Start with your walls and ceilings, as these areas often show the initial signs of trouble. You’ll want to diligently inspect for water stains, which may appear as dark spots or discoloration. Also, keep an eye out for peeling paint or sagging ceilings—these telltale signs indicate that water has infiltrated and could lead to serious structural issues if left unattended. To get more precise measurements, consider using a moisture meter on suspect areas; readings above 20% can signal hidden moisture problems that need immediate attention.
Walls and Ceilings
As you continue your inspection, remember that the longer water sits within these materials, the more damage they incur. If you find evidence of water damage, it’s essential to act swiftly. Not only does this prevent further deterioration, but it also reduces the chances of mold growth, which can pose health risks for your family. Additionally, don’t forget to check baseboards and corners where water may accumulate; even minor leaks can have significant consequences over time.
Next, let’s move down to the basement, a space that often bears the brunt of moisture infiltration.
Basement
When inspecting your basement, start by checking for signs of water seepage along the walls and floor. Look for damp spots or puddles, as well as any musty odors that might indicate mold growth. If you have a sump pump or drainage system installed, verify that these are functioning correctly; a malfunctioning sump pump could lead to flooded basements during heavy rains. To further mitigate potential issues, ensure that gutters and downspouts direct water away from your home’s foundation—this simple measure can make a world of difference in preventing future headaches.
Now, let’s take our inspection upward into the attic, often overlooked but equally crucial.
Attic
In the attic, one of the primary focuses should be on spotting any leaks or moisture infiltrating this upper space. Stains on insulation or wooden beams can indicate ongoing issues that demand immediate resolution. While you’re up there, it’s equally important to assess ventilation—proper airflow helps prevent not just moisture problems but also encourages energy efficiency throughout your home. Ensure vents are open and unobstructed to avoid creating a warm, humid environment conducive to mold growth. If you notice dark patches on insulation or wood beams, it may be time to consult professionals who can offer assistance with both drying out the area and addressing potential mold concerns.
By routinely examining these vital spots in your home, you lay down essential groundwork for fortifying against potential challenges ahead.
Inspecting Ceilings and Floors
When considering repairs after a hurricane, inspecting your ceilings and floors is essential. These areas can be deceptive; while they may appear normal on the surface, hidden damage could pose significant risks if overlooked. For instance, water damage can spread stealthily, causing structural integrity to weaken over time. It’s like a ticking time bomb waiting to explode, making vigilance during inspection of utmost importance.
Floor Inspection
Begin with a thorough examination of your flooring. As you walk across each room, pay careful attention to any signs of warping or buckling in wooden floors; these might indicate deeper moisture problems. If your floors suddenly feel uneven underfoot or sag in certain spots, take note—these are red flags that warrant further scrutiny. The condition of carpeted areas is equally important; a damp or musty smell can signal hidden moisture lurking beneath the surface.
Did you know that wooden flooring, when exposed to water consistently, can lead to mold growth? This not only deteriorates the wood but also becomes a health hazard.
A quick tip: use a moisture meter to get an accurate reading of dampness levels in wood floors; any reading above 20% should prompt immediate action and potentially more professional evaluations.
Ceiling Condition
Moving upward, now it’s time to examine your ceilings—the unsung heroes of structural stability. Start by looking directly above any problematic floors. If there’s warping or discoloration in the flooring below, chances are that the ceiling might show similar symptoms. Keep an eye out for bubbles or sagging; these deformities often indicate water build-up that needs to be addressed quickly before leading to worse scenarios like ceiling collapse.
Use a flashlight to illuminate dark corners where moisture might have crept in unnoticed. Make sure to check for stains or discolorations which could point toward leaks from above—often originating from the roof or bathroom plumbing. This simple visual inspection can save you thousands later on, so don’t skip this stage!
Regular inspections should become part of your home maintenance routine—not just after hurricanes but throughout your time living there. They can catch small issues before they develop into major headaches!
By thoroughly inspecting your ceilings and floors right after storm damage, you’re taking proactive steps toward ensuring safety and long-term livability within your home.
With a solid understanding of how to assess and ensure the safety of your living spaces post-hurricane, we can now explore the necessary steps for managing your outdoor spaces effectively.
Yard and Property Cleanup
A hurricane can leave your yard looking like a tornado hit it, with debris scattered everywhere, fallen trees blocking paths, and other hazards waiting to trip you up. So, when stepping outside post-hurricane, the first thing to take note of is safety. Before anything else, examine the overall surroundings for downed power lines or other potential dangers. Wearing protective gear like gloves and sturdy footwear is crucial as you embark on this cleanup mission.
Tree and Shrub Assessment
Start by inspecting your trees and shrubs for any broken branches or uprooted trunks. Pay special attention to trees close to your home, as they can cause significant damage if they fall. Look for signs of instability; this might include leaning trunks or visible root exposure that could indicate that a tree has been uprooted. If a tree poses an imminent risk, consider stabilizing it or calling in professionals to remove it safely.
Pro tip: If you notice broken branches high up in the canopy, use a pole saw or hire someone with the right equipment to avoid injury while trying to reach them yourself.
Fence and Pathways
Next on your list should be checking fences and pathways around your property. Storms can easily knock down fence panels or break posts, affecting both aesthetics and safety. Inspect each section carefully; a loose fence panel might give way under pressure, potentially leading to dangerous situations for pets or children striking out into the road.
As you inspect the pathways, look for cracks and uneven surfaces. Slips and trips can happen quickly in these areas, so filling cracks or leveling uneven parts not only serves as a preventative measure but also enhances the visual appeal of your outdoor space.
| Item | Damage Check | Action Required |
|---|---|---|
| Trees | Broken branches, Uprooted | Trim branches or remove tree |
| Fence | Loose panels, Broken posts | Repair or replace damaged sections |
| Pathways | Cracks, Uneven surfaces | Fill cracks or level pathways |
With these tasks completed, you’ll have laid a solid foundation for ensuring both safety and aesthetics in your yard after a hurricane. As you shift focus from the exterior to the interior of your home, it’s time to assess the essential systems that keep everything running smoothly.
Evaluating Electrical Systems
Hurricanes can wreak havoc on electrical systems, creating unseen dangers if not assessed properly. When inspecting these systems, you’ll want to take a careful, methodical approach. Start with some basics: wear rubber-soled shoes to avoid any potential electrical shocks and ensure the area around your electrical panel is dry before you begin.
Main Panel Inspection
Your first stop should be the main electrical panel. This is the heart of your home’s electrical system, and it’s crucial to check for any signs of water damage or corrosion. Such damage can compromise the safety and functionality of your entire electrical network. Before you access the panel, make sure to turn off the main circuit breaker. This simple step can protect you from accidental electrocution. Once open, look for rusted areas or moisture; if either is present, consider consulting a licensed electrician for further evaluation. Even minor signs of damage could lead to serious consequences later.
After ensuring that the main electrical panel is in good condition, it’s essential to check all wiring and fixtures throughout your home.
Wiring and Fixtures
Examine exposed wiring and fixtures carefully. Look for frayed wires or any signs of water intrusion. Water can quickly compromise wiring insulation, making it more prone to shorts and potentially even fires. If you spot any discrepancies like melted insulation or exposed copper wires, do not hesitate—replace those damaged wires immediately! Even if the wires appear functional at a glance, they could harbor problems that might cause issues down the line.
While you’re at it, remember that outlets located near water sources (kitchens and bathrooms) are especially vulnerable and should be prioritized during inspection.
With the wiring examined, we now turn our attention to your major appliances—a commonly overlooked area when considering post-hurricane safety.
Appliances
Major appliances require special attention as they often bear the brunt of hurricane-related water damage. Inspect each one carefully: if an appliance has been submerged in water or shows significant signs of damage such as corrosion, it is often safer to replace it rather than attempt repairs. Many homeowners underestimate this risk; however, submerged appliances pose extreme hazards—not only can they lead to electrical fires but they also can create dangerous situations when attempting repairs without professional assistance.
Take note: it’s not just about having power restored; it’s about ensuring that every element of your electrical system is safe to operate again. Each small step in this evaluation process matters greatly toward protecting both your family and your property long-term after a hurricane strikes.
As we shift focus from assessing safety measures to a critical aspect of recovery…
Documenting Damage for Insurance
Accurate documentation of damage is crucial for filing insurance claims. It helps ensure you receive the compensation needed to cover repairs. A well-organized claim can make all the difference, so let’s explore each step in detail to make your life easier during this challenging time.
Take Detailed Photos
Start by capturing clear, close-up photos of all damaged areas throughout your home. Photograph everything from the roof to the foundation—water stains on walls or ceilings, broken windows, and anything that clearly shows the impact of Hurricane Helene.
One useful tip is to use a ruler or a similar everyday object for scale in these images. This helps insurance adjusters understand the severity of damage without needing to visit your property multiple times. These photos will serve as visual evidence, reinforcing your case when submitting claims.
As you gather photographs, it’s just as essential to maintain a thorough record of what has occurred.
Keep a Log
Maintaining a written log detailing the location and extent of the damage is vital. Use a simple notebook or even a digital document; clarity is key. Each entry should contain descriptions, dates, and observations on how conditions may change (e.g., worsening leaks over time).
This log will be invaluable when recounting events to both insurers and contractors later on. Listing specific actions taken—for instance, moving furniture or sealing leaks—can showcase your proactive efforts in mitigating further damage.
Along with photos and logs, ensure you have all relevant financial information at hand.
Gather Receipts
Collect receipts for any immediate repairs or replacements to support your claim. This includes costs for temporary lodging if your home has become uninhabitable. Even minor expenses matter: receipts for emergency supplies like tarps or cleaning materials should not be overlooked; they demonstrate an effort to control potential damages following the initial storm aftermath.
Having organized receipts makes it easier when itemizing costs for your insurance provider and strengthens your case for reimbursement.
By taking these straightforward steps seriously, you enhance your chances of getting adequate compensation and streamline the insurance process for both you and your insurer.
In navigating the aftermath of a hurricane, thorough documentation is not only important for financial recovery but also serves as an essential part of ensuring safety and accountability in rebuilding efforts.
Are there particular signs of water damage I should look for after a hurricane?
Yes, after a hurricane, watch for signs of water damage such as discolored walls or ceilings, peeling paint, and mold growth, which can occur within 24 to 48 hours in moist conditions. According to the National Flood Insurance Program, about 90% of all natural disasters in the U.S. involve flooding, highlighting the importance of early detection and repair to prevent long-term damage and health risks associated with mold exposure.
When should I consider hiring a professional inspector instead of doing it myself?
Consider hiring a professional inspector if you encounter significant structural damage, such as visible cracks in walls or ceiling, or if there’s extensive water intrusion that could lead to mold. According to the Federal Emergency Management Agency (FEMA), nearly 30% of homeowners who attempt DIY repairs after natural disasters report further complications due to improper assessments. In these cases, a professional’s expertise can ensure safety and compliance with local building codes, ultimately saving you time and money in the long run.
What tools or materials do I need to perform an effective DIY inspection?
To perform an effective DIY post-hurricane home inspection, you’ll need a basic toolkit that includes a flashlight for visibility in dark areas, a moisture meter to identify hidden water damage, a ladder for checking roofs and gutters, and a tape measure to assess any structural damages. Additionally, having protective gear like gloves and safety goggles is essential for personal safety during the inspection. According to recent studies, 40% of homeowners who conducted thorough inspections post-hurricane identified issues early on, leading to decreased repair costs by up to 30%.
How can I differentiate between minor damage and major structural issues?
To differentiate between minor damage and major structural issues after a hurricane, look for key indicators such as cracks wider than 1/4 inch in walls or foundations, doors and windows that stick or won’t close properly, and sagging roofs or floors. Minor damage often includes superficial issues like chipped paint or small leaks, which can typically be repaired easily. In contrast, about 25% of homeowners encounter significant structural problems following severe storms, often necessitating professional assessments. Always err on the side of caution; if you’re unsure about the severity of the damage, it’s wise to consult a qualified inspector.
What specific areas of my home should I focus on during a post-hurricane inspection?
Focus on the roof, windows, doors, and foundation during your post-hurricane inspection. The roof is critical as it protects against further weather damage—over 40% of home damage in hurricanes is associated with roof failure. Check for loose shingles, leaks, and structural integrity. Windows and doors should be inspected for cracks or breaks; statistics show that unprotected openings significantly increase water intrusion risk. Finally, inspect the foundation for cracks or shifts that could compromise your home’s stability. Prioritizing these areas ensures you address the most vulnerable points and mitigate further damages.