
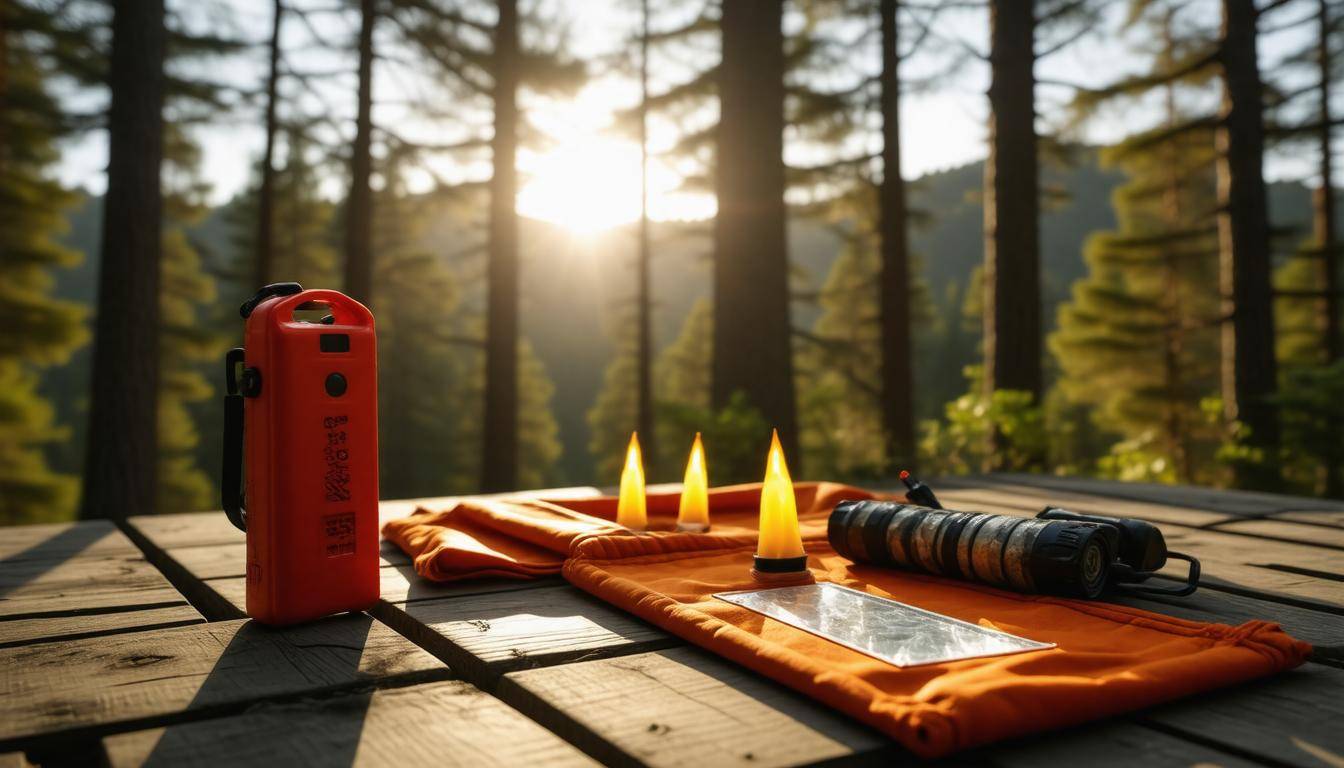
In an emergency, knowing how to signal for help can make all the difference. Whether you’re zip-lining through the mountains or hiking in the woods, the unexpected can happen. What if you find yourself lost or injured far from help? This is where smart signaling methods come into play. Understanding simple, effective ways to get noticed—like using bright colors, reflective materials, and even sounds—can increase your chances of being found. It’s like having a safety net that doesn’t weigh you down. With a little prep and creativity, you can turn everyday objects into powerful signals that stand out in any situation. Let’s explore some easy DIY techniques that could turn a potential disaster into a story of survival.
In the DIY Emergency Signaling Methods: Complete Guide, you will learn essential techniques for effectively signaling for help during emergencies, including visual signals using reflective materials and brightly colored cloths, as well as acoustic signals like whistles. The guide also discusses the importance of carrying multiple signaling methods and outlines practical tips to enhance your safety protocols in remote areas.
Top DIY Methods for Emergency Signaling
Let’s start with visual signals, which are among the most effective means of capturing attention in an emergency. Using mirrors or reflective surfaces can create bright flashes visible from vast distances, especially when sunlight hits them just right. Imagine you’re out hiking and find yourself lost; a simple compact mirror could be your best friend! Reflecting sunlight can reach rescue teams who might otherwise have overlooked you.
Brightly colored cloths or solar blankets are also excellent choices. The more vibrant the color, the better your chances of being seen against natural backdrops. Draping a bright piece of fabric over rocks or waving it can signal to those in the distance.
Now, while visual signals catch the eye, we need to consider our ability to create loud sounds that can travel.
Acoustic Signals
Acoustic signals are crucial in situations where you need to attract attention from afar but visibility is limited—think deep woods or fog-laden valleys. Whistles are particularly effective because they’re lightweight, easy to carry, and surprisingly powerful; a single blast can easily be heard over a mile away under optimal conditions.
In fact, research has shown that while shouts may get lost in the wind, a whistle produces a consistent sound that travels further than general noise. This makes it a reliable option for signaling rescue teams. If you’re ever caught in a situation where you need assistance, don’t underestimate the power of this simple tool.
Light-Based Signals
Beyond sound, light can communicate urgency effectively as well.
Light-based signals can be your beacon in low-light conditions. A flashlight or LED set to strobe mode not only provides illumination but sends out bursts that can draw attention from great distances at night. Just one flash every few seconds can help rescuers locate you without confusion.
Glow sticks, too, should not be overlooked; they are portable and last much longer than batteries on traditional flashlights. Handy for both illumination and signaling, these luminous tools become invaluable in dim environments when every moment counts.
Each signaling method complements the other; together they form a comprehensive strategy for emergencies.
As you design your personal safety kit for hiking or any outdoor adventure, remember to pack multiple signaling methods. Redundancy increases your probability of being found if you’re in remote areas or challenging terrains. It’s always better to have various options at hand—combining visual, acoustic, and light signals ensures you’ll not only be heard but also seen by potential rescuers.
Understanding how these methods work collectively enhances your preparedness and effectiveness during emergency situations, setting the stage for exploring specific techniques using reflective materials.
Using Reflective Devices
Reflective devices can be lifesavers, transforming simple materials into essential tools for survival. Each type serves a definitive purpose and can be utilized effectively when traditional help is out of reach. When you’re stranded or lost, these items can amplify even the faintest rays of sunlight, creating visibility that can mean the difference between being noticed and remaining unseen.
Types of Reflective Devices
-
Signal Mirrors: Often compact and designed specifically for emergencies, these mirrors have a small hole at their center that helps you aim the reflection directly at searchers. Their effectiveness comes from the way they focus sunlight into a bright flash that can travel far. With the proper positioning, you can signal across long distances—sometimes up to 10 miles away—making them an indispensable part of any emergency kit.
-
Mylar Blankets: Lightweight and easy to store, Mylar emergency blankets reflect about 90% of body heat but also serve another critical function: signaling. When unfurled, they catch sunlight effectively and create a large surface area for reflections. Remember to keep one easily accessible in your pack; it could mean warmth and visibility during an unexpected situation.
-
CDs or DVDs: In desperate times, even those old music CDs can find new life as reflective devices! Their shiny surface reflects light much like traditional signal mirrors. Though unconventional, this makeshift solution can work well if you’re in dire need and lack specialized equipment.
Beyond knowing which devices to use, it’s essential to grasp how to operate them effectively in various situations. It often comes down to creating as much contrast as possible against your surroundings. Positioning is key: ensure you’re utilizing these materials in open areas where light can shine unimpeded, maximizing their visibility to searchers—a lesson I learned after nearly misplacing my trusty signal mirror in a dense forest.
And here’s an interesting fact: Reflective materials can enhance visibility by up to 300% in low-light conditions. Incorporating items like reflective tape or signal systems into your gear will only boost your chances of being spotted during those critical moments.
While reflective devices are invaluable for catching the eye, don’t underestimate the urgency conveyed through sound signals. Understanding how to use acoustic signals effectively further complements your emergency preparedness toolkit and increases your chances of getting rescued should you find yourself in a tough spot.
Creating Noise Signals
Making noise is a critical method for signaling your location to rescuers, especially when visibility is compromised by dense foliage or poor weather conditions. The effectiveness of sound can often reach further than sight in some scenarios. One of the simplest and most reliable ways to gain attention is by utilizing a whistle, a small yet powerful tool that can produce a sound audible up to a mile away under optimal conditions. Whistles are not only lightweight but also incredibly easy to carry, making them ideal for outdoor adventures where safety is essential.
Whistles and Their Efficacy
As already mentioned, whistles can be heard from remarkable distances. They generate loud sounds that can cut through other ambient noises. You’ll find varied styles on the market, from standard plastic options to high-end metal designs that resist wear and tear. In a survival situation, this inconspicuous item can mean the difference between being found and remaining undetected.
If you’re without a whistle, remember that improvisation can go a long way. Everyday items can serve as effective noisemakers. Think about stones or sturdy sticks; these tools can create bang signals when struck against metal surfaces or large rocks. This technique has been utilized in survival situations throughout history—an age-old method that’s survived for good reason.
Improvising Noise Tools
-
Stones: Find two sturdy stones that can be struck together to produce sharp, loud sounds.
-
Sticks: Use a thick stick against a metal surface or larger rock to amplify the volume and reach farther.
-
Hitting Hard Surfaces: Striking wood with another hard object can also create effective sounds that travel considerable distances.
Beyond natural noise-making tools, consider incorporating more specialized equipment into your emergency kit. Air horns have become a popular choice due to their powerful sound output; they can reach decibels typical of 120-130 dB under open conditions. Easy to use, portable air horns work effectively across various circumstances—whether you’re hiking in snowy conditions or navigating through rain-soaked trails.
Air Horns
When selecting an air horn for your kit, look for compact models designed specifically for outdoor use. They should provide robust sound and function reliably even in challenging weather conditions. By having multiple signaling methods at your disposal—like combining noise tools with reflective devices—you’ll increase the likelihood of being found.
Noise signals are great, but visibility plays an equally important role in ensuring you’re noticed during emergencies.
High Visibility with Flares
When considering emergency signaling methods, flares stand out as one of the most effective tools in your kit. Their intense brightness and quick visibility make them a prime choice for attracting attention during critical situations. In ideal conditions, flares can be seen from impressive distances and significantly enhance your chances of being located by rescue teams. The sheer power of a flare often makes it the go-to option when traditional signaling methods may not suffice.
Types of Flares
| Type | Duration | Visibility |
|---|---|---|
| Handheld | 2-5 minutes | Up to 5 miles |
| Aerial | 30 seconds | Up to 30 miles |
| Roadside | 15-30 minutes | 1 mile |
Handheld flares are perfect for immediate, close-at-hand situations like roadside emergencies or outdoor gatherings gone awry. They burn brightly for up to five minutes—plenty of time to catch the eye of passersby or nearby hikers.
On the other hand, aerial flares ascend high before bursting into an even more brilliant light display, ensuring their visibility is maximized across vast open spaces like oceans or deserts.
If you find yourself outdoors where help might be far away, an aerial flare could be a lifesaver that is seen from over 30 miles away!
Safety Precautions
It’s essential to handle flares properly to prevent mishaps that could prove dangerous. For instance, you should always wear gloves when handling them; this not only protects you from heat but also shields the flare from oils on your skin that can affect ignition. Be mindful to never point a flare towards people or pets and ensure you have solid footing before igniting it—after all, safety should always come first.
Another little-known aspect of firing off a flare is knowing where to deploy it. Ideally, flares should be ignited in clear areas free from obstructions like trees or buildings. This allows their brilliant light to travel unhindered in search of rescuers.
While flares shine brightly as a method for signaling, transitioning to fire and smoke signals opens up new avenues for effective communication in emergencies.
Effective Fire and Smoke Signals
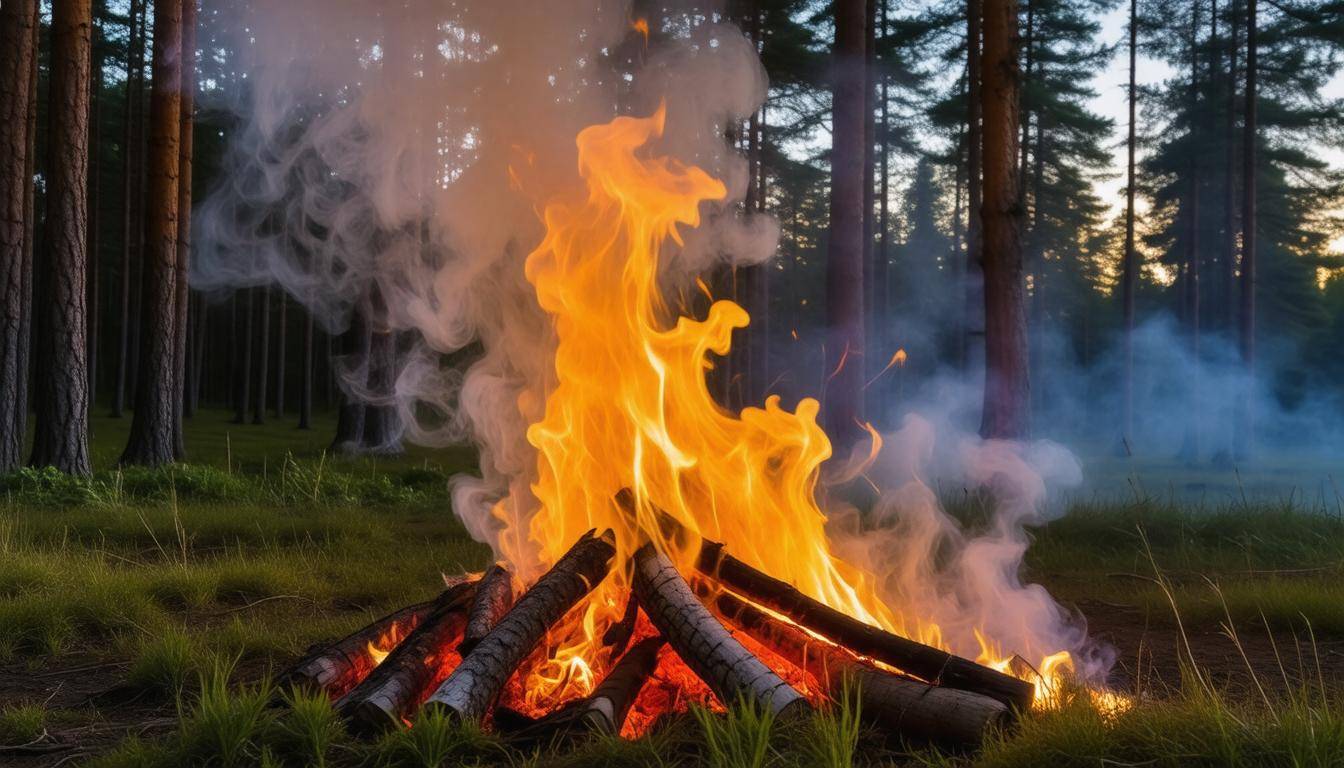
To effectively use fire and smoke as a signaling method, it’s crucial to understand how to create the signals and enhance their visibility for rescuers. The color of the smoke plays a significant role in this. Black smoke indicates burning materials like plastic or oil, while white smoke results from burning green vegetation or damp leaves—this is the color you want for signaling purposes. Setting up your smoke signal correctly can mean the difference between being spotted or missed entirely.
Crafting Effective Signals
Start by gathering materials that will allow you to produce both flames and smoke. Collect dry wood as a reliable fuel source, along with green branches or damp leaves that will generate thick, white smoke when placed on the fire. A dependable fire starter—like waterproof matches—ensures you can ignite your signal quickly, even in adverse conditions.
When you’re ready to build your fire, create a base using dry wood laid out in an open area. Light it carefully, keeping wind direction in mind. Point the flames away from yourself and toward the area where help is expected. As the fire takes hold, strategically add damp leaves or green branches on top to produce a thick column of white smoke that can be seen from miles away.
Remember: An effective smoke signal should last at least 30 seconds to ensure rescue teams spot it clearly from a distance.
Upscaling Visibility
If visibility might be less than optimal—but panic isn’t an option—you might consider building multiple small fires arranged in a triangular pattern. This formation is instantly recognizable as an international distress signal and increases your chances of being seen by search parties.
However, ensuring control over your fire is paramount. Always have a method on hand to extinguish the flames quickly if they start to spread or threaten nearby vegetation; you wouldn’t want a rescue signal turning into a wildfire.
Environmental Considerations
Location matters greatly when utilizing fire and smoke signals. Choose areas clear of overhead obstacles, such as trees and buildings that might block your signal’s view. The terrain can play a role too—smoke signals can typically be seen from up to 10 miles away under optimal conditions, depending heavily on weather and landscape factors.
Keep an ear out for changing wind patterns while the fire burns; adjusting your positioning can significantly increase visibility to any potential rescue team nearby.
As we move forward to explore additional practical methods for creating makeshift signaling tools, keep in mind that preparation and adaptation are key components of effective emergency communication.
Improvised Signaling Tools
Improvised tools can be life-saving in unexpected situations. When you think about signaling for help, you might envision fancy devices equipped with expensive technology, but many everyday items can serve as effective signaling mechanisms. For instance, colored clothing—bright or contrasting colors can catch attention from far away. If you’re ever lost in the wilderness or stranded during a travel mishap, waving a bright shirt can be enough to alert passersby or rescue teams.
Common Tools and Their Uses
An excellent way to utilize sticks and stones is to arrange them on the ground to form large letters like “SOS” or arrows pointing towards your location. The larger the message, the easier it is for aerial rescues or distant observers to see. Similarly, if darkness falls and you’re equipped with a flashlight, remember that creating a repeating pattern—like three short flashes followed by a pause—can signal distress effectively at night, transforming any standard flashlight into a signaling device.
These methods require no specialized equipment but rely on creativity and resourcefulness. This is particularly valuable in unforeseen situations where traditional tools may not be available. Even something as simple as a whistle can prove invaluable; studies suggest that its sound can carry over a mile in open terrain, potentially drawing attention when you’re far from civilization.
While improvisation is essential, understanding how to adapt your approach based on environmental conditions and time of day can significantly enhance your chances of being seen or heard. Let’s explore how different techniques function effectively under varying circumstances.
Methods for Daytime and Nighttime
During daylight hours, visibility plays a crucial role. Bright and reflective items prove to be effective tools for signaling. For instance, mirrors reflect sunlight and can create a beacon visible from several miles away—up to 5 miles under optimal conditions. Imagine standing in an open area and using a simple hand mirror to flash sunlight towards searchers. It’s both easy and highly effective!
Similarly, reflective blankets can amplify visibility by bouncing light back, while smoke signals from a small fire can produce a plume visible from even further away. Smoke can rise into the air and become noticeable from distances of up to 10 miles.
As evening falls, the game changes, and light becomes your best ally in signaling.
At night, it’s all about illumination. Flares are perhaps the most reliable nighttime signaling tool; they can reach heights of up to 1,000 feet and are visible for as much as 20 miles away. Picture this: you strike that flare, and it bursts into brilliant red light against the dark sky—it’s hard to miss!
A good flashlight or torch also does wonders. Depending on its brightness measured in lumens, it could be visible from 1-2 miles away. Don’t underestimate glow sticks; they’re portable and lightweight, and when activated, can be seen from about 500 feet to 1 mile away.
The Power of Planning
When venturing into remote areas or less-traveled paths, consider carrying various signaling devices:
- Flares: Keep a couple handy in your emergency kit.
- LEDs: A compact LED flashlight with multiple settings can adapt to different situations.
- Reflective materials: A piece of bright fabric or a reflective survival blanket serves dual purposes for warmth and visibility.
Remember that having multiple signaling options creates redundancy, increasing your likelihood of being found in an emergency.
Whether you’re trekking through the wilderness or enjoying an outdoor adventure, keeping these methods in mind ensures that you’re prepared for unexpected situations. By utilizing reflective materials during the day or lights at night, you’ll enhance your safety significantly. Prioritizing preparedness and knowledge about your surroundings can make a world of difference in emergencies.
With this foundational understanding, we can now explore additional strategies that bolster overall safety in various environments.
Best Practices for Safety
When you’re in an unexpected situation that requires signaling for assistance, making sure that safety is your priority can’t be overstated. Taking precautions goes a long way in ensuring that you attract attention without putting yourself in more danger. For example, understanding your surroundings and wearing protective gear can significantly influence your response during an emergency. As you prepare your signaling methods, remember that it’s not just about the tools—you are part of the equation too.
Safety Tips
First things first: always wear protective gear. Whether you’re lighting a signal fire or handling flares, gloves and goggles can protect against burns and injuries. Picture this: you’re out camping and decide to use a flare to signal for help. If the flare accidentally ignites something nearby, having gloves on could mean the difference between a minor scare and a serious accident.
Next up is knowing your environment. Familiarize yourself with local wildlife risks; some areas might have bears or snakes that could pose a threat if you’re distracted by a distress signal. Moreover, understanding weather patterns is equally important; conditions can quickly change, turning fire signals into hazards if winds pick up.
While it may seem daunting to consider all these factors, staying calm is essential. Panicking rarely leads to sound decisions, especially when the clock is ticking. Take a moment to breathe deeply and evaluate your options before acting. This way, no matter how pressured you feel, you’ll have time to focus on strategically deploying your signaling methods effectively.
In summary, effective DIY emergency signaling requires more than just tools; it hinges on embracing safe practices as part of your emergency planning. By equipping yourself with knowledge and preparation while prioritizing safety, you substantially increase your chances of being located in times of need.
Ultimately, understanding and implementing safe practices ensures not only your readiness but also your peace of mind during unexpected situations. Preparedness is key to navigating emergencies successfully.
How can I make a signal that is visible from long distances?
To create a signal visible from long distances, use large, bright-colored materials like orange or reflective tape to craft an “X” or an arrow shape on the ground. Studies indicate that signals in high-visibility colors can be seen from over a mile away in clear conditions. Additionally, using mirrors or reflective surfaces to redirect sunlight can amplify your visibility during the day, attracting attention from searchers and aircraft effectively.
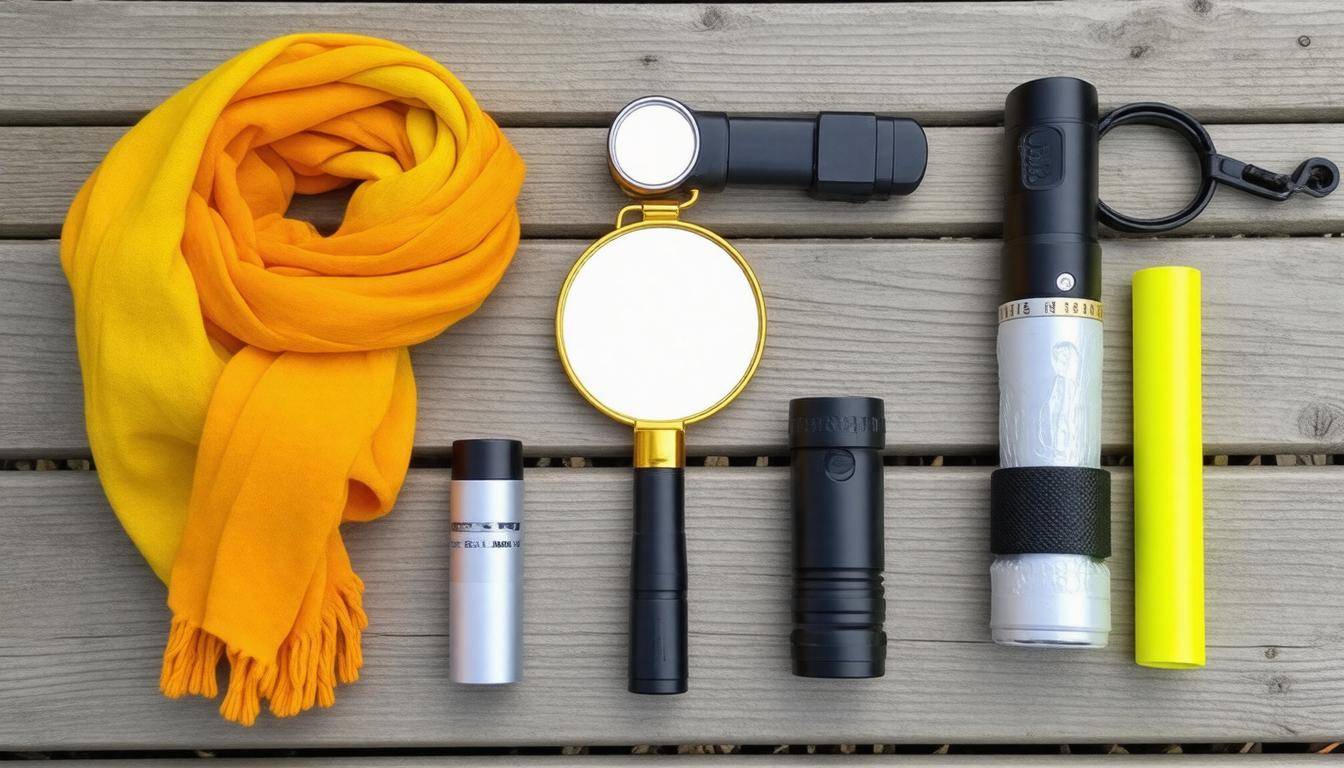
What materials do I need to create effective DIY emergency signals?
To create effective DIY emergency signals, you’ll need reflective materials (like aluminum foil or Mylar), bright and easily visible colors (such as orange or neon green cloth), a whistle for sound signaling, a flashlight or glow sticks for night visibility, and a sturdy base to hold your signal (like a wooden stake). Research indicates that highly visible signals can increase the chances of being spotted by rescuers by up to 70%, making these materials essential for maximizing your safety in emergencies.
How can different environments (forest, urban, etc.) affect my choice of signaling method?
Different environments significantly influence the effectiveness of signaling methods due to variations in visibility, sound travel, and potential obstacles. In a dense forest, for instance, visual signals like smoke or reflective materials may be obstructed by trees, making sound signals such as whistles or shouts more effective. Conversely, in an urban setting where tall buildings can muffle sounds and obscured views are common, visual signals like flares or brightly colored cloth may stand out more. According to studies, 70% of emergency landings in urban areas utilize visual signaling due to increased noise and bright lights that can mask auditory signals. Thus, choosing the right method tailored to your environment is crucial for successful emergency signaling.
Are there any safety tips to consider when creating and using DIY emergency signals?
Yes, when creating and using DIY emergency signals, safety tips include ensuring that the signals are clearly visible from a distance and can be easily activated without endangering oneself. It’s important to use materials that are durable and appropriate for the environment, as 56% of outdoor accidents occur due to poor visibility. Additionally, practicing the signaling method can be crucial; research shows that preparedness reduces response time in emergencies by up to 30%. Always test your signals beforehand under various conditions to ensure effectiveness.
What are some creative ways to signal for help without using electronics?
Some creative ways to signal for help without using electronics include creating large symbols on the ground using rocks, logs, or brightly colored clothing, which can be visible from the air or afar. Fires can also serve as a distress signal, particularly by using green vegetation to produce smoke during the day. Additionally, reflecting sunlight using mirrors or shiny objects can catch the attention of potential rescuers. According to survival experts, non-verbal signals such as three blasts on a whistle (or similar sounds) are universally recognized as calls for help, emphasizing clarity and visibility in emergency situations.