
Rainwater is one of nature’s most overlooked resources, and harvesting it can be both easy and rewarding. Imagine walking into your backyard knowing you’ve created a system that not only captures the refreshing rain but also helps water your plants and gardens sustainably. With a little time and effort, setting up a DIY rain collection system can transform those rainy days into valuable opportunities. In this guide, I’ll share clear steps, helpful tips, and my own experiences to ensure you feel confident taking on this project. So let’s jump right in and discover how you can make every drop count!
To build a DIY rain collection system, first, thoroughly rinse your barrels inside and out. Next, cut openings for downspout connectors and overflow valves, construct sturdy barrel stands, and secure all plumbing connections with PVC cement while ensuring watertight seals with silicone where necessary.

Choosing the Best Location
When determining the best site for your DIY rain collection system, it’s important to find a balance between maximization and accessibility. Start by identifying a flat area close to your home that benefits from a large roof surface area. Larger roof surfaces can capture more rainwater. Avoid areas blocked by trees or buildings that can reduce the amount of rainfall collected due to shading or displacement.
Imagine standing beneath your roof on a rainy day, watching all that potential water flow away without being captured; that’s what you want to avoid.
A smart practice is to position your system beneath the slope that collects the most water. If you have a two-story home, one side of your roof may drain more effectively than the others. Consider how rain hits your roof; if it streams down one side more than another due to wind direction or design, that side is likely your best choice.
For added efficiency, look for an area with at least 30 inches of rainfall annually, ensuring you’ll have enough water for meaningful collection.
Additionally, consider the relationship between your collection system and any areas where you plan to use that harvested water.
Proximity plays a big role too. Positioning your barrels close to plants for garden irrigation reduces the need for extended hoses and limits potential pressure loss during transfer. The shorter the distance from barrel to garden, the easier it will be when you are ready to use that water.
In my personal experience, placing our rain barrels near the herb garden turned out to be a game-changer. We set up a simple drip irrigation system fed directly from our barrels, allowing us to efficiently water our plants while conserving time and resources.
Avoid placing your system beneath trees, which can introduce debris that clogs gutters or creates other maintenance challenges. Ideally, keep a distance of at least 10 feet away from trees. This reduces contamination and assists in optimizing sunlight access. Ensuring that the area receives 6-8 hours of sunlight daily deters algae growth inside your storage tanks, which is important for keeping that collected rainwater clean and usable.
Lastly, never forget about drainage; water must flow smoothly away from both your home and collection barrels.
Ensure the terrain has a slope of at least 1% around the collection area to facilitate proper drainage and prevent pooling or stagnant water around your system components. Standing water could quickly turn into a breeding ground for pests like mosquitoes, defeating much of the purpose behind such an eco-friendly initiative.
With an optimal location selected, let’s explore the essential components needed to bring this project to life.
Essential Materials and Tools
Having the appropriate materials and tools will not only streamline your construction process but also help to ensure that everything is built correctly from the start. A well-planned approach can save you time and minimize potential headaches later on. Let’s explore what you’ll need for this exciting DIY project.
Required Materials
To kick off your rainwater harvesting system, you’ll want sturdy rain barrels. I recommend choosing barrels with a minimum 55-gallon capacity because larger barrels allow for more water storage during those unexpected downpours. This means you’ll have enough water for those dry months when every drop counts.
Additionally, downspout diverters are essential. They direct the rainwater flowing through your gutters directly into your barrels, making sure no valuable resource goes to waste. Incorporating mesh screens is another smart move as they prevent debris or insects from entering your barrels, keeping your collected water cleaner.
Next, you’ll need various sizes of PVC pipes and fittings to create the necessary connections between your diverters and barrels. It’s worth noting that a little silicone sealant and Teflon tape will go a long way in ensuring watertight seals—trust me; nothing is more frustrating than leaks! To facilitate easy access to your stored water, make sure to have some hose bibs on hand.
I also suggest having some concrete blocks or cinder blocks ready as they can elevate your rain barrel system. Elevation allows for better gravity-fed drainage when you’re dispensing water. The higher your barrel is positioned, the easier it will be to fill hoses or watering cans without relying on pumps!
Necessary Tools
Now, let’s touch on tools! A drill with hole saw attachments will make short work of creating holes for any fittings in your barrels or piping—definitely a must-have tool in this project. You’ll also want a jigsaw handy for cutting through any tricky materials since an efficient cut can save time and effort.
An adjustable wrench comes in handy for tightening fittings, while a hacksaw can be useful if you encounter thicker materials needing cuts. You’ll need a reliable measuring tape to ensure all components fit together perfectly, preventing awkward gaps or misalignments during installation.
Finally, don’t forget a marker; it helps when marking measurements or cuts on materials before making final adjustments. Taking the extra few moments to measure and mark accurately will yield better results once you assemble everything.
With these materials and tools at your disposal, you’re well-prepared to embark on the exciting process of constructing your own rain collection system. Ready to dive into the actual steps? Let’s get started with the building process ahead!
Steps to Build Your System
The next phase in constructing your rain collection system is to ensure that you have the right pathways set for water flow. You’ll want to select a stable, flat area near the downspout where the barrels will sit. It’s essential not only for accessibility but also for the overall efficiency of your system. A well-placed barrel can significantly improve your rainwater catchment success.
Step 4 – Install Downspout Diverter
A downspout diverter is a critical component that directs the rainwater from your roof into the barrels while allowing excess water to continue flowing through the original downspout. To do this, cut your downspout at a point that allows the diverter ample space to connect. Fit the diverter securely and make sure it’s angled properly; any misalignment can lead to leaks or overflow issues.
When cutting your downspout, use a hacksaw or a pipe cutter for a clean cut, which will help ensure a snug fit. Don’t forget to measure twice before cutting; there’s no joy in cutting the downspout too short!
Step 5 – Connect PVC Piping
Once your diverter is securely in place, it’s time to begin connecting your PVC piping from the diverter to your barrels. This connection should be tight and watertight; using PVC cement can help secure these fittings and minimize any chance of leaks. To prevent any potential backflow or blockages, ensure that the piping runs downhill towards the barrel without any sharp angles.
As you connect everything, check for spots along the piping where debris can accumulate and plan accordingly with mesh screens or filters as needed.
Step 6 – Add a Spigot
Now that your rainwater catchment system is nearly complete, it’s time to facilitate easy access to the collected water by installing a spigot. Position it close to the bottom of the barrel—as low as possible—to help maximize drainage when you need to draw water out later. Ensure that you firmly attach and seal it with silicone caulk, which prevents leaks and keeps your water clean.
Step 7 – Test Your System
After everything is connected, run some water through the system from your roof. Testing will allow you to observe how well everything flows together—look closely for leaks, blockages, or poor drainage areas. This test is crucial not just to confirm functionality but also as an opportunity to make necessary adjustments before rainy weather arrives.
With all connections secure and tested, maintaining optimal performance becomes key to ensuring effective operation throughout rainy seasons. Next, we will explore how to efficiently manage downspouts and pipes in your system.
Connecting Downspouts and Pipes

Begin by cutting the existing downspout to the appropriate height, which usually means determining where you want the water diverted into your rain barrel. A simple hacksaw or pipe cutter will work wonders here. When I first tackled this task, I felt a sense of accomplishment with each cut; it was as if I was creating something meaningful for my garden. Many people overlook this part, thinking that any height will work, but achieving an optimal fit ensures efficient flow.
Once you’ve cut your downspout, it’s time to attach a downspout diverter. This device is crucial because it guides the rainwater directly into your barrels while preventing overflow during heavy rains. I found using a flexible downspout adapter made the installation smoother and more forgiving—it allowed me some wiggle room without needing precise measurements. Essentially, you want to channel every drop effectively, so paying attention here pays off big!
After securing the diverter, the next step involves connecting it to the barrel inlet using PVC pipes. Selecting 2-inch diameter PVC pipes is generally recommended as they maintain strong water flow and minimize clogs. But remember to measure twice and cut once; there’s little room for error in this stage! By attaching the pipe to the diverter and leading it down to the barrel inlet, you are directly linking your roof’s runoff to your water collection system.
Don’t forget about securing all connections with Teflon tape and silicone sealant. These will keep your system watertight, ensuring that not a single valuable drop of rainwater slips away unnoticed. I learned the hard way that even minor leaks can lead to significant losses over time.
Regular maintenance is just as important as initial construction—monitor your connections for leaks frequently.
As you finalize your setup, consider incorporating an overflow drainage system into your design; it’s like having a safety valve on your water source! An overflow pipe will help manage excess water during heavy storms and prevent flooding around your barrels.
By systematically connecting your downspouts and pipes, you’re not only creating a sustainable resource for watering plants or flushing toilets but also gaining peace of mind knowing you’ve built something dependable.
With these connections in place, attention must now turn to managing excess water flow efficiently while ensuring cleanliness within your collection system.
Installing Overflow and Filtration
Installing a proper overflow and filtration system is vital for maintaining the efficiency and effectiveness of your rainwater collection setup. First, begin by installing a mesh screen over each barrel opening. This screen acts as your first line of defense against debris like leaves and twigs while keeping pesky insects out. Choose a screen with fine enough openings to filter out even the smallest particles; this will help prevent clogging in the plumbing downstream.
Remember, keeping your collected water clean begins right at the barrel opening.
Next, we dive into the overflow system, which is crucial to prevent flooding around your foundation during heavy rains. Measure the height of your rain barrel and mark the overflow outlet about 2-3 inches below the top. Cutting PVC pipe to create this overflow outlet is straightforward: use 2-inch PVC pipe for effective drainage. Connect elbows as needed to direct the flow away from your house, ensuring any excess water is diverted to an appropriate drainage spot or garden area.
For better security, secure all connections with hose clamps and apply a waterproof sealant where necessary. This not only prevents leaks but ensures that your overflow system can handle unexpected heavy rainfall without issues. A well-designed overflow system directs water away from your home’s foundation, preventing erosion and potential structural problems.
Additionally, incorporate a sediment bucket beneath the mesh screen to catch any particles that may evade initial filtration. This ensures that cleansed rainwater flows smoothly into your storage barrel without contamination from accumulated debris. Regular maintenance includes checking and cleaning both the mesh screen and sediment bucket every month; this minimizes algae growth and maintains optimal flow.
With proper installation of both filtration and overflow systems, you’re advancing towards a fully functional rain collection setup that efficiently captures water while safeguarding against flooding concerns. As we move forward, exploring how to optimize tank assembly and securing mechanisms will enhance the overall stability of your system.
Assembling and Securing Tanks
The first step in assembling your rain collection tanks is ensuring that they are properly elevated. Elevating your barrels not only facilitates better water flow but also increases water pressure when you draw it from the tank. You can use concrete blocks or a sturdy wooden stand—options that are both affordable and durable. When arranging the barrels, ensure they are stable and level; an uneven surface could lead to accidents or leaks down the road.
A well-placed stand makes a noticeable difference. Think of it as giving your collection system a solid foundation, so you won’t end up with water pooling where it shouldn’t.
Once your barrels are elevated, it’s time to secure them in place. This is vital, especially in regions prone to heavy rains or strong winds. Use bungee cords or metal straps to tightly fasten the barrels to their stands, preventing tipping and ensuring peace of mind knowing your system will remain intact during tempestuous weather.
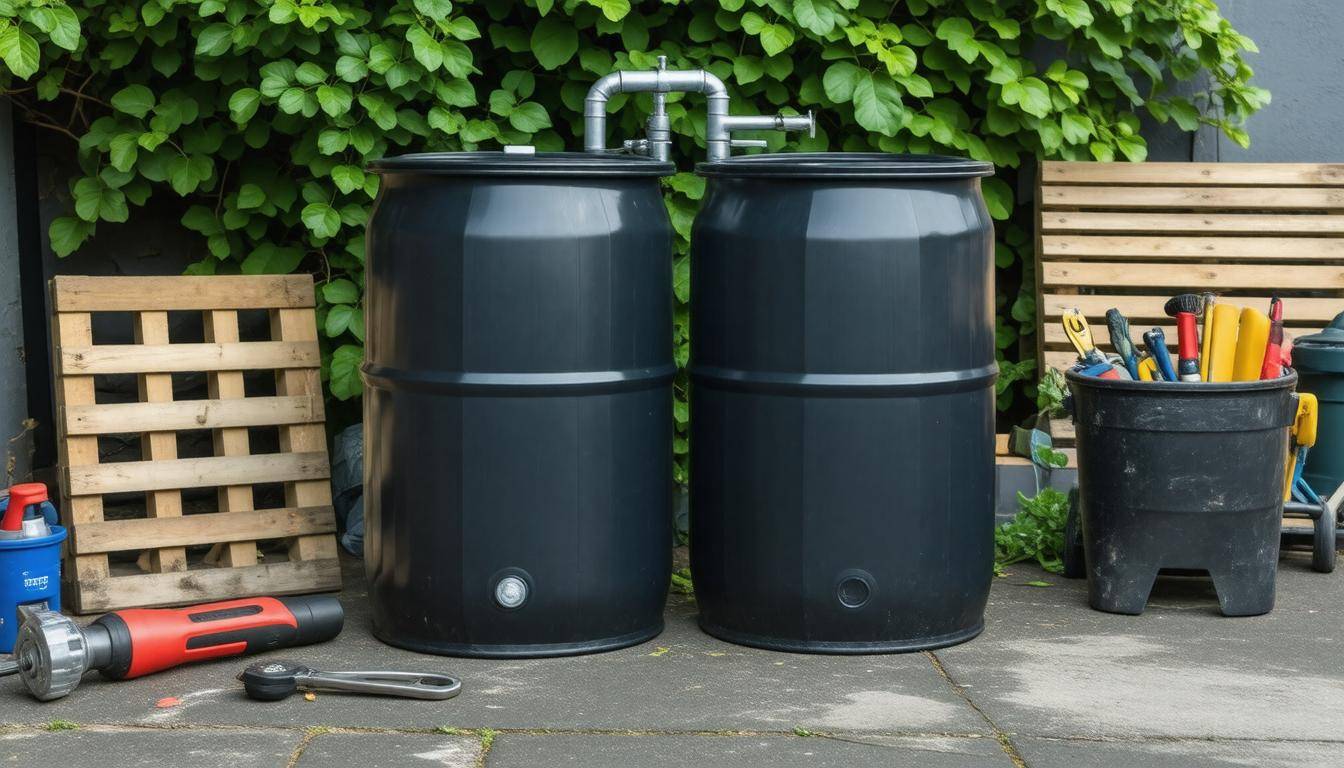
After securing the barrels, consider expanding your storage capacity by connecting multiple tanks together. The beauty of rainwater catchment systems is that they can be as simple or complex as you’d like! Using PVC pipes and fittings, you can link several barrels to create a larger reservoir. This helps in accommodating more rainwater and reduces the frequency of overflow events.
Final Assembly
For this final step, carefully plan out how you want to connect the barrels. Keep in mind the layout of pipes will affect how seamlessly water flows between tanks. A horizontal configuration often works well, allowing gravity to do its job efficiently. Ensure all connections are tight and watertight; any leaks can drastically reduce the efficiency of your system.
One tip: after completing the assembly, fill each barrel slowly with water initially. This allows you to check for leaks at every joint without overwhelming the system all at once. Regularly inspect these joints over time; maintaining vigilance will help avoid unexpected mishaps.
Step back and admire your handiwork! You’ve created a functional and efficient rain collection system that not only conserves resources but also contributes positively to environmental sustainability. With time and maintenance, you’ll reap the benefits of this rewarding project as it supports irrigation needs or non-potable household purposes.
As you gather rainwater effortlessly through this system, remember: you’ve not just constructed a utility—you’ve taken significant steps toward responsible resource management right in your own backyard!
With your rain collection system set up, let’s now focus on keeping it running smoothly for years to come.
Ensuring Proper Maintenance
Regular maintenance ensures your rain collection system remains effective and long-lasting. One of the first things to incorporate into your routine is a monthly inspection. During this check, take a moment to examine the pipes and downspouts closely. Blockages can easily arise from fallen leaves, branches, or general debris that may have washed in during a rainstorm. Minor clogs might lead to significant overflow issues, threatening both your collection tanks and your property.
As you inspect the system, I recommend cleaning the mesh screens frequently. Clogged screens can prevent water from flowing freely into your barrels and even cause water to back up into the gutters. A quick rinse with a hose can do wonders—just make sure to remove any stubborn debris stuck in the mesh with a gentle brush. Keeping these screens in tip-top shape will ensure that you collect every precious drop of rain possible.
The little details add up over time, creating a refreshing environment for water collection and preventing potential problems.
When assessing the barrels themselves, it’s crucial to inspect them for mosquito larvae, especially as warmer months approach. Standing water can attract mosquitoes, which might become a nuisance not only for you but also for neighboring yards. Hence, adding mosquito dunks—these are small tablets safe for plants and animals but deadly to the larvae—to your barrels is an excellent preventive measure. These products release bacteria that target mosquito larvae without harming other wildlife.
By taking these proactive steps in your maintenance efforts, you ensure a safer environment for both yourself and local critters while maximizing your rain harvesting success.
Lastly, don’t forget about regular cleaning schedules for your storage tanks; doing so helps prevent algae growth and sediment buildup, ensuring that the collected water remains clear and usable over time. Just think of it as giving your rainwater a little TLC! Implementing these simple maintenance strategies will not only keep your system running smoothly but also enhance its overall lifespan, allowing you to enjoy the benefits of rainwater harvesting for years to come.
With a solid understanding of basic upkeep established, let’s exploreadvanced strategies that further optimize performance and efficiency of your collection system.
Expert Tips for Optimal Performance
To truly unlock the potential of your DIY rain collection system, consider some expert advice that can dramatically enhance its efficiency. One valuable tip is to paint your barrels a dark color. This not only complements your home’s aesthetic but also inhibits algae growth, which can quickly become a problem in clear barrels due to sunlight promotion. By opting for darker colors, you create an environment that discourages this unwanted visitor, helping keep your water cleaner and safer for use.
Another crucial addition to your system is installing a first-flush diverter. This clever device ensures that the initial dirty water from your roof, which often contains debris and contaminants, is redirected away from your barrels. The diverter allows only the cleanest, most purified water to flow into your storage, improving overall water quality for gardening or other non-potable uses.
“I added a small solar-powered pump which makes watering my garden directly from the barrel much more convenient,” says Jane, an avid gardener from Oregon. This small modification illustrates how integrating technology can streamline usage and save time in maintaining lush greens around your home.
Additionally, incorporating a fine mesh screen over your collection barrel’s openings helps prevent debris and insects from contaminating the water within. Keeping pests at bay not only ensures better quality water but also provides peace of mind when using harvested rainwater.
Lastly, consider positioning your collection barrel on a stable and elevated platform. Elevating the barrel facilitates gravity-fed water distribution, allowing you to access the collected rainwater with ease without struggling with heavy lifting or awkward angles. This simple adjustment can significantly enhance efficiency.
Don’t forget about regular cleaning of gutters and downspouts! Ensuring they are free from blockages maximizes water flow straight into your collection system, thus optimizing performance as rainfall levels change throughout the year.
Through these expert tips and thoughtful adjustments, you’ll not only enhance the functionality of your rain collection system but also contribute to sustainable practices in your daily life. Maximizing every drop collected will benefit both your garden and wallet—an undeniable payoff for your dedication to conservation.
As you implement these strategies to improve your rainwater capture system, you embark on a journey toward environmental stewardship while enjoying the rewards of nature’s bounty. Enjoy the satisfaction of knowing you’re making a positive impact on both your garden and your local ecosystem.