
In times of uncertainty, having a well-stocked emergency food supply can be a true lifesaver. Whether it’s natural disasters, unexpected power outages, or other emergencies, knowing you have access to nutritious foods can offer peace of mind. But just as important as what you store is how you store it. With the right containers, your supplies can last for years and stay fresh when you need them most. This guide will walk you through various types of emergency food storage containers, effective strategies for choosing and maintaining them, and tips for ensuring you’re ready for whatever comes your way. Let’s dive in and explore how to prepare your pantry for the unknown!
The “Emergency Food Storage Containers: Complete Guide” offers valuable insights into the types of containers available, tips for effective food storage, and recommendations for long-lasting food supplies suitable for emergencies. You’ll also find guidance on organizing your emergency pantry, ensuring nutritional adequacy, and maintaining the freshness of your stored goods.
Best Types of Emergency Food Storage Containers
1. Mylar Bags
Mylar bags are frequently hailed by survivalists for their remarkable ability to shield food from light, moisture, and pests. They come in various sizes, making them versatile for storing anything from grains to freeze-dried meals. For example, if you were to use Mylar bags for items like rice or pasta, these bags could significantly extend their shelf life by several years—sometimes even beyond a decade. Sealing them with oxygen absorbers can create an airtight environment, which is essential for maximizing freshness over time.
However, while Mylar bags provide fantastic protection on their own, combining them with additional containers can amplify their effectiveness.
2. #10 Cans
When it comes to long-term storage solutions, #10 cans shine brightly. These aluminum cans are designed to be sealed air-tight and can keep a variety of foods safe for up to 30 years when properly stored. Not only do they prevent oxygen and moisture from seeping in, but they also offer robust protection against physical damage. Many community centers successfully use #10 cans for emergency pantries. As Jane Doe, a long-time prepper shared: “Our church emergency pantry has relied on #10 cans for decades, and we’ve never had any issues with food degradation.” This testimonial highlights how reliable these containers can be for maintaining food quality through time.
As we explore various container options, it’s crucial to consider factors such as durability and accessibility.
3. Food-Grade Buckets
Food-grade buckets made from high-density polyethylene (HDPE) are another excellent option for those looking to store bulk supplies. They are not just durable but also stackable, which is a distinct advantage when space is at a premium during emergencies. Adding a gamma lid to these buckets makes them airtight while ensuring they remain easy to open whenever necessary. This combination enables easy access to your emergency provisions without compromising safety. These buckets can be filled with a mixture of grains, dehydrated fruits, or even ready-to-eat meal kits stored alongside desiccant packs to keep moisture at bay.
Evaluating materials brings us to another innovative option that shouldn’t be overlooked: vacuum-sealed bags.
4. Vacuum-Sealed Bags
Vacuum-sealed bags present another efficient means of extending the shelf life of food storage. By removing air from the space around the food items before sealing, these bags can postpone spoilage dramatically compared to conventional storage methods. Foods sealed in this manner can last many times longer than those in standard packaging since they eliminate oxidation—a primary cause of food deterioration. This technique works wonders for meats and cheeses; I recommend labeling each bag clearly with both content and date so that it’s straightforward to manage your stock efficiently.
Each category of storage container offers unique benefits, forming part of a comprehensive system geared toward preparedness.
Plastic vs Glass: Pros and Cons
When considering plastic containers, their appeal lies primarily in convenience. Being lightweight means they can be easily transported, which is especially beneficial if you’re preparing for an emergency where mobility matters. Additionally, plastic is shatterproof, so you won’t need to worry nearly as much about a drop causing chaos. This makes them favorable for families with children or in high-movement situations. Their affordability also plays a part in household budgeting; you can often buy several plastic containers without breaking the bank.
However, it’s crucial to acknowledge that plastic does come with its downsides. It tends to absorb odors after repeated use, leading to leftover smells contaminating your food over time. Prolonged exposure to heat or sunlight can result in degradation. Certain plastics contain chemicals like BPA that may leach into food, raising health concerns. Using high-quality food-grade plastic can mitigate these risks but is still something to keep in mind when selecting items for long-term storage.
In contrast, glass containers bring strong advantages to the table that make them great choices for some uses but less ideal for portable kits.
Glass containers are notable for their durability. They do not absorb odors, ensuring that contents remain fresh and untainted. Additionally, glass doesn’t degrade over time like some plastics—most glass storage solutions are resistant to heat up to 500°F, making them safe for numerous cooking applications. The heavy weight of glass might deter some people from picking these containers over plastic, but it means they are less likely to tip over easily—an important consideration during emergencies when stability is key.
Nonetheless, their propensity to shatter does present a risk. A dropped glass container can lead to messes and danger, especially in hectic situations. Thus, while they excel in home kitchen settings where stability is ensured, they may not always be practical for emergency scenarios where portability and ruggedness are priorities.
Therefore, the choice between plastic and glass ultimately hinges on your specific needs for food storage during emergencies.
If you prioritize portability and cost-effectiveness, then plastic serves as an excellent choice—you can stock up on multiple containers for minimal expense while having peace of mind regarding their lightweight design. Alternatively, if you want something that will last longer and ensure food quality without leaching chemicals, glass is indeed superior—but take care when handling them during potential crisis events.
By understanding the nuances of each type of container—whether plastic’s lightweight convenience suits short-term needs or glass’s longevity appeals for long-term considerations—you can craft a well-rounded strategy tailored to your precise emergency storage requirements.
As we explore further options available for securing your emergency supplies, it’s worth considering another material that brings unique advantages to the table.
Metal Containers and Their Benefits

Metal containers, such as stainless steel and tin, are highly durable options for storing food. What sets these materials apart is their ability to withstand extreme temperatures and physical impacts. Unlike plastic or glass, metal containers can last over 20 years when properly maintained, making them an excellent choice for long-term food preservation.
One exceptional quality of metal containers is their moisture resistance. Studies indicate that these containers show a 50% lower moisture absorption rate compared to plastic brands. This characteristic is crucial because excess moisture can lead to spoilage, especially in dried goods like grains and legumes. By using metal containers, you significantly reduce the risk of spoilage due to humidity.
Another notable feature is their pest resistance.
Metal is impervious to pests, providing a formidable barrier against rodents and insects that can ruin your carefully stored provisions. Research indicates that metal storage can reduce pest infestations by up to 90% compared to cardboard or plastic alternatives. This aspect is particularly beneficial for those living in rural areas where encounters with mice or insects are more likely.
Additionally, durability extends to temperature regulation.
Metal containers excel at maintaining stable internal temperatures; studies have shown these materials retain heat better than glass, improving energy efficiency for stored foods that may need minimal cooking. Such thermal properties are essential when power sources may be inconsistent during emergencies. A well-insulated environment protects foods from rapid temperature fluctuations.
Yet, it’s not just the practical benefits that make metal containers appealing; they also boast eco-friendly qualities.
Approximately 75% of all aluminum ever produced remains in active use today, underscoring metal’s sustainability as a storage solution. This recyclability means that when your container reaches the end of its life cycle, it can be repurposed rather than contributing to landfill waste.
It’s also worthy of mention that metal containers exhibit chemical resistance.
Unlike some plastics that may leach harmful chemicals into food over time, 95% of tested metal containers show no detectable chemical migration. This characteristic is paramount in ensuring the safety of stored foods, especially in a crisis when every nutrient counts.
Understanding these benefits puts you one step closer to making informed choices for your food storage needs, as we move toward exploring effective methods for maintaining food quality over extended periods.
Long-Term Food Storage Strategies
When it comes to long-term food storage, thinking ahead is crucial. The goal is to ensure that your food lasts long enough to sustain you through any emergency situation—whether natural disasters, extended power outages, or other unforeseen events. Fortunately, there are numerous methods and best practices to help achieve this.
First and foremost, consider the type of food you’re storing. Foods that have a long shelf life should be prioritized. Items like rice, beans, canned goods, and freeze-dried meals can often last for several years, making them ideal candidates for your emergency stockpile. However, not all containers are created equal; using the right type of container contributes significantly to the durability of your supplies. Mylar bags with oxygen absorbers and #10 cans are excellent choices that can extend shelf life considerably, often up to 30 years when stored correctly.
Remember: Proper storage conditions play a massive role in how long your food will last. Keep your supplies in a cool, dark place where temperatures range from 50°F to 70°F.
Another vital aspect of long-term food storage is moisture control. High humidity can promote mold growth and spoilage. Aim for a relative humidity level of 15% or lower in your storage area. You might even consider using desiccants to absorb excess moisture around your supplies. Without doing this simple step, you risk losing valuable food resources during a crisis.
Periodically check your pantry for any signs of damage or spoilage. Inspections should include checking for rust on cans and ensuring vacuum-sealed items still maintain their integrity. A proactive approach keeps everything fresh and ready to use.
Additionally, take into consideration dietary needs when planning your food supply. Especially if you have family members with specific requirements, stock up on specialized items like gluten-free grains or baby foods so that everyone has access to the nutrition they need during an emergency. This ensures you aren’t just prepared but also able to maintain health standards throughout any difficult situation.
Finally, let’s look at how location plays a vital role in the effectiveness of your long-term storage strategy.
Storing your supplies strategically can make all the difference during an emergency. For example, keep frequently accessed items within easy reach—such as those needed for immediate preparation during an initial short-term crisis—while placing bulk supplies in a less accessible area. Maintaining organization not only helps you locate what you need quickly but also allows you to keep track of expiration dates more efficiently.
As we shift focus from these foundational strategies, we can explore the essential practices for maintaining the quality and freshness of your provisions over time.
Tips for Maintaining Food Freshness
One of the critical aspects of effective emergency food storage is understanding how to maintain freshness over time. It begins with creating an appropriate environment. Ideally, food should be stored in a cool, dark, and dry place. The temperature should range between 50°F to 70°F (10°C to 21°C), as exposure to higher heat can degrade nutrients and promote spoilage. Consider a closet or a pantry that’s less frequently accessed; it’s usually dark enough to limit light exposure.
Beyond just finding the right spot, another practical strategy to keep your supplies safe is using oxygen absorbers. These little packets work wonders by reducing the oxygen levels inside your storage containers, thus slowing down oxidation. For best results, pair them with airtight containers. It’s similar to having a friend temporarily hold your breath while you take a deep dive underwater; removing the air helps preserve the food’s natural state much longer.
Vacuum sealing your food is another essential step in this preservation process. By sucking out excess air, vacuum-sealing effectively keeps contaminants at bay. Think about how bread inevitably goes stale after being exposed to air—vacuum sealing prevents that from happening, letting your items stay fresh and tasty for months on end.
Regular inspection is crucial to maintaining the integrity of your food stores. Make it a habit to check each container every 6 to 12 months for signs of moisture or spoilage; any compromised item should be replaced promptly. This proactive approach can save you both money and hassle later; it’s better to find a problem now rather than during an emergency when you need your supplies most.
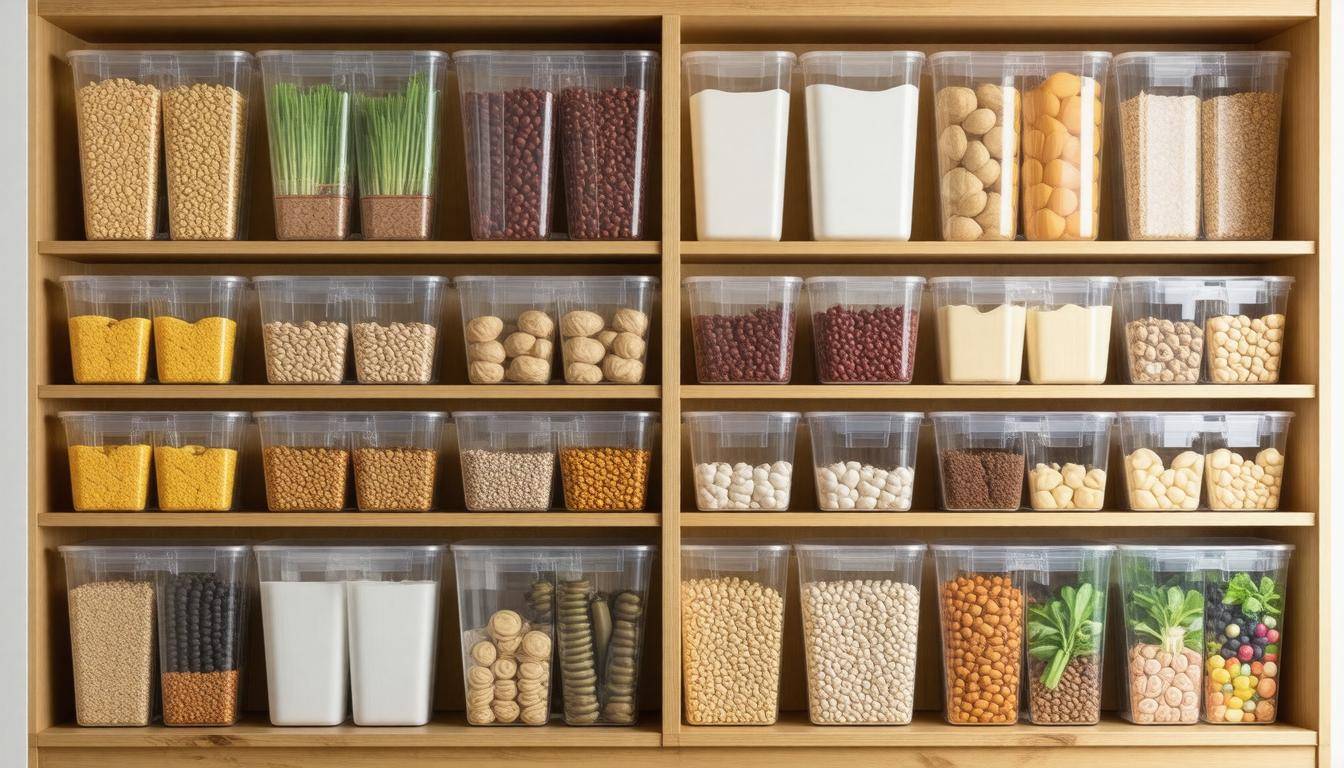
Remember to label each container with not just its contents but also the date of storage. This simple act makes it clear which items need rotating first, ensuring you consume older items before new ones. Using transparent containers where possible allows you to quickly identify what you have on hand without opening each one.
These strategies ensure that your emergency food storage remains robust and ready for any situation that may arise, making it easier to move forward into exploring cost-effective options for securing your supplies.
Affordable Storage Solutions
When it comes to storing emergency food supplies, budget constraints shouldn’t hold you back. There are practical and cost-effective options that allow you to create a solid emergency stockpile without emptying your wallet.
Think creatively about the containers you can use—sometimes what you already have at home will serve perfectly for this purpose. For instance, old glass jars from sauces or preserved foods can be excellent for holding grains, beans, or dried fruits. Just ensure they are meticulously cleaned and sanitized before use to prevent any contamination.
Affordable Container Options
-
Plastic Buckets: Ranging from $5 to $10, these durable containers are stackable and versatile, ideal for storing bulk items like rice or flour.
-
Mylar Bags: Although an initial investment of around $15 for a set of ten may seem steep, they provide an airtight seal that is exceptional for long-term storage of food. Pair them with oxygen absorbers for maximum protection against spoilage.
-
Recycled Glass Jars: The best part? They’re free! Moreover, they’re eco-friendly and perfect for smaller items such as spices or herbs.
Utilizing these solutions not only saves money but also promotes sustainability by reusing and recycling materials that might otherwise end up in the trash.
However, while considering cost-effective methods, it’s equally essential to ensure that these choices maintain the quality and safety of your food storage.
For example, make sure that any containers you use are food-safe and provide a proper sealing mechanism to guard against moisture and pests. Storing in a controlled environment also helps; keep your supplies out of direct sunlight and at stable temperatures to prolong their lifespan.
Overall, an intelligent blend of creativity, resourcefulness, and common sense can lead you to effectively manage your emergency food storage while staying within your budget. Embracing these affordable storage solutions empowers everyone to become proactive in their preparedness journey—after all, a little planning today can make a world of difference tomorrow.
As we explore further, it’s important to investigate how to enhance both the functionality and longevity of your choices in food storage.
Key Features to Consider
When selecting containers for emergency food storage, one of the most significant aspects is ensuring they are airtight. This feature prevents moisture from seeping in, leading to mold growth or spoilage, and keeps unwanted pests at bay. Imagine reaching for a meal only to find it infested with bugs—it’s an unpleasant scenario easily avoided with proper airtight containers. A simple way to test for this is by checking if the container seals tightly; you should hear a distinct “snap” when closing it, indicating a good seal.
Furthermore, the materials used in these containers play a critical role in maintaining food safety. Opting for food-grade materials is imperative—materials like high-density polyethylene (HDPE) or BPA-free plastics are excellent choices that won’t leach harmful chemicals into your stored food. Choosing the right material can feel daunting, but remember, when it comes to protecting your family’s health, corners should never be cut.
Another important consideration is portability, particularly if you ever find yourself needing to evacuate quickly. Stability during transportation is vital; therefore, opting for lightweight containers with handles will ease the burden of carrying multiple items. While durability is paramount—you wouldn’t want your container to crack during a stressful moment—a good balance must be found between weight and strength. For instance, selecting stackable containers maximizes space without sacrificing sturdiness.
Choosing suitable emergency food storage containers requires thoughtful consideration of various features that impact their longevity and usability in times of need. Whether it’s keeping pests out or ensuring your food remains untouched by harmful chemicals, these factors contribute exceptionally to your level of preparedness.
Each choice you make delivers a solid foundation upon which your emergency preparedness can stand strong. As we continue, exploring practical strategies can enhance your readiness for unforeseen circumstances even further.
Quick Tips for Optimal Emergency Storage
When building your emergency food supply, small details make a significant difference. One of the simplest yet most crucial practices is labeling everything. Don’t just jot down the contents; include purchase and expiration dates as well. This gives you a clear idea of what to use first—nothing’s worse than forgetting about food that’s been tucked away for too long. A permanent marker or label maker can keep your inventory organized, allowing you to manage supplies more effectively.
Once you’ve labeled your items, think about how you’re using the space in your storage area.
Use space wisely by maximizing every inch available. Consider stacking containers safely so that you utilize vertical space without making it precarious. Ensure that heavier items are stored on lower shelves while lighter items remain at eye level. This layout aids accessibility and prevents accidents when trying to reach those hard-to-get supplies during an emergency.
Yet even with a well-organized setup, maintenance remains essential.
Regular maintenance is vital for keeping supplies fresh. Make it a habit to routinely check your emergency stock for any signs of spoilage or damage. Look for dented cans, broken seals, or changes in smell and color that might indicate something has gone bad. Not only does this help ensure everyone’s safety, but it also allows you to replace compromised items before they become problematic during an emergency.
As you analyze your stocks, there’s another best practice to adopt.
Segregate foods into different categories by storing them in separate containers. This prevents cross-contamination and ensures that each type of food maintains its freshness longer. For example, keep high-water content foods like fruits away from dry goods such as grains and legumes; their moisture could compromise the latter’s quality. By organizing efficiently, you enable better meal planning and reduce waste during emergencies.
By incorporating these actionable steps into your emergency food storage approach, you’ll be not only prepared but confident in the strength of your pantry plan.
In conclusion, effective emergency food storage is crucial for preparedness, ensuring both safety and efficiency when disaster strikes. With careful planning and regular maintenance, you can build a resilient food supply that meets your household’s needs.
What features should I look for in an airtight food storage container?
When selecting an airtight food storage container, look for features such as a secure sealing mechanism (like silicone gaskets), durable BPA-free materials, and stackable designs for efficient storage. Containers with clear sides allow for easy visibility of contents, while those that are dishwasher safe enhance convenience. Research indicates that proper food storage can extend shelf life by up to 50%, so investing in high-quality containers is essential for maintaining freshness and minimizing waste.
What types of materials are best for emergency food storage containers?
The best materials for emergency food storage containers include glass, stainless steel, and high-quality plastic (BPA-free). Glass is non-reactive and excellent for long-term storage as it doesn’t leach chemicals; stainless steel offers durability and resistance to moisture and pests, while BPA-free plastic provides a lightweight option that can seal tightly. According to various preparedness studies, containers that maintain an airtight seal can increase food shelf life by up to 25%, making the choice of material crucial for those looking to effectively store food for emergencies.
What is the ideal shelf life for foods stored in emergency food storage containers?
The ideal shelf life for foods stored in emergency food storage containers typically ranges from 5 to 30 years, depending on the type of food and storage conditions. Freeze-dried and dehydrated foods can last up to 25-30 years when sealed properly, while canned goods may provide around 2-5 years of quality. It’s crucial to store these containers in a cool, dark place to maximize longevity; as studies show that temperature fluctuations can significantly reduce shelf life by causing food degradation.
How do I determine the right size container for my emergency food supplies?
To determine the right size container for your emergency food supplies, consider the amount of food you plan to store based on your household’s needs during emergencies. A general guideline is to have a minimum of one gallon of water per person per day and corresponding food supplies for at least three days to two weeks. For example, if you have a family of four, aiming for roughly 12 to 14 gallons of usable space should suffice for essential non-perishable items. Remember to factor in airtight seals and durability to protect against pests and spoilage, ensuring your provisions stay fresh until needed.
How can I safely store different types of food (e.g., grains, canned goods) in emergency containers?
To safely store different types of food in emergency containers, use airtight, waterproof containers made from durable materials like BPA-free plastic or glass to prevent moisture and pests. For grains, vacuum-sealing can extend shelf life by up to five times, while canned goods should be kept in a cool, dark place to maintain quality for years. Organizing foods by type and labeling them with dates can ensure that you rotate your supplies efficiently, ultimately reducing waste and ensuring preparedness for any situation.