
When emergencies strike, having a reliable evacuation route plan can be the difference between safety and chaos. Imagine finding yourself in a situation where you need to leave your home quickly, yet you’re unsure of the best way out. It’s a stressful thought, but with effective planning, you can transform that anxiety into assurance. This guide walks you through essential steps, from identifying hazards and exits to mapping routes and preparing your family, helping you feel confident and ready if the unexpected ever happens. With just a bit of effort and foresight, you’ll empower yourself to take charge of your safety during critical moments. Let’s dive in!
The Evacuation Route Planning guide outlines essential steps including assessing your surroundings, identifying multiple potential routes to avoid congestion, preparing an emergency kit, and staying informed about local conditions. By following these steps, you can ensure a safer and more efficient evacuation in case of an emergency.
Identifying Hazards and Exits
The first step towards safer evacuations is recognizing and understanding the various hazards you may face. This could include natural disasters, such as earthquakes, floods, or hurricanes, which are often dictated by your geographic location. Yet, it doesn’t end there; man-made threats shouldn’t be overlooked either. These might involve fires—an ever-present risk in homes with fireplaces or kitchens—or hazardous material spills from factories nearby. Understanding these risks means not only noting their likelihood but also their potential impact on your safety during an evacuation.
Once you have a clear idea of the hazards, the next step involves pinpointing safe exits around your property or workplace. If you live in an apartment building, for example, make sure to identify every available exit route: stairwells, designated fire escapes, and other emergency exits. You may find it surprising, but many residential buildings fail to maintain clearly marked exits. Likewise, in a workplace environment, familiarize yourself with all egress points and ensure they are not obstructed by equipment or furniture. Regularly walk through these routes to assess any changes that may have occurred since your last review.
As you evaluate your surroundings for exits, remember that knowing more than one route can provide additional security if certain paths become blocked during an emergency.
Having a clear understanding of both potential hazards and safe exit routes allows you to map out effective evacuation strategies. It’s important to consider factors like the average distance to the nearest exit; in urban areas, for instance, this is typically around 100 feet but can stretch up to 300 feet in rural locations. Hence, planning multiple evacuation routes becomes critical as you may encounter obstacles or traffic congestion along major highways during an emergency evacuation.
With a thorough assessment of possible hazards and identified escape routes behind you, the pathway to crafting a comprehensive plan becomes clearer, reinforcing your readiness for any impending threats. Next, we will explore how to systematically outline primary and alternative pathways for effective evacuations.
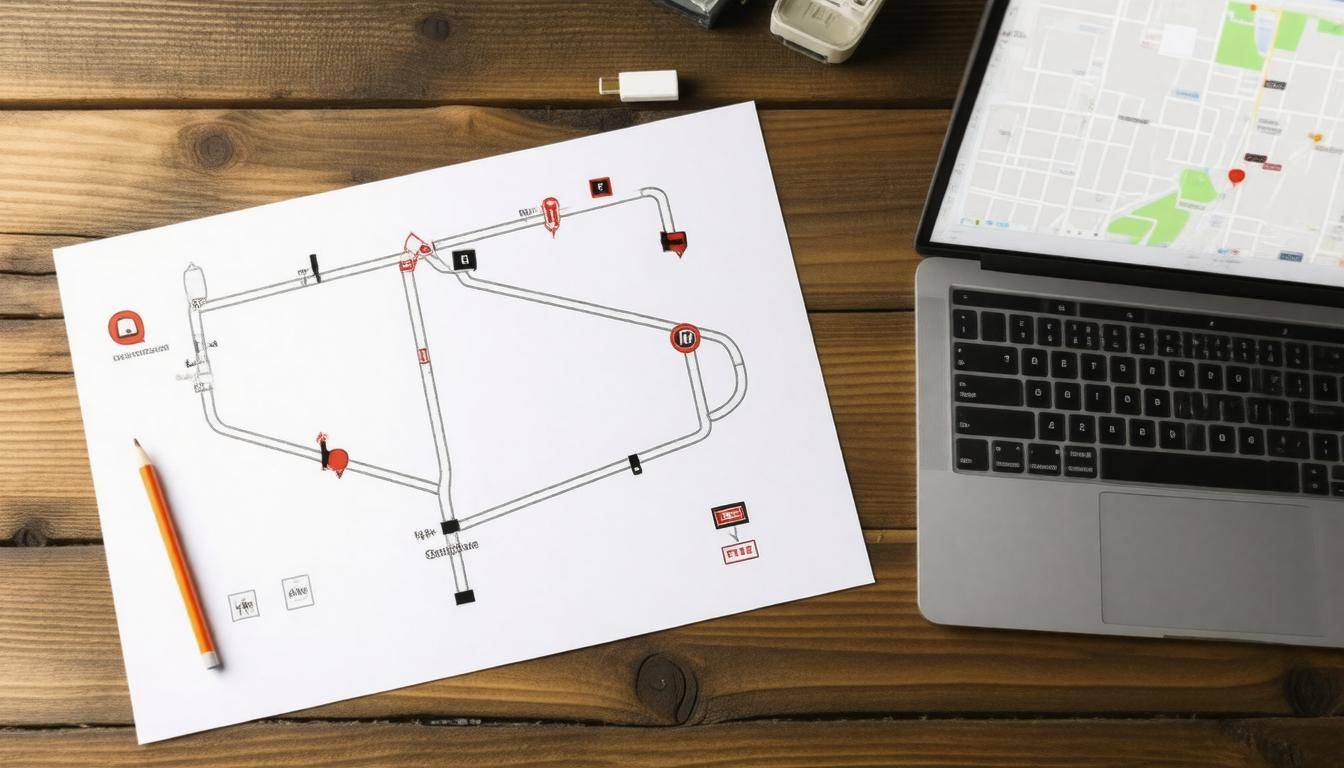
Mapping Primary and Alternative Routes
Mapping out multiple escape routes ensures a safer evacuation by providing options if one route becomes compromised. Start with your primary route, which should be charted as the most direct and fastest way to reach a designated safe zone from your current location. While you might think of this as a simple straight line, consider the road conditions; the ideal path should be free of obstacles like downed trees or flooded roads. This can make all the difference in emergency situations where every minute counts.
Primary Routes
Next, focus on identifying the characteristics of your primary route. For instance, you want to ensure it’s primarily made up of paved roads whenever possible, as these typically allow for faster travel speeds. Some studies show that during evacuations, average vehicle speeds can drop to as low as 15 mph due to congestion. A good practice is to familiarize yourself with key landmarks along this primary route because they can serve as reference points during navigation.
Alternative Routes
However, having just one escape option is risky. That’s why it’s crucial to develop alternative routes as a backup plan. Aim to create at least two alternative paths leading to different safe exits, such as emergency shelters or community centers that can accommodate evacuees. These alternative routes should be chosen strategically to avoid hazards identified in earlier assessments, such as flood-prone areas or streets known for heavy traffic during peak times. Even though these alternative routes might take slightly longer—average distances may range from two miles for primary routes to three miles for alternatives—having them ready can significantly boost your chances of a safe departure.
Example Map
To put all this information into action, translate your planned routes into a physical or digital map. This doesn’t have to be complicated: a simple sketch on paper or utilizing apps like Google Maps are great starting points. Annotate your map with important landmarks such as gas stations, hospitals, and emergency shelters—it helps you stay oriented when anxiety runs high amidst an unfolding crisis. Using specialized emergency planning software can also provide added features, like real-time traffic updates that could be lifesavers during an actual evacuation scenario.
With your routes thoroughly mapped and annotated, the next step involves ensuring effective communication is established before any evacuation takes place.
Establishing Clear Communication Channels
One of the foremost priorities in an evacuation route plan is ensuring that lines of communication are open and functional. Imagine one chaotic moment when every second counts. If a family member can’t be reached or if neighbors are unaware of the nearest safe routes, the chances of a smooth evacuation significantly diminish. Therefore, it’s essential to plan which tools and methods will be most effective given your specific situation.
Create a Contact List
The foundation of your communication system is a well-compiled contact list. This list should include not just immediate family members, but also trusted neighbors, local authorities, and emergency services.
The key is redundancy; don’t rely on just one method of communication, as power outages or damaged networks could hinder efforts. Create this list in printed form so that everyone has a physical copy easily accessible during emergencies. In digital formats, consider secure cloud storage. It’s equally wise to keep verifying and updating these contacts regularly; after all, people move or change numbers frequently.
Communication Tools
Next comes the selection of communication tools. While traditional methods like phone calls are essential, technology offers numerous innovative solutions that can be lifesavers during emergencies. Equip everyone with reliable communication devices—this could range from mobile phones and walkie-talkies to battery-operated radios.
These tools provide augmented options for keeping in touch, especially in areas where cellular service may falter due to heavy use or technical failure. Consider using apps like WhatsApp or Zello for instant messaging and real-time updates; they allow for group messages, enabling large family units or community groups to share important information quickly. It’s beneficial to conduct a few practice runs where everyone simulates an emergency scenario. This way, you gauge what works best and if any additional training is necessary.
In volatile environments like Syria, where infrastructure may falter under duress, having these emergency communication protocols can mean the difference between safety and uncertainty.
With these robust communication strategies set into motion, the next logical step involves exploring how collaboration with local entities and community resources can significantly enhance evacuation planning efforts.
Collaborating with Community and Authorities
Working together makes everything stronger, including evacuation planning. Engaging with local authorities not only helps you understand your community’s emergency protocols but also reveals available resources that can support your plan. It’s like creating a safety net; when everyone is informed and involved, the whole community benefits. Local officials can provide insight into existing emergency services or outreach programs that you may not be aware of, enabling you to navigate different responses effectively during a crisis.
Engage with Neighbors
Bringing neighbors together can enhance safety through shared knowledge and resources. Forming a community group dedicated to discussing evacuation plans creates a sense of camaraderie while preparing for emergencies. This collaboration could include organizing carpooling arrangements in the event of an evacuation or designating clear safe zones for sheltering.
Imagine having a network of families ready to assist one another—sharing information about routes, transportation options, or even areas that might be more vulnerable than others. These connections can make a significant difference when time is of the essence.
While some may argue about the effectiveness of community-level plans versus individual preparedness, it’s crucial to recognize that both play vital roles. Individual preparedness ensures that every household is ready to act if needed, but without community coordination, the overall response could lack cohesion. Aligning your evacuation plan with those of emergency services helps everyone stay on the same page, resulting in a seamless evacuation process. After all, in times of chaos, clarity is what will keep people safe.
With this foundation in place, we now shift our focus toward equipping each household and its members—with the tools and strategies necessary to ensure their safety in emergencies.
Preparing Residents and Family Members
Preparation isn’t just about knowing where to go; it’s also about ensuring that every family member understands their role in the event of an evacuation. Each person should be aware of the plan and feel confident about what actions to take, especially if you have young children or elderly adults in the home who may need extra guidance.
Assemble Emergency Kits
To begin your preparation, start assembling emergency kits, often referred to as “go-bags.” For each family member, include essentials like at least one gallon of water per person per day for three days and enough non-perishable food to last a similar duration.
Add a flashlight with extra batteries, a first-aid kit stocked with necessary medical supplies, and important identification documents such as insurance cards and contact information. You might also consider including some cash since ATMs may not work during emergencies.
It’s wise to personalize each bag with items specific to individual needs—perhaps extra medications for an elderly relative or comfort items like a favorite stuffed animal for a child. This thoughtfulness can provide reassurance in tense times.
After assembling useful supplies, let’s find out how having frequent practice drills can streamline evacuations.
Home Drills
Conducting regular home evacuation drills is essential and shouldn’t be overlooked. Set aside time at least twice a year to run through your family’s emergency protocol. Start by clearly explaining the plan: assign roles if necessary, determine primary and secondary exits from your home, and designate meeting points outside.
During a drill, emphasize the importance of moving quickly but safely toward exits. Keep conversations light-hearted after such drills to discuss what went well and what could be improved. By doing this, children can ask questions without feeling pressured or scared about the situation.
Practicing these drills boosts confidence and efficiency during real evacuations. You’ll find that familiarity with the procedure not only lowers anxiety but also hones instincts; when the alarm rings in reality, instinct will take over, guiding you toward safety without hesitation.
With these proactive measures in place, the next logical step is ensuring that everyone is well-versed in executing those plans when it matters most. This leads us to further explore how consistent practice prepares each member for any unexpected situations that may arise.
Conducting Drills and Practice Runs

Regular evacuation drills serve a vital role in ensuring that everyone in your household or organization knows what to do during an emergency. It’s one thing to talk about evacuation plans, but another to practice them; this is why drills should be a priority in your emergency preparedness routine.
Scheduling regular drills—at least twice a year—helps ingrain the necessary steps into everyone’s mind. For instance, rotating the scenarios will keep participants engaged and allow them to practice responding to various types of emergencies, whether it’s a wildfire, flooding, or other natural disasters.
Scheduled Drills
Making drills part of your routine can be transformative for fostering a culture of safety. When planning these exercises, try to vary the conditions under which they occur. Perhaps simulate an early morning evacuation one time and an evening scenario the next. By doing so, you prepare everyone for the unpredictabilities of real events: disorienting situations can arise when you’re least prepared.
Consider involving local emergency services if possible; they can provide valuable input and insights that might not be apparent otherwise.
Regular participation builds confidence and reinforces a community spirit where everyone feels responsible for each other’s safety.
In addition, aim to keep these practice runs succinct; completing them within 15 to 30 minutes can create a realistic sense of urgency while ensuring that participants remain focused and engaged. To gauge effectiveness and commitment, it’s essential to ensure that at least 90% of all occupants participate in each drill. This allows for a comprehensive understanding of how well everyone is prepared.
Feedback Loop
After each drill, make it standard practice to gather feedback from participants right away. This step is crucial because it highlights any issues or areas for improvement that may have gone unnoticed during the drill itself. Ask questions like what went well and what aspects caused confusion or delays? Strive for a response rate of at least 75% from participants, incorporating their insights into your post-drill review meetings within a week afterward.
Continuous improvement is key; perfecting how your team responds in high-stress situations takes time and iteration.
Keep in mind that communication isn’t only about collecting data but also sharing findings with your group afterward. Highlight strengths and demonstrate how these sessions contribute to enhancing overall safety—this acknowledgment motivates everyone involved and encourages ongoing participation in future drills.
Drills form the backbone of your evacuation plan, yet special attention must be paid to those with unique needs to create an inclusive strategy.
Addressing Special Needs

When crafting an effective evacuation route plan, it’s critical to accommodate individuals with special needs within your household or community. This involves actively planning for their safety and accessibility during emergencies. By recognizing these special needs from the start, you lay a strong foundation for a comprehensive evacuation strategy.
Identify Special Needs
Begin by taking a close look at the residents or family members. Are there individuals who have mobility challenges or medical conditions requiring attention? For instance, young children will need different considerations than adults. Special arrangements may also be necessary for elderly family members who might require medications or assistance. Documenting these requirements ensures no one is left behind during the evacuation.
This initial inventory leads directly to creating tailored strategies that can significantly enhance your evacuation plan’s effectiveness.
Specific Arrangements
With this knowledge in hand, focus on crafting practical solutions. For example, prepare an evacuation kit that includes essential items like wheelchairs or assistive devices for those with mobility issues, and ensure you have backups of any necessary medical supplies. Keep everything organized in one easily accessible location to save time when you need it most.
Additionally, consider assigning specific roles to able-bodied family members or friends to facilitate the process. One person could be responsible for guiding someone using a wheelchair, while another handles younger children. Establish clear responsibilities ahead of time so that everyone knows their role; this collaboration can save precious minutes during a stressful situation.
Each member’s well-being hinges upon being prepared together—after all, emergencies rarely come with warning signs.
Regularly practicing your evacuation plan as a group is crucial. Drills not only emphasize the importance of practicing these roles but also help identify any gaps in preparation that need addressing. Continual updates to align with changing circumstances—such as new health conditions or life events—will maintain a state of readiness while giving everyone peace of mind.
Keeping these plans active and well-rehearsed paves the way for ongoing preparedness as the situation evolves.
Regularly Updating the Plan
An outdated evacuation plan can be as hazardous as no plan at all, especially in a critical situation where every second counts. That’s why scheduling regular reviews is imperative. By committing to reviewing the entire evacuation plan every six months, you ensure that all contact information remains current and that the evacuation routes are still viable. This routine check-up serves as a reminder not just of your escape routes but also reinforces the importance of having a solid plan in place.
Think of it like maintaining a car; if you neglect to check the oil or fill up on gas, you’re setting yourself up for failure down the line. An outdated evacuation plan can lead to confusion and chaos when it matters most.
Review Semi-Annually
During these biannual reviews, it’s beneficial to gather your family or team members together. Discuss any changes in your home or local area that might affect your proposed escape routes. For instance, if you have kids who are growing up, their abilities to quickly follow directions may change. Make sure their knowledge of the routes keeps pace with their maturity. You might even want to make a family “field trip” out of it to practice navigating your planned routes.
Additionally, pay close attention to new developments in local infrastructure. If a new road is built or a nearby park has been transformed into housing, these changes could alter travel times and routes significantly. Being aware of local construction projects or community events can provide crucial updates to your evacuation plan.
Adapting to Changes
Surrounding environments are dynamic; they evolve over time. Updating your evacuation plan means being adaptable to these changes. For example, if a new road or bridge creates a more straightforward route away from danger, incorporate it into your plans. Consider alternative routes that avoid hazard-prone areas like flood zones or wildfire risks if natural disasters frequently impact your region.
To ensure thoroughness during updates, establish key checkpoints for regular assessment.
Key Update Checkpoints
| Checkpoints | Details |
|---|---|
| Address Change | Always verify addresses for everyone included in your plan. |
| New Household Members | Include any pets or people who may need special assistance during evacuations. |
| Changes in Local Environment | Stay informed about local construction or changes affecting your area. |
| Feedback from Drills | Use insights gained from evacuation drills as valuable input for improving the plan. |
Maintaining an evacuation plan isn’t simply a task checked off a list—it’s an ongoing commitment to safety and preparedness that adapts along with you and your environment.
In doing so, you’ll create not just an effective plan but also instill confidence within yourself and those around you whenever an emergency arises.
By regularly updating and adapting your evacuation strategy, you prioritize safety for yourself and others, ensuring you’re always prepared for whatever circumstances may arise.