
In the chaos of life, it’s easy to push thoughts of emergencies aside. But let’s face it—disasters can strike when we least expect them. From natural disasters like hurricanes and wildfires to man-made emergencies, having a plan can make all the difference. You might think preparing for an evacuation requires a big budget, but it doesn’t have to! This guide is here to show you how to put together a solid emergency plan without breaking the bank. Let’s explore some simple yet effective strategies that will ensure you and your loved ones are ready when the unexpected happens—because a little preparation now can lead to peace of mind later.
The Low-Budget Evacuation Planning complete guide outlines affordable strategies such as developing community-based emergency operations plans, engaging local officials and citizens for enhanced coordination, and utilizing free resources from organizations like FEMA. It emphasizes the importance of clear communication, community engagement, and creating actionable steps to ensure preparedness while minimizing expenses.

Crafting a Low-Budget Evacuation Plan
When it comes to planning for emergencies, simplicity and resourcefulness are key. The first crucial step is conducting a risk assessment, which involves identifying the most common hazards in your area, such as hurricanes, wildfires, or floods. This doesn’t require expensive resources; local government websites often provide free information tailored specifically to your region’s needs. These resources can show you past incidents that give clues to potential future threats. Understanding these risks sets the foundation for a sensible evacuation plan that adapts to your circumstances.
Once you have a clear understanding of the risks, it’s time to evaluate vulnerabilities within your household.
In evaluating those vulnerabilities, consider who might be at higher risk during an emergency. Elderly family members may need additional assistance, and pets will require special attention during evacuations. Moreover, don’t forget about children—they may need different types of support and reassurance. Use free online assessment tools to understand how your home might fare against expected disasters, identifying any necessary preparations in advance. For instance, if you live in a flood zone, elevating furniture could be part of your strategy.
With risks and vulnerabilities assessed, it’s essential now to establish roles and responsibilities for each family member.
Assigning roles transforms chaos into order during stressful situations. It’s crucial for everyone to know what they are responsible for when the time comes. For example, one person could be tasked with gathering your emergency kit—make sure it’s stored in an easily accessible location! Another can focus on ensuring pets are secure, while someone else manages communication with any extended family members not physically present. Clear delineation of tasks reduces confusion and enhances efficiency when every second counts.
After establishing roles, it’s time to put this plan into action through regular practice.
Conducting drills offers invaluable training for each member of your household. Regular rehearsals help everyone become familiar with their responsibilities and make the process feel less daunting should a real emergency occur. Utilize free checklists available online tailored for evacuation drills as guides for running these simulations. Practicing not only instills confidence but also uncovers any gaps in your plan that you may need to address before a real evacuation situation arises.
By leveraging free resources and prioritizing assessments, clear role delineation, and regular drills, families can enhance their preparedness for unforeseen circumstances that may arise. Let’s take a closer look at what essential items and supplies you’ll need to address during an evacuation.
Essential Supplies for Evacuation
Supplies are critical for a successful evacuation, and believe it or not, they don’t have to drain your wallet. First and foremost, securing enough water and non-perishable food is essential; FEMA recommends at least one gallon of water per person per day for three days. So, if you’re a family of four, that amounts to twelve gallons—preferably in manageable bottles.
For food, look for affordable options like canned goods, pasta, or energy bars. These items not only provide nourishment but also deliver long shelf lives that ensure they will be there when you need them.
After ensuring hydration and sustenance, don’t overlook the importance of health and safety.
A basic first aid kit is a must-have; you can often find inexpensive kits at dollar stores which contain many essential items like adhesive bandages and antiseptic wipes. However, it’s worth taking the time to personalize your kit by adding personal medications and perhaps even basic instructions on how to use each item. This ensures that in case of an emergency, you’ll have quick access to what you need without fumbling through countless supplies.
Keeping clean during stressful situations might slip your mind, but it’s vital for both comfort and health.
Now let’s talk about personal hygiene items—an important yet often underestimated necessity. Essentials such as toilet paper, wet wipes, and hand sanitizer can usually be bought cheaply in bulk from discount retailers. These items not only help maintain your personal hygiene but can also contribute significantly to the overall morale of your group during challenging circumstances. Just imagine trying to stay comfortable while managing without these basics; it can quickly add unnecessary stress.
Light is another often overlooked aspect of preparedness.
Finally, you can’t underestimate the value of having reliable flashlights and batteries on hand. Opting for LED flashlights is wise as they are energy-efficient and long-lasting—the perfect combination for emergency situations. Don’t wait until an evacuation is imminent to stock up; take advantage of seasonal sales or clearance events to buy a few extras so that you’re never left unprepared if the lights go out. Keeping extra batteries is just as crucial; after all, what good is a flashlight that doesn’t work?
Gathering these essential supplies not only requires mindful spending but also encourages proactive thinking about unexpected scenarios. With these fundamentals covered, we can next explore how to create safe pathways during an evacuation.
Developing Safe Evacuation Routes
When it comes to evacuation planning, safety should always be at the forefront. It’s not merely about having a few paths mapped out but ensuring that these routes are free from hazards that could exacerbate an already stressful situation. One of the first steps in this process is to identify primary and secondary evacuation routes based on your specific area layout. Knowing which roads you can safely use during an emergency can make all the difference in swift, effective evacuations.
Assessing Accessibility
It’s important to ensure that your chosen routes are accessible for everyone, especially individuals with disabilities or those who may need assistance. Imagine having a smooth path lined with helpful signage that guides each evacuee—this type of preparation can significantly alleviate panic during an actual emergency. Make it a point to regularly review these routes for accessibility issues and possible obstructions so you’re prepared when the unexpected happens.
Of course, no good evacuation route is complete without proper markings.
Marking Your Routes
Clear signage plays a crucial role in guiding people along safe evacuation paths. This needs to be visible from a distance, allowing evacuees to quickly ascertain where they should go. Mark these routes well in advance so that your community understands them; this visual cue can be particularly helpful in high-stress situations where every second counts. Additionally, consider placing markers at significant turning points along these paths to keep everyone oriented as they move.
In addition to clear signage, conducting thorough risk assessments of each route could save lives.
Risk Assessments
One cannot underestimate the need for conducting risk assessments along each potential evacuation route. You might find that some roads are prone to flooding or subject to fire risks depending on past weather patterns and geography. By identifying such hazards beforehand, you can either prepare alternative routes or situate barriers that minimize risks during an emergency. The idea is to stay one step ahead—this proactive approach will help not only protect lives but also instill a greater sense of calm amid chaos.
Lastly, establishing a common meeting point offers tremendous psychological benefits.
Establishing Meeting Points
Set up a designated gathering spot outside of the evacuation area for all evacuees. This centralized location serves not just as a waypoint but also as an emotional anchor for families and friends, allowing them to reconnect after navigating through an emergency scenario. Whether it’s a park or a community center, having that solid point aids in keeping things organized and supporting mental wellness during such challenging times.
Taking proactive measures like these cultivates stronger community resilience during emergencies, leading to better preparedness overall. Next, we will explore essential items and strategies needed for effective personal kits designed for rapid response.
Low Cost or DIY Evacuation Kit
Building a DIY evacuation kit doesn’t have to break the bank, and it can be a rewarding venture for you and your family. The first step is to assess your needs and prioritize items that would be essential during an emergency. Consider medical needs, food preferences, and specific requirements such as medication for family members.
To start, a sturdy backpack is crucial—it will serve as your kit’s home base and should be durable enough to withstand different conditions. Opt for one with multiple compartments so you can organize items effectively. When selecting this backpack, choose something comfortable and lightweight, ensuring you can carry it effortlessly if you need to evacuate quickly.
Assembling Your DIY Kit
After securing your backpack, it’s time to gather your essential supplies. Begin by creating a checklist to keep track of what you’re including in the kit. Here’s what I recommend based on personal experience:
Documents: Place important documents—like IDs, insurance papers, and medical records—inside a waterproof folder. These documents expedite recovery processes or verify identity at shelters.
It’s advisable to also include digital copies stored securely online just in case.
Next comes emergency snacks—non-perishable foods like granola bars, trail mix, or dried fruits provide necessary energy during stressful situations. Aim for at least a three-day supply per person; around 12-15 meals per individual is ideal.
Essential Items
- Water: Always plan for one gallon per person per day for at least three days.
- First Aid Kit: Assemble basic supplies like adhesive bandages, antiseptic wipes, gauze, and pain relievers—typically costing around $20-$30.
- Multi-tool: Invest in an affordable multi-tool that can undertake various tasks. These gadgets come in handy for everything from meal preparation to minor repairs.
Don’t forget hygiene items! Travel-sized toiletries, wet wipes, and hand sanitizer are essential for maintaining personal hygiene while displaced.
Replenishing Your Kit
After you’ve gathered everything together, periodically check the contents of your kit—especially food items that may expire. Setting reminders every six months ensures nothing goes stale or outdated. This regular examination not only keeps your supplies fresh but also enhances your preparedness as you might discover that new items have become necessary over time.
With a solid foundation for your evacuation kit established, the next focus shifts toward identifying places that can offer safe refuge when emergencies arise.
Affordable Shelter Options
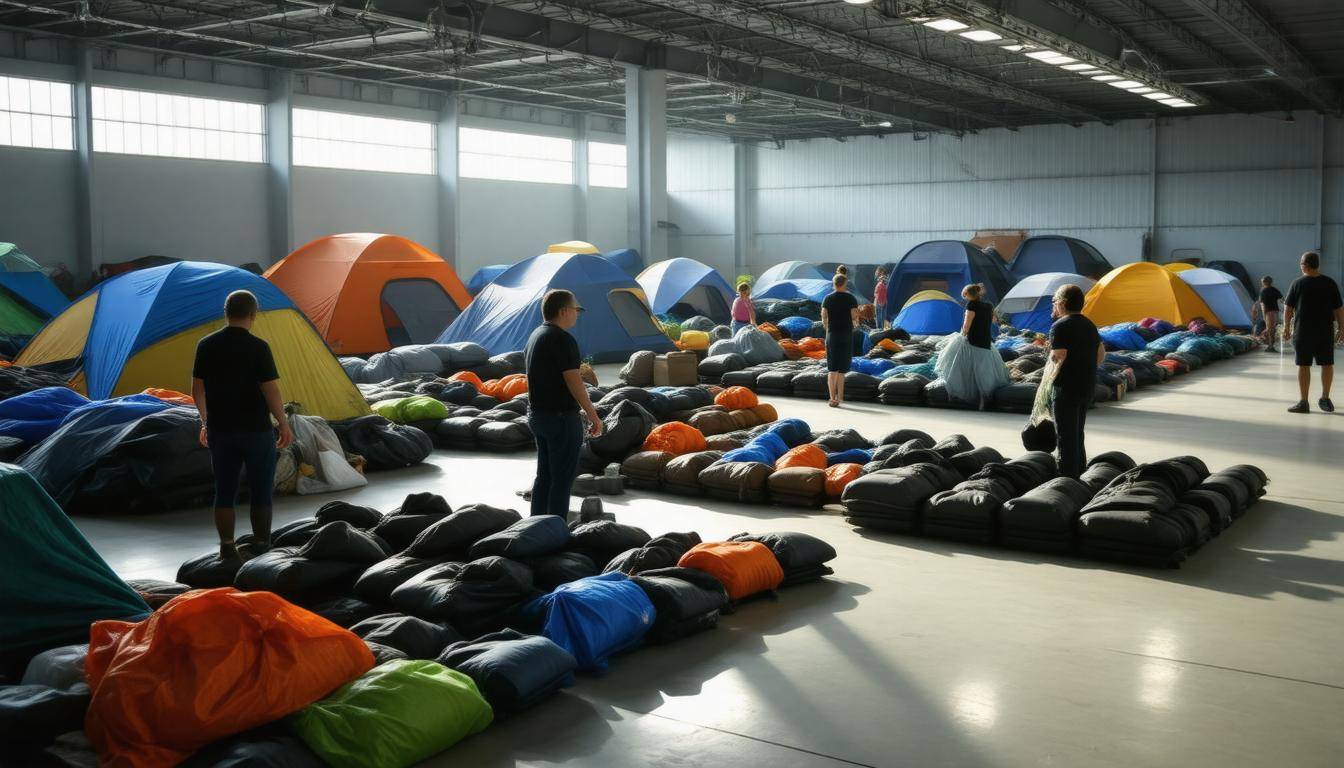
During an evacuation, finding a temporary shelter can feel overwhelming, but it doesn’t need to be. Many people don’t realize that local communities often come together in times of crisis, providing a range of affordable options to keep you safe.
For starters, community shelters—such as local schools or churches—often open their doors during emergencies. These shelters are typically free and look out for community members in need. Imagine walking into a familiar school gymnasium filled with your neighbors; it can feel comforting surrounded by the supportive spirit of your community, even in distressing times.
On the other hand, if community options fill up quickly or aren’t suitable for your situation, consider reaching out to friends or family living outside the danger zone. Staying with loved ones is not only cost-effective but also fosters familiarity and security during tumultuous moments. Simply having someone you know nearby can drastically improve your emotional state when facing uncertain times.
Beyond these options, many are turning to technology for assistance.
Alternatives
Using apps like Airbnb can yield surprising results during emergencies—hosts might lower their prices significantly to attract guests who are evacuating. It’s a win-win: you get secure accommodations at an affordable rate while hosts have their properties occupied rather than sitting empty.
Moreover, making direct contact with hosts may allow for further negotiations on price and flexibility in booking, especially during a time where empathy is prevalent.
Navigating online platforms also gives you the opportunity to explore unique spaces that may better suit your family’s needs—think cozy cabins or spacious apartments that offer full kitchens so you can prepare meals rather than relying on ready-made options.
Additionally, if you find yourself needing more immediate solutions, don’t overlook low-cost temporary shelters such as tents or pop-up shelters. While they require some upfront investment ($100-$500 depending on size), they can serve as invaluable resources if you’re displaced due to a prolonged emergency.
Lastly, consider more long-term solutions too.
Permanent shelters such as small cabins or converted shipping containers present another viable option if you’re concerned about frequent evacuations due to your area’s risk profile. Not only do these structures provide more comfort than traditional tents, but they can also serve as a retreat post-emergency. The initial costs might range from $2,000 to $30,000 depending on the type and customization level; however, think of this as an investment in peace of mind and safety for future crises.
By connecting with resources around you and leveraging technology along with creative problem-solving, you can significantly ease the stress surrounding evacuation planning.
Exploring these various options lays a solid groundwork for effective preparedness strategies that involve clear communication with your community and local authorities. Let’s shift focus now to how integral communication plays a role in these scenarios.
Comprehensive Communication Strategy
Effective communication can indeed mean the difference between a smooth evacuation and chaos. When disaster strikes, having a well-thought-out strategy for how your household will communicate can alleviate stress and confusion. For instance, utilizing free apps like Signal provides an excellent foundation for encrypted messaging that remains operational even when internet service is spotty. This added layer of protection ensures vital messages concerning safety and movement are sent without the fear of interception, making it a valuable tool in uncertain times.
Alongside setting up these communication channels, creating designated check-in points becomes crucial.
Setting Up Checkpoints
Designating specific checkpoints where family members can reconvene helps establish accountability during emergencies. It’s advisable to choose easily identifiable locations, such as community centers or local landmarks. Additionally, leveraging social media platforms like Facebook’s Safety Check feature allows you to notify not just loved ones but also a broader circle that you’ve reached safety, reducing the anxiety of those who may be worried about your well-being.
Now, while digital options are paramount, we must not overlook traditional methods in our communication plans.
Emergency Contacts
Maintaining a physical list of emergency contacts—rather than relying solely on smartphones—is wise. Smartphones can fail or run out of battery at the worst possible moment. Keep this list in several strategic places around your home: on the fridge, in wallets, or pinned inside a kitchen cabinet. Not only should it include phone numbers for family and friends but also important contacts like local emergency services and utilities. This immediate accessibility can save time in critical situations when every second counts.
Importantly, as we navigate through these strategies, remember that technology is not infallible.
Keeping Devices Charged
Make sure your phones are always charged! In preparation for an evacuation, motivate your family to develop a habit of charging devices fully and keeping backup power banks nearby. This small step can drastically improve the reliability of your communication means during a crisis. It might sound simplistic, but that charged device could be your lifeline—especially when alarms are blaring and chaos ensues.
By integrating modern technology with traditional methods of communication, you lay the groundwork for minimizing confusion and maximizing safety during evacuations.
As we explore further, it’s essential to examine how planning affects cost-effectiveness and overall efficiency in these strategies.
Evaluating Total Cost and Efficiency
Assessing the total cost of your evacuation plan is essential because it directly impacts its feasibility. By breaking down expenses associated with supplies and resources, families can make informed decisions that align with their budgets. Understanding the costs ensures preparedness while enhancing peace of mind.
| Item | Estimated Cost | Notes |
|---|---|---|
| Water and Food Supplies | $30 | Per person, for three days |
| Basic First Aid Kit | $10 | Dollar store options available |
| Personal Hygiene Items | $15 | Multi-pack purchases |
| Flashlights and Batteries | $20 | LED recommended |
| Multi-tools | $15 | Online discounts |
| DIY Hand Sanitizer Ingredients | $5 | Rubbing alcohol, aloe vera |
One effective strategy for keeping costs manageable is to focus on streamlining purchasing efforts.
Streamlining Costs
Utilizing bulk purchasing options and taking advantage of sales can significantly reduce expenses. For instance, buying water, non-perishable food items, and hygiene kits in larger quantities can often yield considerable savings. Additionally, consider establishing resource-sharing agreements with neighboring families or friends. Pooling together for provisions like flashlights, first aid kits, or even bulk foods can lead to both financial efficiency and increased adaptability.
Another smart approach is to tap into local resources, such as community health programs or disaster preparedness workshops. Many organizations offer free or low-cost supplies in emergencies or provide training on how to create effective plans without breaking the bank. Being proactive about these available options can ease the financial burden and enhance readiness.
Investing the time to evaluate costs now will pay dividends later when every penny counts during emergencies.
These strategies foster not only affordability but also encourage collaboration within the community as they prepare for potential crises.
Resource Planning on a Budget
Effective resource planning doesn’t need to be a financial burden. Many local organizations and agencies offer valuable resources that can significantly enhance your preparedness without draining your wallet. For instance, FEMA provides emergency supply lists and budget planning tools available online at no cost. Taking advantage of these resources can provide a solid foundation for your evacuation strategy.
Beyond the help from agencies, thinking creatively about individual efforts can reap substantial benefits too.
One practical tip is to set aside a small, dedicated amount each month into an emergency fund specifically for supplies—perhaps $10 to $20. This modest monthly commitment can quickly add up over time and make a significant difference when you need to purchase items like portable emergency kits or communication tools.
Utilizing Community Resources
Participating in community preparation workshops is another excellent strategy. Many of these workshops are free of charge, offering not only crucial information but also tangible supplies to attendees. These gatherings often serve as networking opportunities where you can meet others in your area who share similar concerns about emergency preparedness.
Moreover, collaborating with neighbors can be especially effective. By pooling resources and creating a shared evacuation plan, you lighten the load on yourself while ensuring that everyone has the essentials covered. Imagine each household contributing specific supplies—perhaps one group handles first aid kits, while another gathers food and water resources. When disaster strikes, this cooperative approach allows for greater resilience within your community.
Engaging with local faith-based organizations is vital as well; they often have established networks in place that support communal resilience during emergencies.
In this way, resource planning becomes not just an individual effort but a collective endeavor that strengthens relationships and enhances safety for everyone involved.
By leveraging community resources and establishing affordable budgeting strategies, you can position yourself and your household to respond effectively during emergencies. Embracing collective action not only amplifies your preparedness but also builds a stronger community fabric that thrives even in the face of adversity.
What resources or tools are available for developing an effective evacuation strategy without spending much money?
To develop an effective low-budget evacuation strategy, leverage free resources such as community emergency response teams (CERT), local government websites offering guidelines, and social media platforms for real-time updates. Engage with neighborhood groups for sharing information and coordinating drills; studies show that communities with regular practice have a 30% higher success rate in emergencies. Additionally, utilize basic tools like maps and inexpensive communication channels to ensure everyone is informed and prepared without incurring significant costs.
How can communities come together to support one another during emergency evacuations while minimizing costs?
Communities can support one another during emergency evacuations by establishing resource-sharing networks, where local businesses and residents donate supplies and services. For instance, pooling resources can help create community-based shelters that reduce costs significantly compared to commercial alternatives. According to a FEMA report, communities that utilized volunteer networks effectively saved approximately 30% in emergency response costs. Additionally, organizing training sessions for residents enhances preparedness and fosters solidarity, making the process smoother and less expensive for everyone involved.
How can families or individuals prepare for evacuations on a tight budget?
Families and individuals can prepare for evacuations on a tight budget by creating an emergency kit using inexpensive items, such as water bottles, non-perishable food, first aid supplies, and essential documents stored in a waterproof container. Regularly review and update the kit to ensure it meets current needs; studies show that having a well-prepared kit can reduce panic by 63% during emergencies. Furthermore, communities often offer free workshops on disaster preparedness, providing valuable resources without financial strain. Engaging family members in planning and practicing evacuation routes also helps build confidence and clarity without extra costs.
What common mistakes should be avoided in low-budget evacuation planning?
Common mistakes in low-budget evacuation planning include neglecting to conduct regular drills, which can lead to confusion and panic during an actual emergency; failing to communicate clear evacuation routes to all members of a community, resulting in bottlenecks and delays; and underestimating the importance of essential supplies, such as food, water, and first-aid kits. According to studies, nearly 60% of families do not have a plan or adequate supplies ready for emergencies, highlighting the critical need for effective communication and preparedness strategies—even on a tight budget.
What are the essential components of a low-budget evacuation plan?
A low-budget evacuation plan should include clear communication strategies, designated evacuation routes, and a well-stocked emergency kit. Essential items in the emergency kit might include water, non-perishable food, a flashlight, first-aid supplies, and important documents—all of which can be sourced affordably. According to FEMA, having a preparedness plan can significantly enhance survival rates during emergencies; for instance, communities with established plans report up to a 30% higher chance of successful evacuations. By prioritizing these components, individuals can ensure their safety without incurring heavy costs.