
When you find yourself in a situation where clean drinking water is scarce, knowing how to make a makeshift water filter can be a total game-changer. Whether you’re camping under the stars, navigating through a natural disaster, or simply looking for a way to purify tap water during a boil advisory, this simple skill can ensure you stay hydrated safely. It’s surprisingly straightforward and requires items you probably already have at home or can find nearby. By taking a few moments to set up your own water filtration system, you can transform murky water into a refreshing drinkable resource. Let’s dive into this easy guide to get you started on creating your very own DIY water filter!
To create a makeshift water filter, begin by cutting the bottom off a plastic bottle and creating a small drainage hole in the cap. Then, layer materials starting with cloth or coffee filters to catch large particles, followed by activated charcoal, fine and coarse sand, and finally gravel to stabilize the structure, ensuring effective filtration of impurities before sterilizing the filtered water for safety.
Gather Your Materials
Before starting the construction of your makeshift water filter, it’s essential to assemble specific materials that can either be found at home or easily sourced nearby. Each item plays a unique role in the filtering process, working together to ensure that the water you obtain is as clean and safe as possible.
-
Plastic Bottle: A clean plastic bottle, ideally with a capacity of 1 or 2 liters, serves as the primary container for your filter. Make sure it’s thoroughly washed to avoid introducing any contaminants.
-
Cloth Material: A piece of clean cotton or cheese cloth is necessary for the initial filtration layer. This will act as a barrier to catch larger debris before it gets further into the filter.
-
Coffee Filters or Porous Cloth: These provide additional filtration by capturing finer particles that the cloth might miss. They are handy and can be replaced easily when they become clogged.
-
Activated Charcoal: It’s key to understanding that activated charcoal (found in pet stores or aquarium sections) is different from regular grilling charcoal, which contains harmful chemicals. Activated charcoal will help remove toxins and unwanted tastes from the water.
-
Fine Sand: This layer will further refine your filtration process, trapping smaller particles and providing a smoother flow of water.
-
Coarse Sand or Small Pebbles: These materials create a sturdy structure within your filter and assist in preventing clogging while allowing better water flow.
-
Gravel: Placed at the top of your filter setup, gravel offers stability and helps prevent erosion of the layers beneath it.
-
Scissors or Knife: For cutting your plastic bottle to prepare it for filtering duties, these tools are required—just be cautious while handling them!
-
Rubber Band or Tape: These items can be used to secure your cloth material over the mouth of the bottle, ensuring that nothing slips through during the filtration process.
Think of each material as a vital part of a team working toward a common goal – providing you with safer drinking water when you need it most.
With all these materials gathered and ready for use, you’re on the verge of transforming them into an effective filtration system. Let’s proceed to explore how these components come together in the next section.
Step-by-Step Filter Construction
Begin with cutting the bottle. Using a pair of scissors or a knife, carefully cut off the bottom portion of your plastic bottle. This will serve as the opening for your filter, allowing you easy access to insert the other materials. It’s akin to preparing a canvas; the better the base, the smoother your creation will be. Ensure you have enough space to work comfortably—setting up on a stable surface will make handling the materials easier and safer.
With the bottle prepared, it’s time to address one crucial aspect: drainage.
Creating a Drainage Hole
Now, use a sharp object to poke a small hole in the bottle’s cap. If your bottle does not have a cap, create several tiny holes in the bottom part of the bottle that you’ve just cut off. This drainage hole is vital because it allows filtered water to flow through efficiently without backlogging. Think of it as creating a path for rainwater; if there are no channels for excess water to escape, it could pool and create mess or damage.
Now that we have ensured proper drainage, let’s move on to adding effective filtering materials.
Adding the Straining Fabric
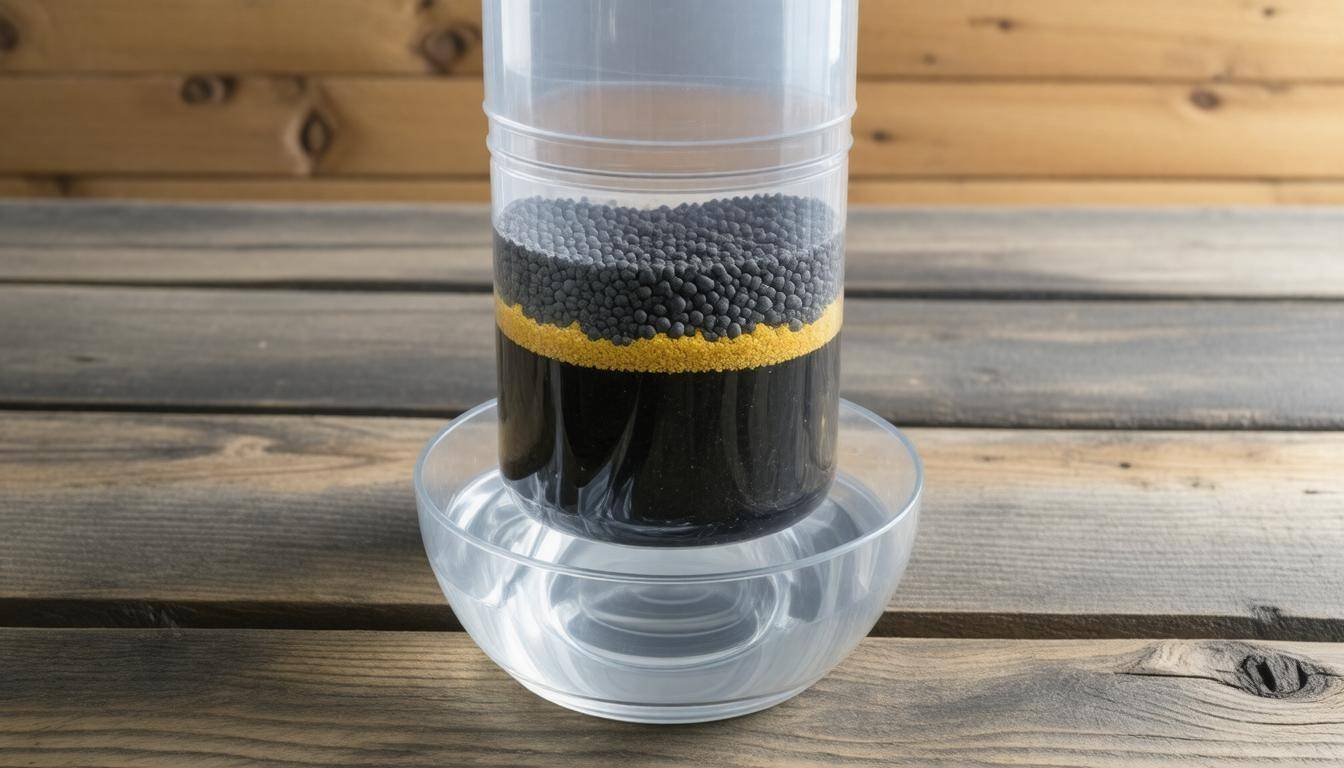
Start by placing about three inches of clean cotton, cheesecloth, or even a coffee filter at the base near the neck of the bottle. This initial layer is akin to a sieve; its main purpose is to catch larger debris and particles before they enter the heart of your filtration system. Without this straining fabric, fine particles would clog your activated charcoal layer too quickly, diminishing effectiveness and impacting water quality.
Now we begin building upon this stable foundation with our next important layer: charcoal.
Adding the Charcoal Layer
Pour approximately three inches of activated charcoal above your cloth layer. It’s critical here to use activated charcoal, not standard grill charcoal, as ordinary charcoal can contain toxic chemicals. Activated charcoal is an exceptional filtering agent that removes pollutants and unpleasant odors from water, much like how it detoxifies other substances. Its porous nature significantly traps impurities while allowing clean water flow through effortlessly.
After adding charcoal, we’ll introduce sand into our filter structure to enhance filtration further.
Adding the Sand
On top of the charcoal layer, add two to three inches of fine sand; think of this as adding finesse—a secondary barrier that further works to block smaller particulates from passing through. Following this layer, incorporate another two to three inches of coarse sand or small pebbles. The coarse elements have an additional advantage: they also help set up pathways for water movement within your filter system.
Finally, it’s time to complete your filtration masterpiece by capping it off with gravel.
Finishing with Gravel
Add a final layer of two to three inches of gravel at the top of your filter setup. This gravel acts as a stabilizing element for all layers beneath it and catches any larger debris not intercepted by previous layers. It also assists in maintaining pressure within the filter during operation so that water flows consistently without any interruption or overflow issues.
With your filter assembled and ready for action, understanding how to maximize its effectiveness is crucial for achieving purified drinking water while exploring layering techniques that enhance filtration efficiency.
Effective Layering Techniques
The effectiveness of your makeshift water filter largely depends on the order and depth of each layer. It’s essential to know why each layer is important and how it contributes to the filtration process.
Layer Purposes
The first layer, which consists of gravel, serves a twofold purpose: it stabilizes the filter while catching large debris that could block the finer filters downstream. Think of gravel as the bouncer of your filtering club—only letting in what is acceptable for the actual party later on.
Following gravel, we have coarse sand or small pebbles. This layer further filters out larger particulates that might have slipped past the gravel. It acts like a second line of defense, ensuring nothing too cumbersome makes it to the more delicate particles—akin to a quality control inspector checking for imperfections.
Next comes fine sand, which captures even smaller sediments and impurities. It’s like a meticulous artist adding finishing touches; without this component, you’d miss critical details that can affect both taste and safety.
Then, we introduce activated charcoal, known for its magic-like ability to remove toxins and improve flavors through adsorption. Unlike regular charcoal you might find in your barbecue supplies—which can be toxic if ingested—activated charcoal is specially processed to maximize its filtering capabilities. Activated charcoal’s surface area is enhanced through a process that creates numerous tiny pores, trapping chemicals and odorants, making your water tastier and safer.
Lastly, we have the straining fabric at the very top of your filter setup. This fundamental layer acts as the first screen for large particles and prevents them from descending too quickly into the layers below. Think of it as a safety net that ensures everything remains orderly as water flows down.
Each layer plays a crucial role in ensuring clean drinking water emerges from what could otherwise be a muddied source. If one layer is improperly constructed or insufficiently thick, it could impede the entire filtration process.
For example, if that gravel layer is too thin—or worse yet, almost nonexistent—large particles won’t get trapped effectively. Instead, they’d overwhelm finer layers with their bulk, clogging sand and charcoal far too soon.
Regular maintenance of these layers is just as critical. For optimal filtration performance, consider replacing your activated charcoal every two to four weeks, depending on usage frequency; this will keep your filter running smoothly and minimize health risks associated with degraded materials.
By understanding how each component contributes meaningfully to the cleaning process, you can ensure that every sip you take from your makeshift filter not only tastes better but is also safe for drinking—an indication of careful resource management.
With this knowledge in hand about filtering techniques and their significance, let’s now explore how we can tap into our surroundings to enhance our systems further.
Utilizing Natural Resources
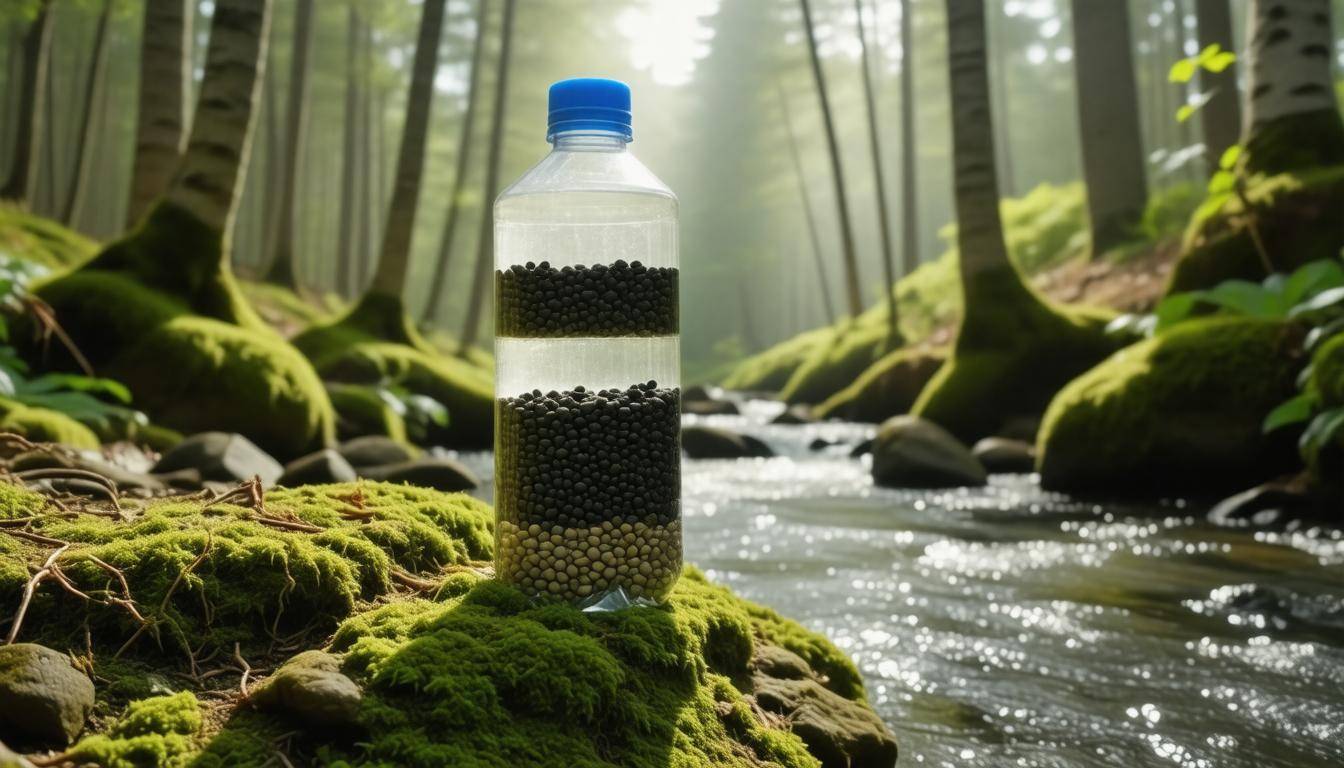
In emergency situations, natural resources can often be lifesavers, especially when commercial materials are out of reach. Gathering elements from your surroundings not only makes sense from a survival standpoint but also allows you to utilize what nature offers. For instance, when it comes to creating a reliable water filter, you can rely on charcoal, sand, and gravel sourced directly from the environment around you. Harnessing these materials effectively can improve the filtration process and ensure clearer drinking water.
Locating Natural Charcoal
Finding suitable charcoal is easier than you might think. If you’ve had a recent bonfire or want to make use of remnants from a camping trip, look no further than the leftover ashes. When collecting this charcoal from a campfire, it’s crucial to focus on pieces that are fully burned; they should appear black and firm without any sign of unburned wood or flame-treated bits.
By ensuring that the charcoal is free from harmful chemicals or contaminants—like lighter fluid or other accelerants—you create a safer alternative for your makeshift filter. This natural charcoal substitutes for store-bought activated charcoal perfectly, helping to remove odors and toxins from the water.
Using Natural Sand and Gravel
Just like charcoal, sand and gravel play an essential role in effective water filtration. These materials can easily be sourced from nearby riverbeds or clean beaches. However, before incorporating them into your filter system, make sure to give them a good rinse—this step is paramount since any dirt or impurities present could undermine your purification efforts.
Rinsing with clean water helps wash away sediment that could introduce more contaminants into your already-filtered source. It may sound trivial, but using clean sand and gravel will drastically improve your water quality as it passes through these layers in your DIY system.
While having natural substitutes at hand makes for an efficient filtration system, it’s essential to recognize that additional purification steps follow to ensure safety before consumption.
Purifying Water Properly
While filtration does wonders at removing physical impurities, it’s not enough on its own. This is especially true when it comes to ensuring that the water you collect is free of harmful pathogens. To safeguard your health, purification becomes essential. Think of it like brushing your teeth; you wouldn’t stop at just rinsing without ensuring the germs are gone, right? This analogy illustrates why treating filtered water should be a non-negotiable step in your process.
Boiling
One of the most effective methods for purifying water is boiling. It’s simple yet powerful: by bringing filtered water to a rolling boil for at least one minute (or three minutes if you find yourself at altitudes above 2,000 meters), you can eliminate most bacteria, viruses, and parasites lurking in the liquid. The temperature doesn’t just kill off these harmful microorganisms; it also alters their infrastructure, preventing replication or illness.
Keeping a camping pot or a kettle with you during outdoor adventures can make this process effortless. Just remember—while boiling is a quick fix, safety always comes first, so don’t rush! Allow the water to cool before pouring it into a clean container for drinking.
Solar Disinfection
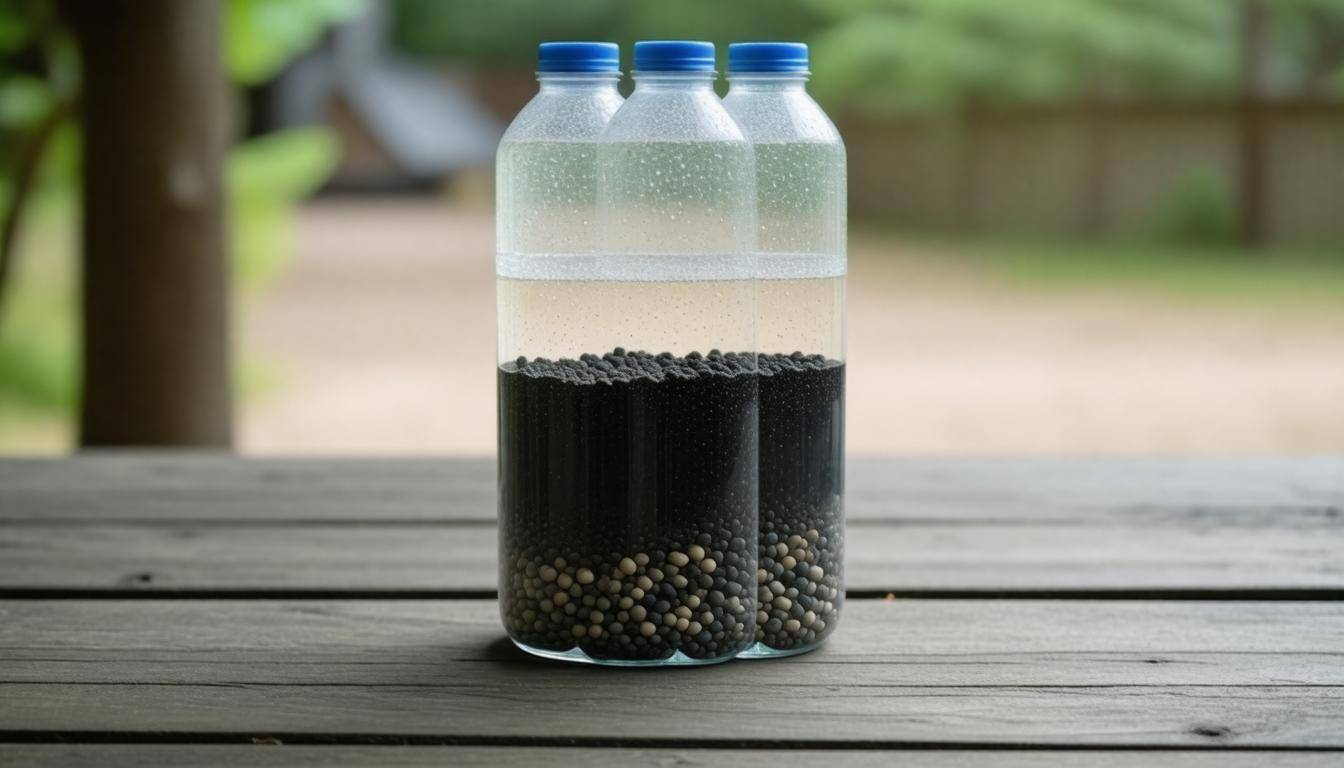
If boiling isn’t an available option, solar disinfection—or SODIS—offers an ingenious alternative. Utilizing sunlight as your ally, place clear plastic bottles filled with filtered water directly under the sun for at least six hours. UV rays from the sun effectively neutralize those pesky microbes without any complex setup.
Naturally, clear bottles are best because they allow maximum sunlight penetration. Keep in mind that cloudy weather may extend the time required for this method; you might need up to two days in less than optimal conditions.
Choosing to use both boiling and solar disinfection increases your assurance of drinking pure water, so consider switching between these techniques based on your available resources and environment.
As we explore additional measures for enhancing your water’s cleanliness, you’ll find there’s even more ground to cover regarding effective testing methods that ensure safe consumption of your drinking water.
Essential Water Quality Tests
Regularly testing your water—yes, even after filtering—ensures that it remains safe for consumption. The first step in this process is a visual inspection. This might sound straightforward, but your eyes can reveal a lot about what’s lurking beneath the surface. You want to see clear water, free from any visible particles or unusual colors. If it looks cloudy or has an odd hue, you might need to reconsider your filtration method.
Another vital test is the odor and taste check. Water should ideally be odorless and tasteless. If you pick up on any strange smells—like chemicals—or if it leaves an unpleasant earthy aftertaste, these are red flags indicating that something isn’t quite right. Relying solely on visual and olfactory cues might seem simplistic, yet they are often the first indicators of contamination.
For a more quantifiable assessment, consider employing a Total Dissolved Solids (TDS) meter. This handy tool will measure the concentration of dissolved substances in your water, giving you a clearer picture of its safety level. Ideally, a TDS reading below 500 ppm (parts per million) suggests that the water is safe for drinking. Higher readings could mean you’re ingesting harmful minerals or pollutants—a risk you do not want to take.
| Water Quality Parameter | Safe Limit for Drinking |
|---|---|
| TDS (Total Dissolved Solids) | < 500 ppm |
| Turbidity | < 5 NTU (Nephelometric Turbidity Units) |
| pH Level | 6.5 – 8.5 |
In addition to TDS readings, keep an eye on turbidity levels; anything exceeding 5 NTU suggests that larger particles may still be present in the water, which could affect both safety and taste. The pH level is crucial too; ideal drinking water should fall between 6.5 and 8.5 on the pH scale to avoid issues like acidity that can corrode pipes or lead to unpleasant flavors.
Understanding these essential tests helps ensure your drinking water remains clean and safe as you explore different filtering solutions to enhance your water quality.
Benefits and Drawbacks of DIY Filters
Makeshift water filters come with an array of benefits that make them an appealing option, especially in emergency situations. For starters, they are cost-effective. Utilizing common materials like plastic bottles, sand, and charcoal allows anyone to construct a functional water filter for as low as $5 to $20. This affordability is particularly crucial when traditional, commercial filters can set you back anywhere from $30 to several hundred dollars. In dire situations, such as natural disasters or camping trips, this accessibility can mean the difference between having clean drinking water or going without.
Alongside affordability, another significant benefit is education. Crafting a DIY filter sheds light on how filtration processes work. It engages users in hands-on learning—ideal for families teaching children about science through practical experience. Understanding these principles empowers users and instills a sense of self-sufficiency that can be invaluable in emergencies.
However, the effectiveness of these homemade solutions isn’t flawless. A vital drawback worth noting is their limited filtration capabilities. While they can effectively remove large debris and some bacteria, makeshift filters may not eliminate all pathogens or harmful chemical contaminants. Microscopic organisms like Giardia and Cryptosporidium can slip through if the construction isn’t done correctly or if unclean materials are used.
This limitation highlights the importance of sterilization after filtering, as boiling the filtered water will ensure any lingering microorganisms are destroyed.
Furthermore, maintenance is essential for ensuring your filter continues to perform adequately. Just like a car requires oil changes, DIY filters need regular cleaning and sometimes replacement of materials to stay effective—especially the charcoal layer which must be refreshed to maintain its purifying properties. Neglecting this upkeep could lead to reintroducing contaminants back into your formerly filtered water.
Another aspect to keep in mind is efficiency. Generally speaking, DIY filters tend to be slower compared to their commercial counterparts. When you’re in need of large quantities of purified water quickly—such as during an extended camping trip or when preparing for emergencies—the labor-intensive nature and time required for filtration can be cumbersome.
Realizing both the strengths and weaknesses equips you with valuable insights on how to leverage makeshift filters effectively while also preparing for potential challenges you may encounter along the way.
As you consider building your own filter, balance the benefits against these drawbacks to create a practical solution tailored to your specific needs.
In conclusion, understanding both the advantages and disadvantages can help you navigate waters—literally and figuratively—when it comes to finding clean drinking solutions.