
In the face of unpredictable circumstances and food shortages, having a reliable source of nutrition is more important than ever. That’s where microgreens come into play—tiny but mighty plants that can provide a significant boost to your diet right from your kitchen. Imagine being able to grow fresh greens in just a few weeks, all while taking up minimal space! As a writer passionate about self-sufficiency, I’ve learned the joy of cultivating these green powerhouses at home. This guide will not only show you how to grow your own microgreens with ease but also explain why they are essential for emergency nutrition. Let’s dig into the wonderful world of microgreens and discover how they can enhance both your meals and your life during challenging times.
The “Microgreens for Emergency Nutrition: Growing Guide” provides essential information on how to successfully grow nutrient-dense microgreens at home, including required materials, optimal growing conditions, and step-by-step instructions for germination and harvesting. It emphasizes the importance of microgreens as a sustainable food source that can supplement your diet during times of limited access to fresh produce.
Why Microgreens Are Ideal for Emergency Situations
Microgreens aren’t just compact and easy to grow; they also pack a powerful punch in terms of nutrition. Imagine having a small tray of greens that can potentially provide your family with essential vitamins and minerals when access to food is limited. Their ability to deliver high concentrations of nutrients makes them an invaluable asset during uncertain times. Packed with vitamins A, C, E, K, and important minerals like calcium and magnesium, they can supplement your dietary needs without taking up much space or resources.
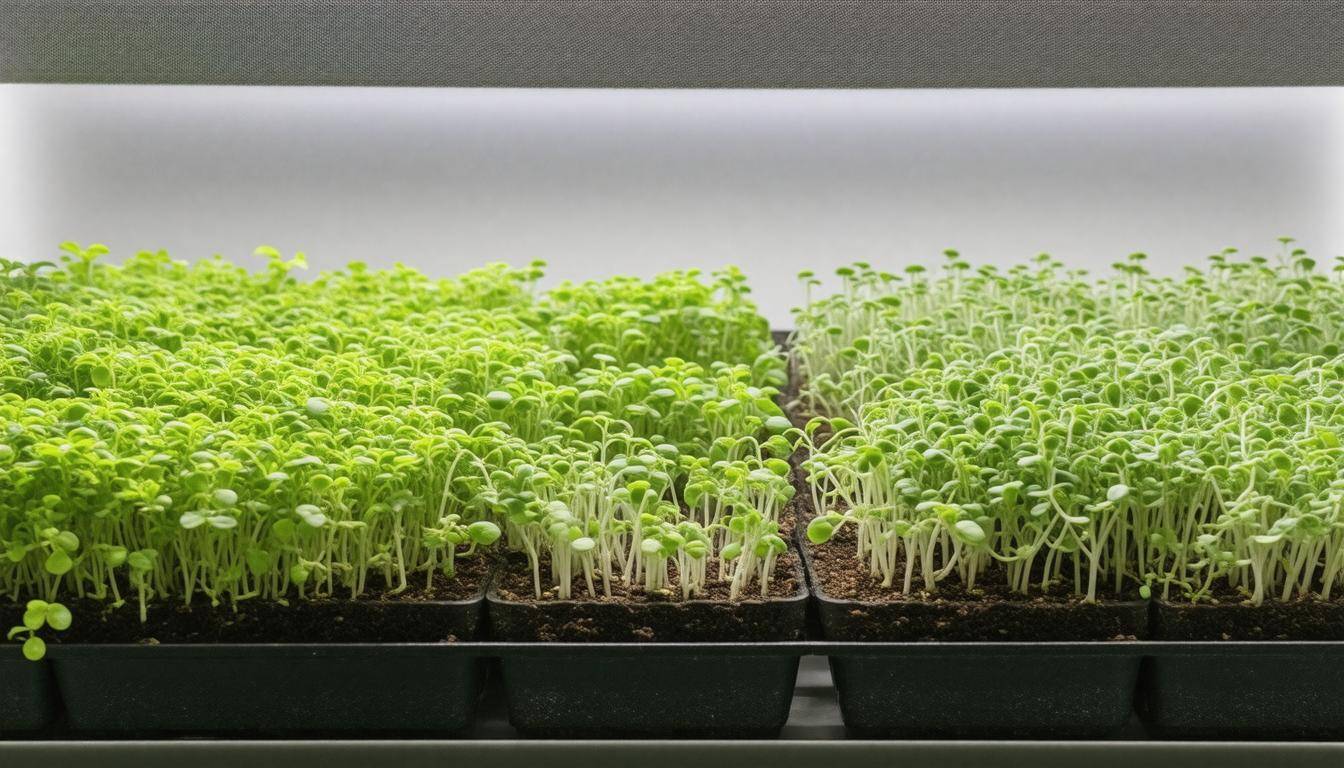
One striking feature of microgreens is their quick growth cycle. Most varieties are ready to be harvested in a span of just 7-21 days. This lightning-fast turnaround is crucial when other food sources may be unavailable. For example, while radish microgreens take merely 7-10 days to sprout, traditional crops like carrots and tomatoes necessitate several months before they bear fruit. This efficiency allows families to quickly replenish their food supply and maintain their nutritional needs during emergencies.
The growing requirements for microgreens are minimal, so they don’t demand large amounts of soil, water, or sunlight. This adaptability means they thrive even in challenging environments—whether it’s a small apartment with limited natural light or a spacious home with full sun exposure. You can easily set up a growing station on a windowsill or countertop without needing extravagant equipment.
“Microgreens may take up little space, but they bring enormous benefits,” said food sustainability expert Jane Smith. “They’re like the pocket-sized vitamins of the gardening world.”
Beyond their rapid growth and minimal resource use, microgreens offer several additional benefits during emergencies:
-
High Nutrient Density: These little greens can contain up to 40 times more nutrients than their mature counterparts, presenting an economical way to meet your nutritional goals.
-
Versatile Cultivation: They can be grown indoors or outdoors, providing flexibility regardless of climate conditions.
-
Low Caloric Content: While nutrient-dense, microgreens offer low calorie counts; this makes it crucial to pair them with other caloric foods for a balanced diet.
Their numerous advantages—from fast maturation and minimal resource requirements to high-density nutrition—make these greens remarkably useful in emergency preparedness plans. As we explore further, let’s examine how these tiny powerhouses contribute significantly to our dietary needs.
Nutritional Benefits Explained
One of the strongest advantages of microgreens lies in their remarkable nutritional density. These small greens pack a big punch, offering extraordinary levels of vitamins and minerals that far exceed those found in more mature plants. For instance, the USDA reports that microgreens can contain up to 40 times more vital nutrients than their adult counterparts. Imagine biting into a handful of microgreens and knowing you’re getting an exceptional dose of goodness—this is why they’re becoming popular among health enthusiasts and practical gardeners alike.
To put things into perspective, a study from the University of Maryland highlights that red cabbage microgreens boast six times more vitamin C and an astounding forty times more vitamin E compared to full-grown red cabbage. The significance of these nutrients cannot be overstated; vitamin C promotes immune function and skin health, while vitamin E serves as a powerful antioxidant that protects our cells from damage. With such pronounced differences, it’s clear that adding microgreens to your meals is not merely an aesthetic choice but an intelligent nutritional strategy.
Core nutrients found within microgreens include essential vitamins like A, C, E, and K—each playing critical roles in body function—alongside essential minerals such as potassium, magnesium, and iron. Additionally, they are rich in various antioxidants which help combat oxidative stress in our bodies. According to nutritionists, incorporating microgreens into one’s diet can significantly boost immune function, enhance digestion, and even lower chronic disease risks. These little greens may often go unrecognized amid larger vegetables but should not be overlooked due to their impressive profiles.
Interestingly enough, because microgreens are so nutrient-dense yet low in calories, they serve as excellent dietary supplements rather than meal replacements. Eating approximately four kilograms (around eight pounds) might only yield about 1000 calories, emphasizing that while they are beneficial for enhancing your meals’ nutritional value, they shouldn’t constitute your entire diet.
Moreover, growing microgreens offers a sustainable approach to food sourcing. You don’t need vast outdoor space or fancy equipment; just a small tray on a window sill can deliver fresh greens year-round. This accessibility means that during uncertain times—and with grocery stores sometimes facing shortages—homegrown microgreens can act as a vital supplement to your nutrition plan.
It’s important to recognize that while microgreens are exceptionally potent in terms of nutrient content, relying solely on them isn’t feasible for fulfilling all caloric or nutritional needs over long periods. They shine best when used alongside a diverse range of food sources—a balanced diet of fruits, vegetables, proteins, and carbohydrates remains essential for comprehensive health.
Integrating microgreens into your emergency nutrition plan will allow you to leverage their extraordinary health benefits while enjoying the satisfaction of cultivating your very own food source right at home. Now let’s take a closer look at the key supplies needed to start your own microgreen garden.
Essential Growing Supplies
To get started with cultivating your own microgreens, having the right supplies is crucial. You don’t need fancy equipment; just a few basic but essential items will set you up for success.
Basic Items and Tools
-
Microgreen Seeds: Choose organic, non-GMO seeds to ensure the best quality. Popular options for beginners include broccoli, radish, and sunflower. Each type offers unique flavors and nutritional benefits, broadening your options for incorporating them into your diet.
-
Growing Medium: The medium is vital for supporting your seeds. You can opt for peat-based mixes or coconut coir due to their moisture-retention capabilities. If you’re feeling adventurous, hydroponic mats can even be used as they offer a soil-less approach that reduces mess.
-
Containers: While flat trays (about 10×20 inches) are commonly used for growing microgreens, don’t hesitate to get creative! Recycled materials like plastic takeout containers can also serve well if they allow for drainage—just make sure to poke a few holes in the bottom.
-
Watering Tools: A simple spray bottle will work wonders in keeping your growing medium moist without overwhelming it—a gentle misting goes a long way in nurturing those delicate seedlings.
-
Light Source: While natural sunlight works beautifully, especially during spring and summer, don’t rule out grow lights. They come in handy for indoor setups, ensuring your microgreens receive ample light even during darker months.
Once you’ve gathered these crucial items, you’re well on your way to starting your little green garden right at home.
For those looking for an all-in-one solution, consider investing in beginner-friendly gardening kits like the Hamama Microgreens Kit. These kits typically contain all the essentials packaged together, making it easy to dive into the delightful world of microgreens without any hiccups.
Remember, the process doesn’t have to be complicated or intimidating. With simple tools at hand and a little love and patience, you are already setting yourself up to enjoy fresh and healthy greens from your own home.
With these supplies lined up, you’re ready to explore effective ways to plant those seeds and nurture them into vibrant microgreens that can significantly enhance your nutrition and self-sufficiency.
Quick Planting Methods
When it comes to planting microgreens, having a streamlined approach can make all the difference. First things first: preparing your container is a breeze if you follow a few simple steps. Begin by filling your tray with a 1 to 2-inch layer of your chosen growing medium. The foundation is vital; it should be evenly distributed to ensure each seed has the room it needs for growth. A balanced layer allows for proper moisture retention, which is crucial in those early days.
Step-by-Step Guide
Once your tray is prepared, it’s time to sow the seeds. Here’s where the fun begins! Scatter the seeds evenly across the surface. Many types, particularly smaller seeds like arugula or radish, do not require soil covering at all. However, it’s wise to double-check specific instructions for the seed variety you’re using, as some larger seeds may prefer a light coating of soil. You want them to have good contact with the medium but not be buried too deep—it’s all about balance.
After sowing comes one of the most crucial parts of planting: watering.
Lightly mist the seeds with water using your spray bottle. This gentle approach keeps the surface moist without dislodging your carefully placed seeds—using too much water can cause pooling, which leads to uneven growth or even rot. Ensuring your seeds get just the right amount of hydration is key at this stage; a soft mist is all you need to kickstart their journey.
Once you’ve watered them, you’ll need to cater to their comfort during the germination phase.
For optimal germination, cover your tray with a lid or plastic wrap to create a warm and humid environment—the perfect incubator for those delicate seedlings. Place this setup in a dark area since many seed varieties thrive in darkness initially. During this period, monitor the moisture levels closely; you’ll want to keep that environment cozy without letting it become soggy.
After a few days, excitement builds as you watch for those little sprouts!
As soon as you see them breaking through the surface, remove the cover and introduce them to light. Position your tray in an area that receives ample natural light or use grow lights if natural light is insufficient. Aim for about 12-16 hours of light daily; it mimics their natural sunlight exposure and encourages strong, healthy growth.
Remember: Consistency is essential during this phase! Ensure that you regularly check their light and moisture levels for robust development.
Following these steps will not only simplify your planting process but also reward you with flourishing microgreens ready for harvest in no time! Enjoy watching your little garden come to life while boosting your nutritional intake with home-grown greens.
With confident planting under your belt, let’s explore how to sustain that vibrant green growth while maximizing yields throughout their lifecycle.
Maintaining Your Microgreen Garden
Watering is crucial for the success of your microgreen garden. It’s essential to adopt a routine that strikes a delicate balance—light but consistent watering helps keep your plants thriving. Overwatering can create a damp environment that leads to mold growth on seedlings. The rule of thumb is to check the moisture level of the growing medium before watering; it should feel just moist but not soggy. If you press your finger gently into the medium and it feels dry, then it’s time to water.
As you grow your microgreens, monitoring for pests becomes increasingly important. Tiny invaders, like aphids and spider mites, can wreak havoc on your fresh greens if they’re left unchecked. To keep them at bay, utilize neem oil sprays that are safe for organic gardening—it’s a gentle yet effective solution that minimizes harm to both plants and beneficial insects. Regular checks every few days can save your plants from undue stress and ensure a boisterous harvest.
Pruning
Think of microgreens as requiring a haircut. Just as getting regular trims promotes healthy hair growth, trimming your microgreens encourages denser and bushier plants. Any leaves that yellow or appear unhealthy should be carefully snipped away with sharp scissors or shears. This not only enhances the appearance of your garden but also directs the plant’s energy towards strengthening healthy foliage.
After addressing any yellowing sections, remember that proper maintenance practices are vital for reaping a healthy harvest. Continue observing nutrient levels in your growing medium; sporadic fertilization may come in handy if you notice slow growth or poor color development. This proactive approach will help you achieve a vibrant array of greens.
With these simple yet effective maintenance tasks in mind, you’ll be prepared to elevate your yields further by exploring techniques for gathering and utilizing your crops effectively.
Harvesting Techniques
Harvesting microgreens is a delicate yet rewarding process that brings the fruits of your labor right to your plate. Understanding when and how to harvest these greens will ensure you maximize their nutritional benefits as well as their flavor. Most varieties are typically ready for harvest when they’ve fully developed their first true leaves, which usually occurs within a window of 7 to 21 days post-germination.
Harvesting Step-by-Step
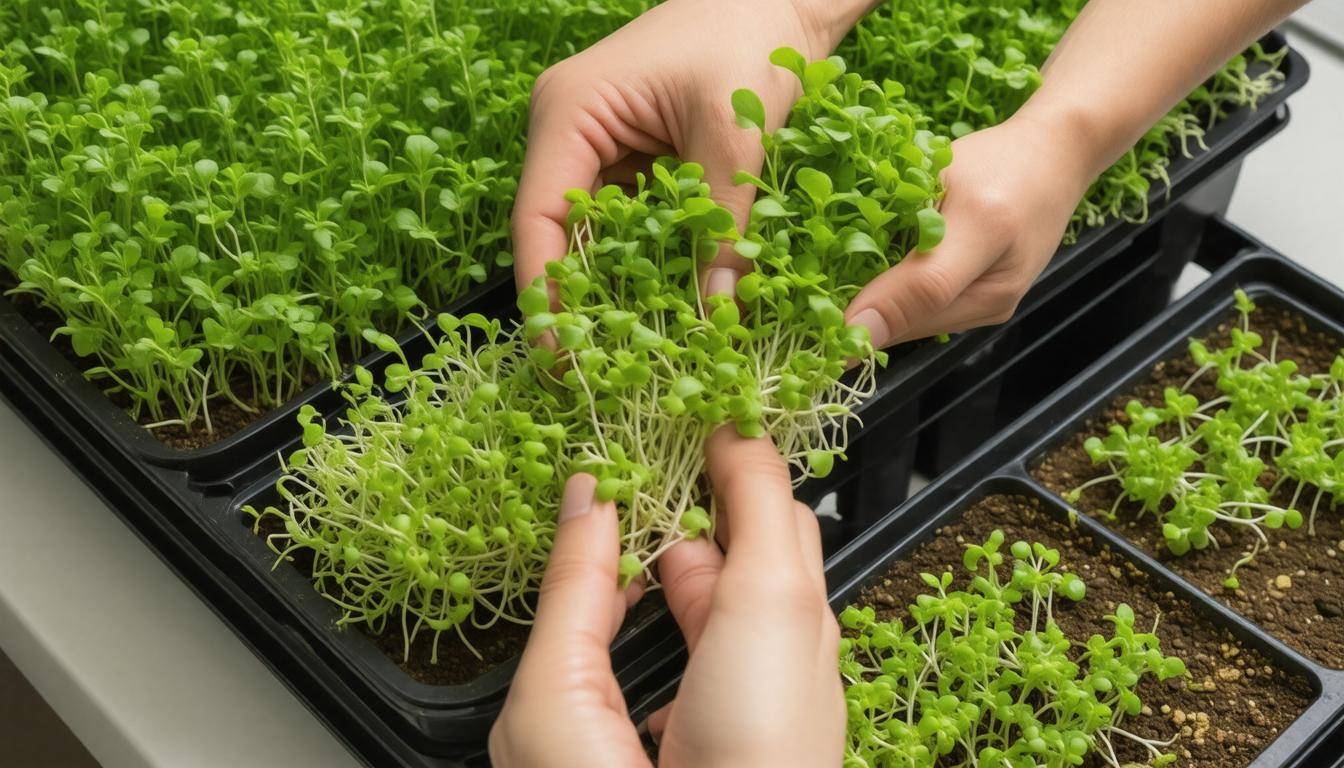
When you’re ready to collect your microgreens, the first step is to prepare the right tools. You’ll want sharp scissors or a clean knife to make the process smooth and efficient. A clean cut helps avoid damaging the remaining plants, allowing them to continue growing if you wish to stagger your harvest.
Next, select the area you want to harvest. It’s essential to look for plants that show healthy growth with vibrant colors—these are indicators of ready-to-harvest greens. Once you’ve identified your target, gently snip the greens just above the soil level. This method ensures minimal disturbance to the roots, allowing any remaining shoots in the tray to thrive without interruption.
Be gentle during this process; pulling at the roots can result in unsightly gaps in your growing medium and may hinder future growth.
After you’ve harvested your greens, it’s crucial to wash them carefully. Gently rinse them under cold water to remove any residual dirt or particles. I often use a salad spinner or a few paper towels to pat them dry, ensuring they stay crisp and fresh for your salads or sandwiches.
Regularly harvesting young shoots not only adds freshness to your meals but also promotes continuous growth in your microgreen garden. With proper care, these tiny greens can become an integral part of your emergency nutrition strategy, offering vital vitamins and flavors throughout the year. Now, let’s explore how best to keep these nutritious greens fresh and accessible for longer periods.
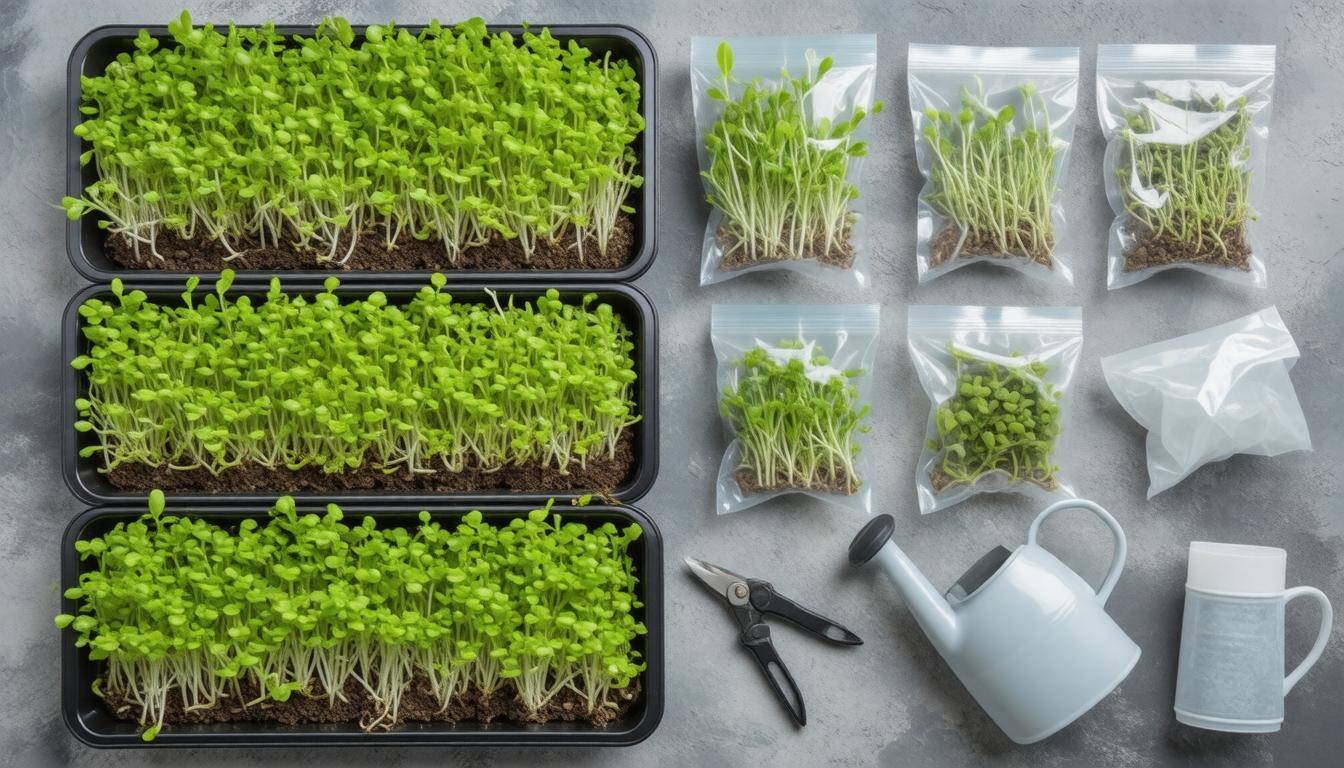
Storing Microgreens
Freshly harvested microgreens need to be stored properly to maintain their nutritional value and freshness. The moment you harvest those vibrant greens, it’s important to think about how you’re going to keep them fresh. A simple strategy that I’ve always found effective involves using airtight containers lined with paper towels. The paper towels absorb excess moisture—something that can lead to spoilage—and this method can extend the lifespan of your microgreens up to a week when stored correctly.
To kick things off, consider glass containers over plastic ones. Glass tends to be a better choice because it minimizes moisture buildup inside the container. This is particularly relevant when storing delicate items like microgreens, which are sensitive to excess humidity. If you’ve ever opened a plastic container only to find soggy greens, you’ll appreciate the importance of minimizing moisture!
Ideally, place these glass containers in your refrigerator’s crisper drawer, which provides the perfect balance of humidity and cool temperature for your precious edible seedlings. The crisp environment slows down decay while maintaining their crunchiness and flavor. It’s like giving your microgreens their own little sanctuary within your fridge!
However, let’s talk about longevity too because there may be times when you find yourself with an abundance of microgreens that you can’t consume right away. While freezing is an option, it’s important to know that this method can impact the texture of your greens; they might end up more wilted once thawed. Therefore, if you’re really planning to store them long-term, consider using the freeze method sparingly and only for specific varieties that handle freezing well.
Consuming microgreens fresh proves to be your best option for maximizing all their delightful nutrients and flavors. So whenever possible, try to incorporate them into your meals soon after harvest for that burst of freshness they provide.
Additional Tips
Keeping microgreens fresh also entails monitoring moisture levels in your storage conditions continually. If you notice condensation forming inside the container after a couple of days, replace the paper towel or remove some moisture with a clean cloth. This small act can make a big difference in extending the life of your greens.
Remember that different types of microgreens have varying shelf lives: for instance, arugula and basil typically last around 7-10 days, while pea shoots may hold out for up to 14 days under proper conditions. By being mindful of these nuances in storage, you ensure that every handful of greens remains as nourishing as intended.
As we navigate through the journey of growing these nutrient-dense greens, it’s crucial to anticipate challenges that may arise during storage or cultivation.
Troubleshooting Issues
Growing microgreens might seem easy, but as with any gardening endeavor, occasional challenges can pop up unexpectedly. For instance, consider Jane, who was excited over her new batch of microgreens only to find a fuzzy layer of mold on top after a few days. This is a common issue that can make even the most seasoned gardener feel defeated.
Common Problems and Solutions
The first problem many encounter is mold growth. If you notice a fuzzy mold accumulating around your seedlings, it’s usually a sign you’ve been overwatering or that there’s poor air circulation. Reducing watering frequency is essential; it’s better to allow the top layer of soil to dry out slightly before watering again. Increasing ventilation with a small fan can also improve air circulation, drastically reducing humidity levels and creating an inhospitable environment for mold.
“Maintaining humidity levels below 70% can significantly reduce mold incidence.”
Another issue that may arise is pest infestations. Our friend Tom once faced this challenge when he noticed some unwanted visitors munching away at his green treasures. To tackle this, applying organic neem oil can be incredibly effective, offering protection against common pests without harsh chemicals. You might also consider introducing beneficial insects like ladybugs if pests are abundant; they will actively seek out and devour their unwelcome counterparts.
However, one challenge leads to another when it comes to growth rates.
Slow growth can be frustrating as well. It’s not unusual for novice gardeners to worry when noticing that their sprouts aren’t developing as expected. Often, this could be related to inadequate light exposure or unsuitable soil pH levels. Ensuring that your microgreens receive about 12-16 hours of light each day is crucial for healthy growth. If you’re growing indoors, investing in grow lights can make all the difference—just ask Tom who found that placing his lights closer resolved his leggy sprout dilemma in no time.
Lastly, yellowing leaves can indicate nutrient deficiencies, commonly associated with nitrogen shortages. If you notice your greens starting to lose their vibrant color, it may be time to feed them with a balanced fertilizer or use nutrient-rich soil to encourage healthy leaf greenness.
Having these troubleshooting tips at your fingertips ensures that you can quickly address any issue while cultivating microgreens.
By having a quick troubleshooting guide handy—addressing mold, pests, slow growth, and nutrient deficiencies—you can maintain the health of your microgreens and ensure they thrive through whatever challenges arise in your indoor garden.
In conclusion, understanding these common problems allows you to successfully navigate the world of microgreens and keep your emergency nutrition plan robust and effective.