
In a world where photographs capture our most cherished memories, facing the aftermath of a disaster can feel overwhelming. Whether it’s a flood, fire, or other calamity, the instinct to save family pictures often kicks in right alongside the shock and fear. The good news is that even in tough times, you can take steps to rescue these irreplaceable mementos. This guide will lead you through friendly but essential techniques for preserving your photos after disaster strikes—from assessing their condition to effective drying methods and restorative solutions. Get ready to reclaim those memories and ensure they stand the test of time!
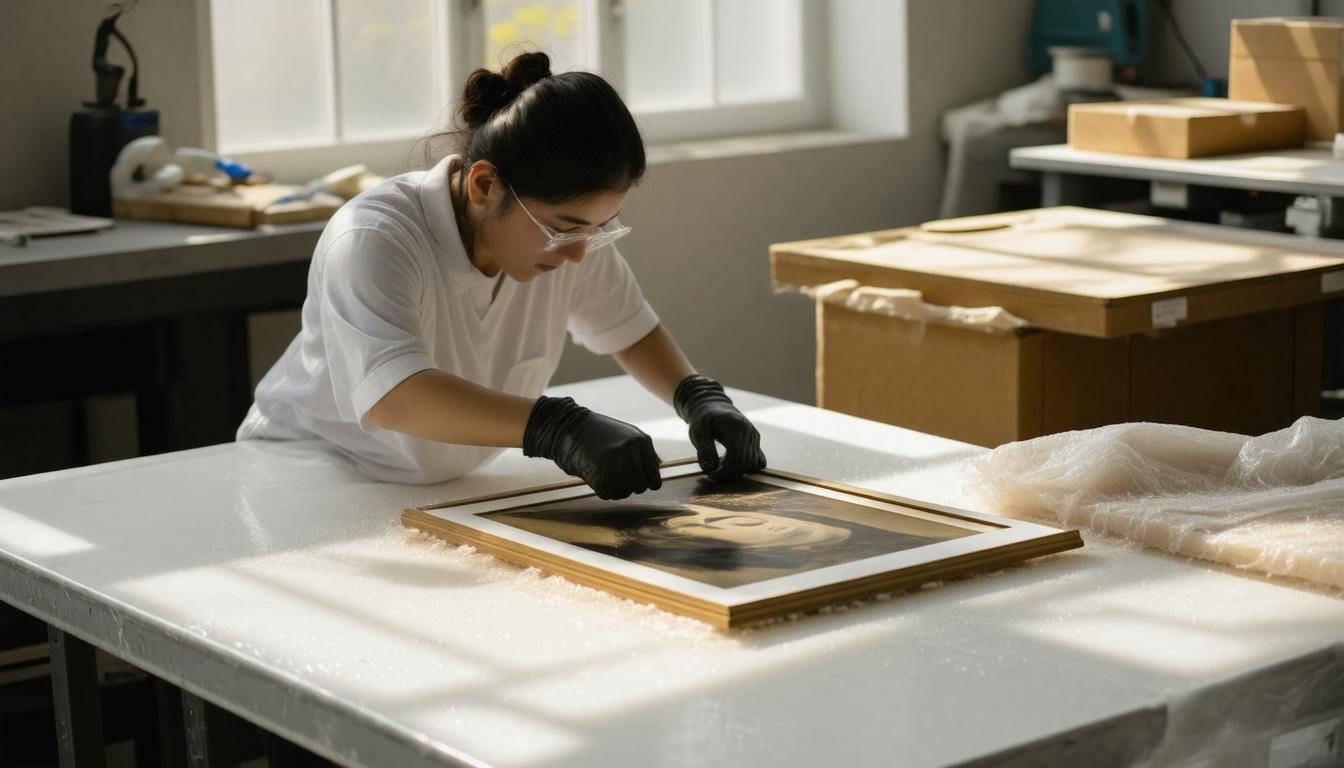
The “Photo Preservation After Disasters: Rescue Guide” outlines essential steps for salvaging photographs and other cherished items following disasters, such as wearing protective gear, properly handling and cleaning affected materials, and effective drying techniques. Additionally, it provides resources for further assistance and emphasizes the importance of focusing on irreplaceable items during urgent recovery efforts.
Assessing the Condition of Your Photos
When it comes to evaluating the state of your cherished photos following a disaster, gentleness cannot be overstated. Begin by placing each photo on a clean, dry surface, ensuring you have adequate lighting. The right conditions allow you to catch details that may otherwise go unnoticed. Take a moment to breathe and settle into this process; it’s as much about care as it is about assessment.
Start your assessment with a close examination for signs of water damage. This can manifest through warping or discoloration caused by moisture penetration. The presence of mold is another key indicator, often resembling dark spots or patches. If you notice any of these conditions, it’s vital to act quickly, as prolonged exposure can lead to irreversible deterioration.
The next part of your evaluation involves checking for other forms of damage that might require different restoration techniques.
Beyond water damage, there are other potential hazards to consider. After ensuring there are no immediate signs of moisture issues, take a close look at the color integrity of the photographs. Fading or discoloration indicates that light and air have taken their toll on the print over time. Check for structural integrity, too: gently assess for any tears, bends, or creases that could worsen if handled improperly during restoration efforts.
“It’s better to be safe than sorry; precautions during handling can save countless memories from further harm.”
To aid in this critical assessment, gather some useful tools:
- A magnifying glass: Essential for inspecting intricate details.
- A soft brush: Ideal for delicately removing surface dust and debris.
- A light source: Helpful for spotting fading or discoloration in images.
As you go through this meticulous process, document your findings. Create a simple log detailing each photo’s condition, noting specific types of damage along with their potential restoration needs. Taking photographs of the damaged items also provides a visual reference you can refer back to during recovery planning.
Once you’ve carefully assessed each item, you’ll be better equipped to determine the appropriate steps for restoring these treasured memories effectively, which leads us to consider the various types of damage you may encounter during this process.
Identifying Damage Types
Understanding the types of damage that can affect your photographs provides a roadmap for their recovery. Think of it like putting together a puzzle; each piece represents the condition your photo is in and tells you what method to use for restoration. Let’s take a closer look at some common types of damage and what they mean for your precious images.
-
Water Damage occurs when photographs are exposed to flooding or high humidity. You may notice that photos are stuck together or develop unsightly smear marks. This can lead to irreversible loss if not addressed promptly. It’s vital to act quickly by separating these images gently, ideally while they’re still wet, to prevent further adherence.
-
Mold Growth is another critical concern. Mold can spread rapidly in damp conditions and poses health risks, making it important to handle affected materials carefully. If you see mold, it’s advisable to wear protective gear such as gloves and a mask before attempting any cleaning efforts.
-
Physical Damage, such as tears, holes, or scratches, requires immediate attention but can often be repaired with the right techniques. Using archival tape to mend tears and specialized tools for flattening creases can work wonders here.
-
Fading, which leads to loss of color intensity, typically results from prolonged exposure to water or sunlight. It may seem hopeless if your photos look washed out, but sometimes reprinting can offer a fresh start if the original image quality permits.
Fixing water and mold damage should be prioritized as they present the greatest risk to both your health and the longevity of the photographs.
By identifying these different types of damage, you can choose the most effective recovery methods and tailor your approach according to each situation’s specific requirements. For instance, dealing with mold might necessitate placing affected items in a sealed container until receiving professional assistance, while cleaning up physical damage might involve delicate hands and patience.
To safeguard your treasured memories, preserve them correctly based on their damage type. A little knowledge goes a long way in protecting your images from being lost forever.
With a clearer understanding of the various forms of damage that photos endure, let us now turn our attention to effective methods for tackling these challenges head-on.
Initial Recovery Techniques
Once damage is identified, taking quick action is essential. The sooner you begin the recovery process, the better the chances of preserving precious memories. The first step focuses on rinsing any muddy or dirty photos delicately. This is no simple task, as the goal is to clean them without harming crucial layers of the image. Start by using clean, distilled water—it’s important to use distilled rather than tap water since it lacks impurities that can further damage prints or emulsions.
Step I – Rinsing Photos
Rinse each photo carefully in a gentle flow of distilled water. If the photos are excessively muddy, you might need to submerge them completely. However, be cautious not to let them soak for too long; just a few moments can often suffice. The key here is precision and gentleness; too much agitation may disturb the fragile emulsion layer that holds your memories intact.
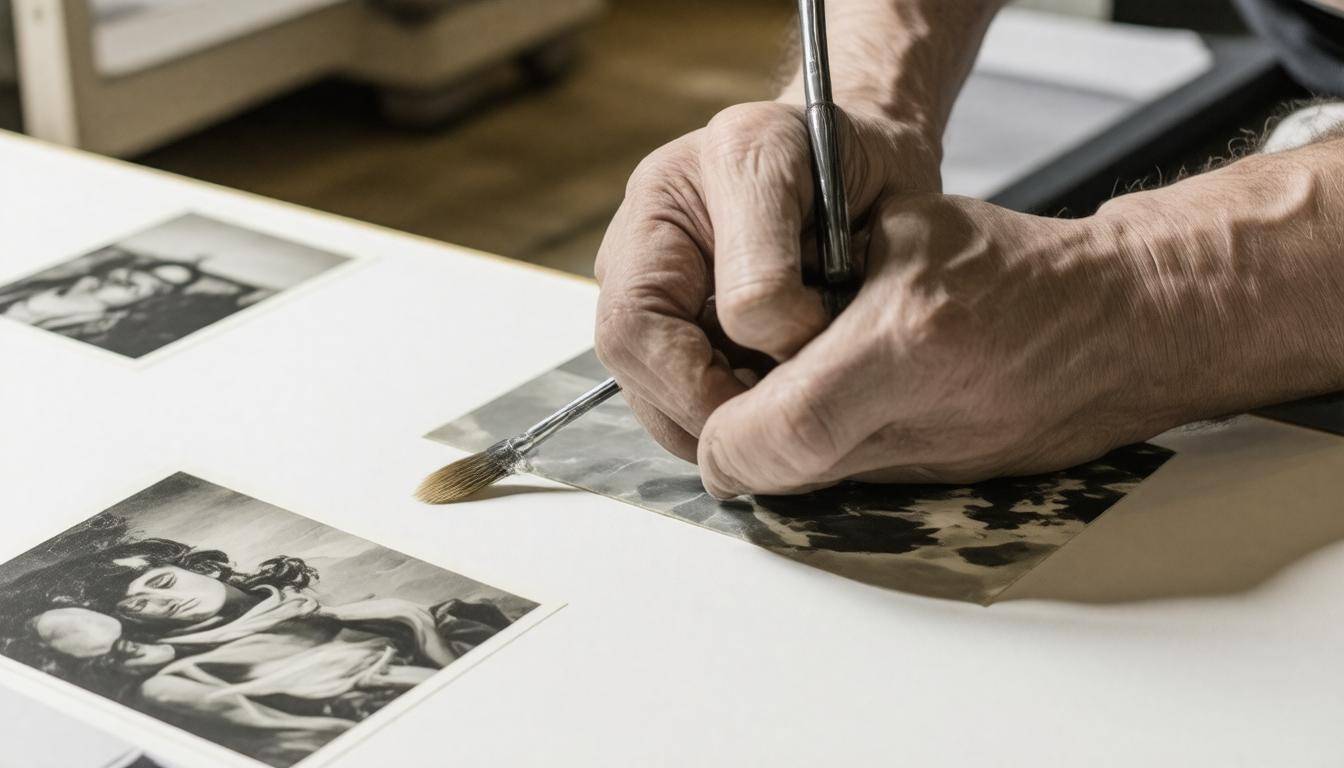
As you’re working through this process, remember that time is essential. For instance, if you notice stubborn dirt clinging to a photo’s surface, using a soft brush can help dislodge it without causing damage. A clean artist’s brush works fantastically for this purpose since it provides precise control while being gentle enough to avoid scratching or tearing the image.
Step II – Unsticking Photos
Following the rinsing stage, you may find yourself dealing with photos that have stuck together due to moisture exposure. For these stubborn items, your approach will require even more patience. Begin by preparing a container with distilled water and submerging the stuck photos gently. Keep in mind that separating these images might take several hours; so don’t rush through this step. A gentle tug may work at first, but if they resist separation, let them soak longer.
As you allow the photos to sit submerged, employ your fingers cautiously to separate them slowly. Avoid using sharp objects as they can easily cause tears or creases in delicate paper. Instead, use a gentle stream of water to encourage separation if needed; doing this can also rinse away any remaining debris effectively without introducing additional mechanical stress.
This method requires both caution and gentleness; rushing through it could wreck what remains of those cherished photographs.
With initial cleaning done, it’s crucial to turn your attention next to the proper drying techniques that will help ensure your photos remain intact and preserved for years to come.
Drying Methods for Damp Photos
It can be heartbreaking to discover your cherished photos damaged by water. However, utilizing the right drying methods can help salvage those irreplaceable memories.
First and foremost, air drying is one of the simplest yet most effective techniques. After gently cleaning your photographs, lay them flat on a clean, dry surface—think of something like absorbent paper towels or cloths. It is crucial to handle them with clean hands or gloves to avoid adding any more contaminants. Place each photo in a single layer, ensuring that they aren’t touching each other, as contact could lead to sticking or damage.
Change the towels frequently to efficiently absorb moisture from the photos. This encourages quicker drying without risking mold growth.
To enhance the airflow around your photographs, consider using fans positioned at a safe distance—not blowing directly on the photos—to promote even drying. This indirect method not only speeds up drying time but also helps prevent warping or curling. The goal is to keep your workspace well-ventilated and maintain an optimal environment for your photos. Depending on humidity levels, air drying may take anywhere from 24 to 48 hours.
Using Desiccants
In addition to air drying, you might want to explore the use of desiccants, which can be incredibly effective, especially in high-humidity conditions. Silica gel packets, often found in shoeboxes or new products, can absorb moisture very well. If you have desiccants handy, place your damp photos in a sealed container alongside these packets. The desiccants will work diligently to reduce moisture levels in that enclosed space, contributing significantly to the preservation process.
It’s important to check the container regularly; once it appears filled with moisture (which you’ll notice when it changes color), replace the silica gel with fresh packets to ensure continued efficacy. This method is excellent for protecting photographs from excessive humidity while they dry.
Once dried thoroughly using these methods, professional restoration services may be necessary to effectively revive their original condition and beauty. Let’s examine how those specialized services work and what options are available for recovery.
Restoration Solutions for Damaged Photos
Certain photographs may require just a bit of elbow grease rather than costly interventions. If you feel up to the task, there are several techniques you can employ to breathe new life into your beloved images. By utilizing common household items and embracing a little creativity, you can tackle some types of damage without needing professional help.
Cleaning Techniques
The first step in restoring your photographs is to gently clean them. If floodwaters or debris have left dirt or residue on your photos, grab a soft brush or a microfiber cloth, and carefully remove any surface grime. It’s crucial to be gentle here— too much pressure can cause further damage. For those stubborn stains, consider using a gentle mixture of distilled water and a few drops of mild dish soap. Always test this solution on an inconspicuous area first, as not all papers and inks will react kindly to moisture.
Navigating the delicate balance between cleaning and preservation requires patience; remember that every photo has its own story, and preserving that narrative is worth the extra care.
Drying Methods
After cleaning, it’s time to dry those photos properly. Air drying is your best friend here; lay each photo flat between two clean sheets of plain absorbent paper. Ensure they are weighed down gently to prevent curling, which often happens when they dry by hanging. It’s essential to keep these drying next to a fan but away from direct sunlight since heat sources like hair dryers or ovens can lead to disastrous results.
This stage sets the foundation for the next steps; dry photos are easier to restore and less prone to further damage in their vulnerable state.
Flattening Curled Edges
Once your photos have dried but still bear evidence of curling, it’s time for flattening techniques. After drying thoroughly, take that same absorbent paper and sandwich curled edges on both sides of the picture. Now place a heavy object on top, like a stack of books or weights—this creates a consistent pressure that helps flatten those troublesome corners without damaging the image itself.
Repeat this process over several days if necessary; persistence pays off in achieving that satisfying flatness.
Digital Restoration
Although physical restoration methods shine brightly with potential, don’t forget about digital options! Scanning your photos at high resolution provides an opportunity to preserve them digitally. Aim for at least 300 DPI when scanning; this ensures clear detail is captured for any future edits or prints.
Once digitized, use software programs such as Adobe Photoshop or GIMP for digital restoration efforts. These platforms allow you to perform color correction, blemish removal and even reconstruct torn fragments. Restoring digitally not only salvages the memory but also makes it easier to share with family members across generations.
Digital formats offer unprecedented accessibility and additional layers of security against future disasters too—think of it as adding an insurance policy for your memories.
Seeking Professional Help
Of course, if these methods feel daunting or if damage is beyond the repair you can handle alone, seeking professional help remains a valuable option. Professionals bring expertise that combines specialized techniques with advanced tools designed specifically for photo restoration. As mentioned earlier, testimonials from satisfied customers emphasize how these experts can turn back time on beloved family treasures.
“I trusted a specialist and they were able to restore my grandmother’s wedding photo perfectly.” That sentiment echoes across countless stories of restored family history.
Choosing between DIY solutions and expert services enhances your ability to protect what matters most after disaster strikes. Now, let’s explore another realm where technology plays a key role in preserving our prized memories effectively.
Digital Restoration Options

When it comes to digitally restoring damaged photos, there are a wealth of software options available that cater to different needs and technical skill levels. Programs such as Adobe Photoshop, known for its versatility, allow users to manipulate images in countless ways, ensuring that faded colors can be brought back to life. It’s akin to being a digital artist crafting a masterpiece from a damaged canvas, where every brushstroke matters.
For those seeking something less complex yet equally effective, Affinity Photo offers a user-friendly one-time purchase alternative with unique features worth exploring.
While both of these applications handle photo restoration adeptly, there are also lighter options for those who may not want to invest significant time or money into this task.
Using Restoration Software
Free tools like Photopea mirror much of Photoshop’s functionality but exist entirely online, making them accessible on any platform. These applications can restore color balance, remove blemishes, and even stitch torn edges seamlessly, allowing the user to navigate the restoration process with ease.
For users who prefer more manual control without the expense of premium software, GIMP provides a capable option. However, it’s important to note that while GIMP is free, its limited capabilities mean that serious restorations could require more extensive effort and experience.
“Sticking with well-known software like Photoshop or alternatives such as Photopea ensures reliable results.” – Alex97
As you embark on this digital restoration journey, many resources exist online; countless tutorials illustrate step-by-step recovery techniques. Whether it’s reviving colors or repairing intricate damage, tutorials can guide you through effectively using the software at your disposal.
Expert Advice
Incorporating expert insights enhances your approach to photo restoration significantly. According to TorsteinH, professionals often gravitate toward paid options since they simplify the process with better tools and features. This highlights an essential aspect of restoration—the quality of software often influences the outcome significantly.
Here are some important notes regarding your software choice:
- Adobe Photoshop: A classic tool with comprehensive features ideal for detailed image correction.
- Affinity Photo: A cost-effective solution with unique offerings.
- Photopea: Versatile and free, great for simple tasks.
- GIMP: A free alternative but may require more effort and skill.
By choosing the right software tailored to your needs and skill level, you not only improve the quality of your restored photos but also streamline the process itself. Understanding your tools can empower you in safeguarding those valuable memories against future calamities.
With the right tools and knowledge, you’ll be able to tackle any photo restoration challenges that come your way. As we move forward, let’s look closely at how you can ensure your cherished images are stored safely after recovery.
Storing Photos After Disaster
Proper storage after a disaster goes beyond simply placing items in a box; it plays a crucial role in preserving their condition for years to come. After the emotional upheaval of recovery, you want to ensure that your restored photographs maintain their beauty and integrity.
This begins with choosing the right containers. Acid-free archival boxes should be your go-to choice, as they prevent acid migration which can cause yellowing and degradation over time. Be sure to provide ample padding within the box to avoid any movement that could lead to damage.
It’s important to keep moisture in check; including silica gel packs in your storage solution is a simple yet effective way to absorb excess humidity, which can harm photos and create the perfect environment for mold growth. Just like every prized possession, photos deserve special care—so treat them accordingly!
Moving on to additional protective measures, consider using archival-quality photo sleeves made from polypropylene, polyethylene, or polyester. These materials provide a non-reactive environment for your photos while allowing easy viewing and handling. The right sleeves not only guard against physical dust but also shield against pollutants from the air, ensuring clarity and vibrancy remain intact.
And let’s not forget about those tiny desiccants! By adding these little moisture-absorbing packets to your storage boxes, you’ll further reduce humidity risks. This proactive step helps deter any potential dampness that could jeopardize the quality of your snapshots.
However, physical storage isn’t the only option; digital cloud storage can also play a significant role in backup. Integration of both physical and digital strategies fortifies the security of your precious memories.
Digital Cloud Storage for Backup
Digital backups provide an essential layer of protection against future damage to your cherished images. Utilizing cloud storage services like Google Photos, Dropbox, or Apple iCloud gives you robust backup features designed specifically for disaster situations. These platforms not only facilitate easy access but also prioritize the safety of your memories by storing them securely in the cloud. A survey found that 60% of users prefer Google Photos due to its unlimited high-quality photo storage, showcasing its popularity among those seeking risk-free preservation.
Benefits of Cloud Storage
One of the most significant benefits of digital cloud storage is accessibility. Imagine being able to access all your precious photos from any device, whether you’re on a family vacation or visiting friends. It makes sharing moments effortless while ensuring they are safely backed up at the same time. You aren’t tethered to one location or device; everything you need is just a login away.
The second benefit is redundancy, which mitigates risks posed by local disasters like floods, fires, or simple hardware failures. By having your photos stored in a remote location, you can rest easy knowing they are protected from unexpected mishaps around your home. What might seem like an inconvenience when backing up turns into a lifesaver when faced with potential threats.
Security is another critical aspect of using cloud services for photo storage. Most providers offer sophisticated encryption and secure storage solutions to prevent unauthorized access to your data. It’s comforting to know that your hard-earned memories are safeguarded behind layers of security protocols. For instance, consider this testimonial: “After the flood, I never worried about my photos again thanks to Dropbox,” shared by one disaster victim who learned firsthand the impact of reliable digital backups.
Accordingly, combining both physical and digital storage methods offers the best security for your treasured memories. Using digital cloud services allows you to take proactive steps toward ensuring that photographs survive both everyday accidents and extraordinary catastrophic events.
In summary, leveraging cloud storage not only keeps your images safe but also provides flexibility and peace of mind during uncertain times. Your memories deserve to be preserved and accessible, no matter what challenges arise.
Are there professional services available for photo restoration after a disaster?
Yes, there are professional services available for photo restoration after disasters. Many specialized companies focus on digitizing, cleaning, and restoring damaged photographs, employing techniques like scanning, retouching, and archival treatments. A survey conducted in the aftermath of natural disasters indicated that approximately 60% of individuals sought professional help for photo restoration, highlighting the importance of expert assistance in preserving irreplaceable memories.
What immediate steps should I take to rescue photos after a disaster?
Immediately prioritize the safety of yourself and others before attempting to rescue photos. Once safe, gently separate wet photos and place them in a cool, dry location to prevent further damage—ideally at room temperature. If possible, avoid using heat sources directly on the images, as this can cause irreversible damage. According to the American Institute for Conservation, quick action can save over 80% of photographs if dried within 48 hours, highlighting the urgency of your response.
What materials should I use for storing rescued photos to ensure their long-term preservation?
For long-term preservation of rescued photos, use acid-free, archival-quality materials such as photo boxes, sleeves, and albums made from polyethylene or mylar. These materials help prevent deterioration caused by acids and pollutants, which can lead to fading or discoloration over time. According to the Library of Congress, using proper storage methods can significantly extend the life of photographs, with well-preserved images lasting over 100 years compared to just a few decades when stored improperly.
What techniques are recommended for preserving photographs that have been exposed to fire or smoke?
To preserve photographs exposed to fire or smoke, it is crucial to handle them with care and work quickly. First, gently remove any soot or debris using a soft brush, but avoid rubbing the surface to prevent further damage. If photos are stuck together, freeze them to separate without tearing. For smoke-damaged images, restoration techniques such as washing with distilled water and a gentle detergent can help remove odor and discoloration. According to preservation experts, immediate action can significantly increase the chances of successful recovery, highlighting the importance of prompt intervention in disaster scenarios.
How can I dry out photos that have been damaged by water?
To effectively dry out photos damaged by water, start by laying them flat on a clean, dry surface, preferably in a climate-controlled environment. Use absorbent materials like paper towels to gently blot excess moisture without rubbing, as rubbing can cause further damage. For more extensive water exposure, consider placing the photos between two pieces of unprinted paper and using a fan on a low setting to circulate air around them. According to preservation experts, immediate action can reduce mold growth chances—within 48 hours after water exposure, the risk increases significantly.