
When the ground shakes beneath your feet, the panic that follows can be overwhelming. You might find yourself wondering about the safety of your home and loved ones. But in these chaotic moments, taking a methodical approach to assessing structural damage can make all the difference between safety and disaster. This guide is designed to walk you through the essential steps you need to take immediately after an earthquake strikes. You’ll learn how to identify common signs of damage, what specific areas require close inspection, and how to assemble a knowledgeable team for thorough evaluations. Equipping yourself with this information can empower you to act quickly and effectively, ensuring that both your property and your peace of mind are safeguarded.
The Post-Earthquake Safety Assessment: Complete Guide includes detailed procedures for evaluating building safety, the categories of building assessments (such as inspected, limited entry, and unsafe), and checklists for proper evaluation following seismic events. Additionally, it offers vital information on emergency preparedness, appropriate resources, and community support to ensure safety and effective response in the aftermath of an earthquake.
Common Post-Earthquake Structural Damage
After the tremors settle, take a moment to assess your building carefully. The signs of structural damage might be subtle, but they can pose significant risks if overlooked.
One of the first indicators to watch for includes cracks in foundations. These cracks can vary in width, with those wider than a quarter inch often indicating serious issues. Such shifts compromise stability and may lead to complications like water intrusion or pest infestations.
As we examine the walls of a structure, you may notice wall damage such as drywall separations or more severe issues like cracking and collapse of masonry walls. This is particularly concerning since compromised walls can diminish a building’s overall integrity. Doors and windows that no longer close properly may signal a shift in the structure that demands immediate attention.
Meanwhile, roofs and ceilings are not spared from nature’s wrath; roof and ceiling damage frequently translates into tiles dislodging or cracks forming across surfaces—both can lead to leaks or even collapse if left unaddressed. When inspecting your chimney, look closely for any leaning or visible cracks; these signify potential dangers where chimneys may crack or partially collapse due to seismic stress.
It’s crucial to approach any observed damage with caution—these conditions must be assessed by professionals who can diagnose the severity accurately.
Following these structural concerns, don’t overlook signs of shifted or tilted buildings. Severe earthquakes can displace structures off their original foundations, which may only reveal itself through sloping floors or gaps between walls and ceilings.
Consider this: after the 1994 Northridge Earthquake, Santa Monica faced extensive foundation cracking in residential homes. Local government estimates revealed many properties required retrofitting efforts costing millions of dollars. This serves as a reminder that even seemingly minor cracks should never be dismissed—they could represent severe underlying problems requiring prompt professional evaluation.
By maintaining vigilance and addressing these issues quickly, homeowners can work towards ensuring their property remains safe and structurally sound in the long term.
Now, turning our attention to specific indicators of damage, let’s explore common warning signs that necessitate careful inspection to maintain safety.
Inspecting for Cracks and Shifts
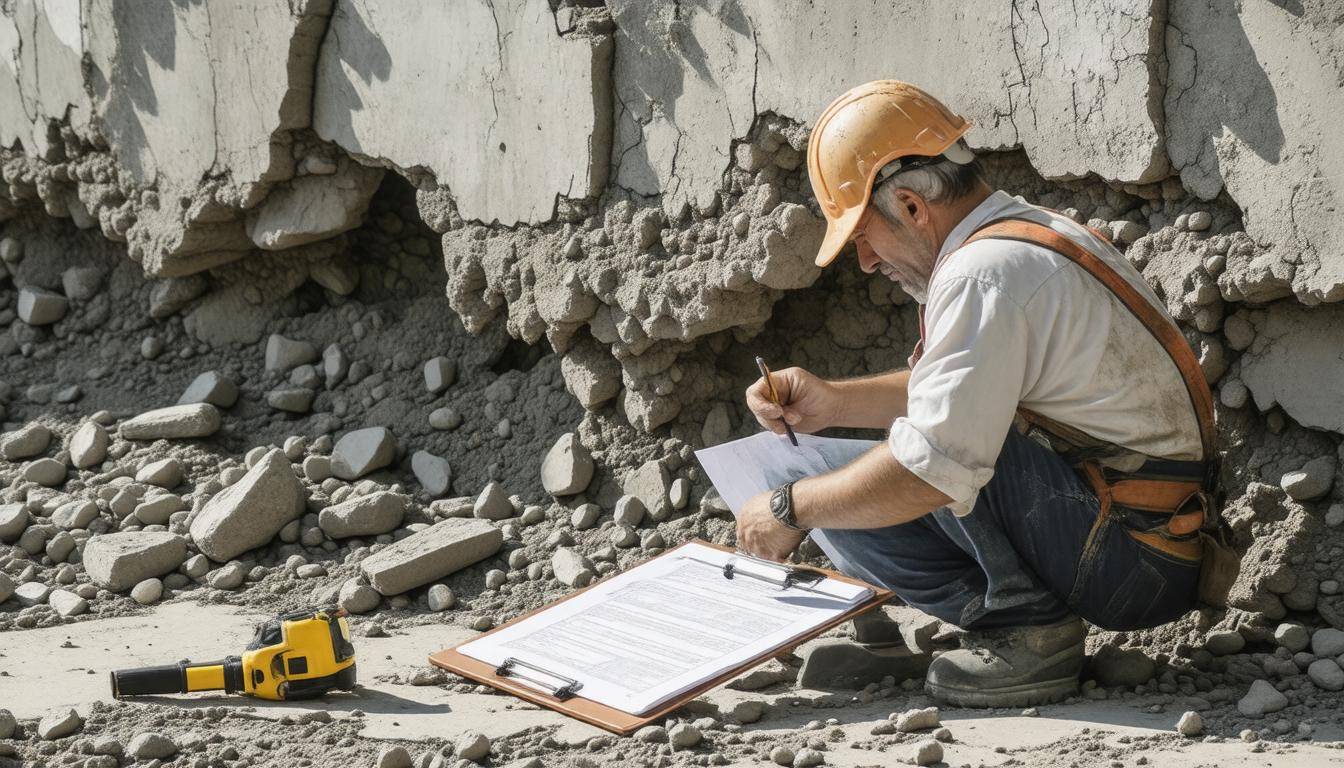
When we think about post-earthquake assessments, inspecting for cracks and shifts might seem like a simple task. However, it’s an essential process that can significantly impact safety and potential recovery efforts. Just imagine walking outside after an earthquake, taking a deep breath, and noticing the once-solid foundation has spiderweb-like fissures spreading out like veins. These cracks, even if they seem minuscule at first, can herald serious structural issues if left unchecked.
Steps for Inspection
Start your inspection by walking the perimeter of the property. As you walk around, keep your eyes peeled for any visible cracks on the foundation. It’s vital to note that cracks wider than 1/4 inch—considered significant—might indicate deeper structural problems. Use this time to connect with your surroundings; understanding how your building fits into the landscape is pivotal. Is it leaning slightly? Are there signs of settling?
Next, turn your attention to load-bearing walls. After all, these walls are what support the structure above. Areas where these walls meet the foundation are particularly vulnerable during seismic disturbances. Look closely for any separation between walls and floors that could hint at internal damage.
Now that you’ve inspected the external structures, it’s time to look inside. Walk through each room and examine interior walls for any new or widening cracks—especially near windows or doors where stress is often greatest from movement during an earthquake. Should you see diagonal cracks extending from corners of these openings, consider them red flags that must be documented.
As you make your way to inspect ceilings and roofs, watch for sagging or displaced tiles; these are telltale signs of distress that could jeopardize safety. Remember: any displacement you observe may contribute to ongoing settlement issues which could worsen over time.
Using a level during this phase will enhance your assessment significantly. By checking whether walls and floors remain level, you can gauge how much shifting may have occurred. Should you find discrepancies greater than 1 inch vertically or ½ inch horizontally, take detailed notes as these figures will be essential going forward.
While undertaking these comprehensive checks, it’s crucial to document everything with photos and notes; this not only aids in precise assessments but also informs subsequent repair efforts effectively. Each crack or shift you identify tells a story that contributes to reinforcing the safety of your environment for the future. Following this thorough examination will prepare you for the next critical step in ensuring safety during recovery efforts.
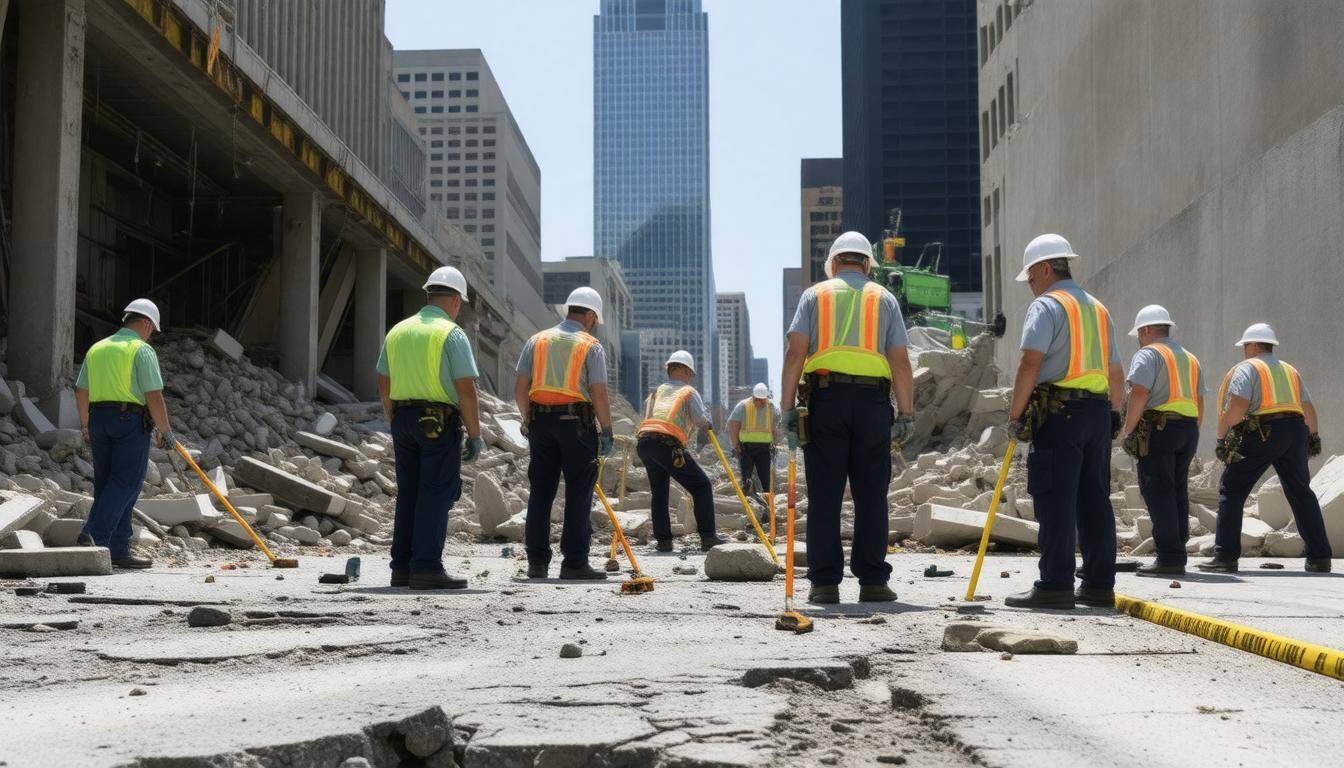
Assembling a Safety Assessment Team
The foremost step in forming an effective safety assessment team is recognizing the diverse skill sets required to conduct thorough evaluations. A successful team ideally comprises 5-7 members, blending technical knowledge with practical experience. Each member brings unique skills that can significantly influence the safety of the assessment process.
Team Composition
At the heart of your team should be a structural engineer. This individual becomes your linchpin, capable not only of identifying serious structural damage but also recommending immediate actions to mitigate risks. Their training equips them to recognize weaknesses in construction that may elude others, ensuring that unsafe conditions are not overlooked.
Alongside the structural engineer, a building inspector plays a pivotal role. This professional is tasked with verifying compliance with building codes while identifying potential hazards that might compromise safety. Their familiarity with local regulations can help streamline the evaluation process and ensure all inspections adhere to required standards.
To address utility concerns, having both a plumber and an electrician on your team is essential. In many cases, an earthquake can disrupt water supply and electricity, presenting dangers like gas leaks or electrical fires. These specialists can assess damage efficiently, guiding appropriate measures to safely shut down utilities when necessary.
Finally, appointing a safety officer is paramount. This individual ensures adherence to protocols while overseeing the well-being of each team member during assessments. They are responsible for enforcing personal protective equipment (PPE) usage and evacuation procedures if conditions worsen, fostering a culture of safety throughout the evaluation.
“After the 2001 Gujarat earthquake, our safety team, comprising engineers, inspectors, and volunteers, effectively minimized further risks,” recalls a senior safety officer from the local disaster management authority.
The success of your safety assessment team’s operational capacity hinges not just on expertise but also on their training and preparedness to handle emergency situations effectively.
Training Requirements
It’s critical that at least 80% of your team members have completed FEMA’s Incident Command System (ICS) training. Training in ICS-100 and ICS-200 courses provides invaluable foundational knowledge regarding disaster response coordination. Understanding how to communicate clearly and efficiently under pressure can’t be underestimated; this could make or break an operation.
Additionally, proper equipment is vital for effective assessments. Essential items include hard hats and safety goggles for personal protection against falling debris. Communication devices such as radios keep everyone connected during evaluations where visibility may be compromised due to dust or smoke. Lastly, structural assessment tools like measuring tapes and levels enable precise evaluations essential for determining safety conditions accurately.
Finally, timing is paramount—as disasters unfold quickly, so too must the response efforts encapsulated by your well-prepared team leaders.
Response Time
Aim for your team to assemble within 1-2 hours post-earthquake. This promptness ensures timely evaluations while reducing the risk of further injuries due to aftershocks or unstable structures. Being among the first responders can significantly reduce losses—both human and structural—by allowing early intervention strategies that protect lives and property.
Establishing clear communication protocols empowers your team to swiftly relay significant information about hazards identified during inspections while providing updates on the overall situation within their assigned areas.
By creating an adept team aligned with strict training protocols and essential equipment readiness, we pave the way for proactive measures in crisis scenarios. This sets the stage for identifying crucial checkpoints during subsequent evaluations.
Detailed Inspection Points
When undertaking a post-earthquake safety assessment, knowing what specific areas to inspect is vital to ensure the safety of everyone who may reenter the building. It can be helpful to visualize these areas, almost as if you’re retracing a path through the structure. The first thing you should focus on is the foundations. Watch out for signs of significant cracking or tilting; the foundation supports everything above it, and any compromise could mean a greater risk down the line.
Next, shift your attention to exterior and interior walls. Look for large cracks that may indicate settling or movement within the structure, or check for separation from floors or ceilings. This may seem minor, but even small shifts can signify serious problems brewing beneath the surface.
Moving upward, you must examine the roof closely. Look for displaced or missing tiles, sagging structures, and any signs of leaks forming around seams or edges. A compromised roof can lead to water infiltration, which could exacerbate existing vulnerabilities and create new ones.
Additionally, it’s essential to inspect chimneys and fireplaces carefully. Cracks or signs of collapse should not be taken lightly; they pose serious hazards if dislodged bricks or structural components fall.
In this process, never overlook utilities such as gas lines, water pipes, and electrical systems. Inspecting these components can be straightforward: use a soapy water solution around gas connections to check for leaks; check for exposed wires or tripped breakers in electrical systems—these checks are critical because they can pose immediate risks like fires or explosions.
According to a study by the Earthquake Engineering Research Institute, severe consequences often arise from neglecting these inspection points; approximately 60% of post-earthquake fatalities are due to undetected structural vulnerabilities.
As you inspect these points, remember to keep safety your priority. Always wear protective gear and ensure that someone else knows where you are during inspections; vigilance and preparation can make all the difference during these daunting assessments. This emphasis on thorough evaluation will naturally lead us towards understanding potential hazards that may exist in the environment around you.
Identifying Surrounding Hazards
When assessing a post-earthquake environment, it’s vital to take a thorough look at the area surrounding your building. Hazards outside can be just as dangerous—if not more so—than issues within the structure itself. This process requires vigilance and a structured method to ensure you don’t overlook anything that could jeopardize safety or complicate evacuation efforts.
Keeping this in mind, let’s explore some common external hazards you should assess after an earthquake.
First and foremost, fallen power lines present a serious electrocution risk. If you notice power lines hanging low or lying on the ground, maintain a safe distance and report them to utility companies immediately. Approach these situations with caution; it’s better to err on the side of safety than to unknowingly walk into a precarious situation.
As you survey the area, be aware of damaged roads. Cracked pavement or broken bridges can hinder evacuation routes and complicate emergency response efforts. Look for any signs of structural damage on nearby roads that may make them impassable, such as large fissures or complete collapses. Maintaining clear paths for emergency services is vital for swift rescue operations.
In some regions, landslides or avalanches can occur as a direct result of seismic activity. This risk is particularly prevalent in hilly or mountainous areas where soil saturation from rainfall or aftershocks can trigger these natural disasters. Be sure to evaluate the stability of nearby slopes and heed any warnings from local authorities if landslide risks are indicated.
Just as damaging as the dangers above are fallen trees and debris littering the landscape. Trees may become uprooted and pose risks to both individuals and properties, blocking access or causing further damage if they fall onto structures nearby. Clear pathways wherever possible but only if it’s safe to do so.
Lastly, keep your senses sharp for gas leaks. An odor similar to rotten eggs could indicate a leak from gas lines that were disrupted during the earthquake. If you smell gas, evacuate immediately and report it to emergency services using your mobile phone from a safe distance or by alerting neighbors who might still be in harm’s way.
A reminder from past experiences: in the 2015 Nepal Earthquake, subsequent landslides triggered by aftershocks caused significant additional casualties and blocked vital rescue routes. The emphasis on identifying surrounding hazards cannot be overstated, as these unforeseen dangers can exacerbate an already grave situation.
Remember that being prepared also extends beyond assessing immediate hazards; understanding how to respond effectively is essential for ensuring safety in crisis situations.
Essential Safety Protocols Checklist
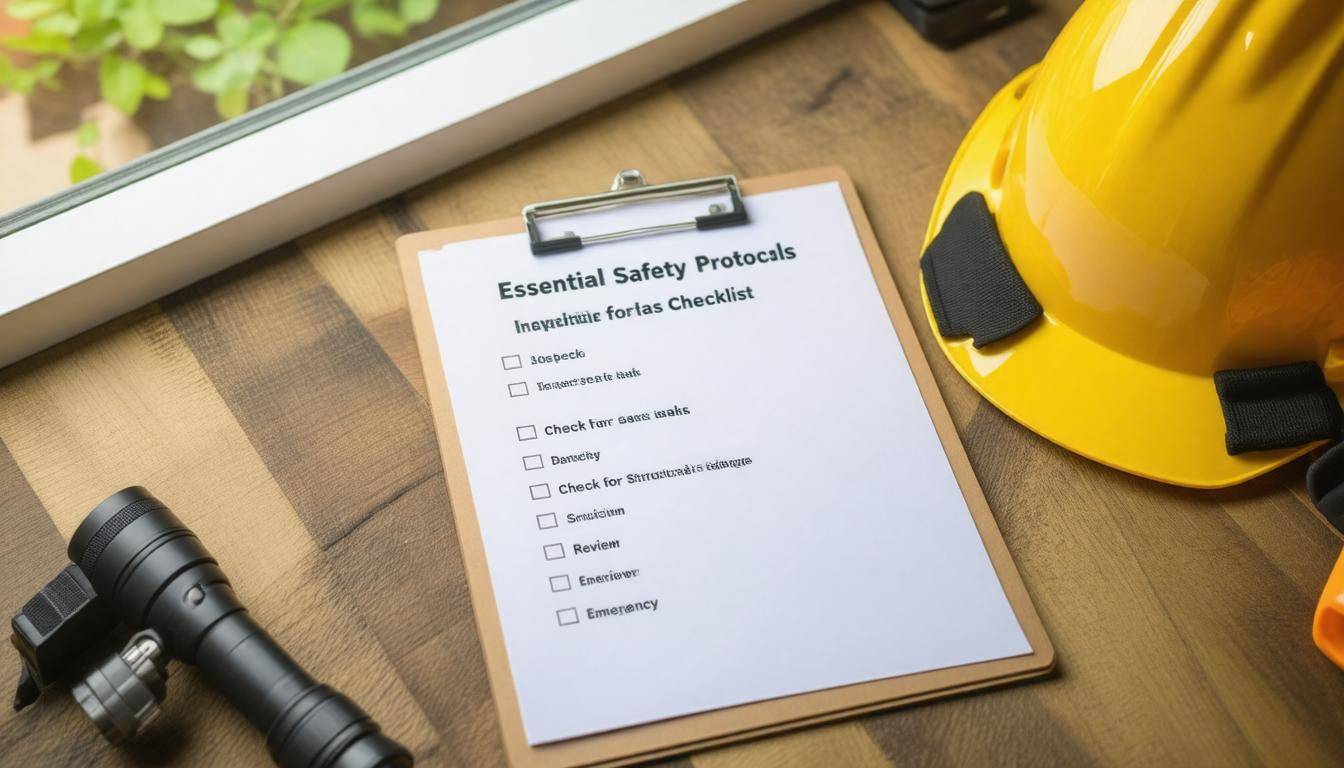
Following established safety protocols when assessing a building after an earthquake not only protects you but also ensures that the evaluation can proceed with minimal risk. It’s about creating a safe environment where you can effectively identify damages and hazards—before it’s too late. By implementing a clear checklist, you set the stage for a thorough assessment while prioritizing personal and team safety.
Checklist
Let’s break down the critical items to consider:
First and foremost, wear protective gear. This includes hard hats, gloves, and masks. The importance of this cannot be overstated. Just think about it: after an earthquake, debris may be present everywhere, and a falling piece of plaster from the ceiling can cause injury if you’re not prepared. Wearing proper protective equipment ensures you’re shielded against unexpected hazards.
Next on our list is the need to turn off utilities. If you suspect any leaks or damage, it’s crucial to shut off gas, water, and electricity right away. Gas leaks can lead to fires or explosions while damaged electrical lines pose significant shock hazards. Assessing your surroundings beforehand helps avoid these dangerous situations.
Establishing a safe perimeter around the affected structure is equally important. By clearly marking areas that are potentially hazardous, you limit access and reduce the risk of anyone wandering into unsafe zones without realizing it. A simple barrier or caution tape can make a world of difference in maintaining safety.
Another tip worth emphasizing is the importance of using the buddy system. Working in pairs not only provides mutual support but also offers backup in case of emergencies. Imagine being trapped or needing immediate assistance; having a buddy nearby can save lives.
Lastly, establish a communication plan among all team members. Effective communication helps everyone stay informed about their roles and any changes in conditions. Whether it’s using two-way radios or simply shouting out information—clear lines of communication during an emergency are essential for coordination and quick response.
It’s noteworthy to mention that according to the Red Cross, adhering to these safety protocols can reduce the risk of injury by up to 50%. Just think how valuable each safety measure really is!
As we move from these essential protocols, let’s consider how we can proactively address potential risks and establish preventive strategies to safeguard lives and property in the aftermath of an earthquake.
Immediate Preventative Measures
After an earthquake rattles the ground beneath us, the instinct is often to check for personal safety and assess the damage. But before you turn your attention to larger concerns, implementing immediate preventative measures is paramount. These actions can shield against additional hazards and help maintain the integrity of your home or structure. For example, roof damage isn’t just about aesthetics; if left unaddressed, it can lead to water intrusion that will cause mold and structural degradation over time. This is where tarp protection comes into play. Utilizing a heavy-duty tarp to cover exposed areas of the roof minimizes water damage until professional repairs can be made.
Quick Steps
It’s essential to follow up your initial assessment with decisive actions:
Covering damaged roofs prevents water from infiltrating your home, especially during rainstorms. Another critical aspect is shoring up compromised walls; temporary supports are vital to avoid collapse in case aftershocks occur. These supports must be sturdy enough to bear any load they might encounter.
Furthermore, blocking off unsafe areas is crucial for safety. Use clear signage to mark off hazardous zones around significant debris or potential structural failures.
Securing loose objects also shouldn’t be overlooked; anything that could fall during subsequent shakes—like picture frames or bookshelves—should be anchored down or removed entirely until everything calms and can be safely re-evaluated later. Establishing areas for treating minor injuries provides much-needed comfort and care during chaotic situations.
Drawing from experience: after the devastating 1989 Loma Prieta Earthquake, San Francisco implemented many of these measures effectively. They covered broken roofs with tarps, reinforced weakened structures, and marked off dangerous zones. This decisive action significantly mitigated further damage from aftershocks, showcasing how these steps can safeguard lives and property.
As these immediate preventive actions are implemented, we can look ahead to strategies that prepare individuals and communities for future seismic events.
Preparing for Future Earthquakes
Strengthening our defenses against earthquakes means taking consistent steps to ensure that our homes, families, and communities are better equipped to handle the next big quake. One powerful way to start is by retrofitting buildings. This involves reinforcing structures to meet updated seismic standards. Think of it as giving your home a solid backbone—enhancing its ability to withstand the shockwaves of an earthquake. It often includes adding steel braces or shotcrete, which can significantly bolster a building’s integrity.
When families invest in retrofitting, they’re not just safeguarding their homes; they’re also taking proactive steps that can save lives. A report by the USGS estimates that retrofitting can reduce fatalities by up to 30% in future seismic events. That’s a remarkable statistic, highlighting just how vital this practice is!
But preparing isn’t just about structural changes; it’s also about being ready on a personal level.
Every household should have an emergency kit packed with essentials such as food, water, and medical supplies. Envision being able to grab this kit when danger strikes—a lifeline during chaos. When assembling the kit, think about including non-perishable foods like canned goods or energy bars, bottled water (at least one gallon per person), flashlights, extra batteries, and a first-aid kit.
Here’s a quick checklist to consider for your emergency kit:
| Item | Details |
|---|---|
| Water | One gallon per person per day for at least three days |
| Non-perishable food | At least a three-day supply |
| Flashlight | With extra batteries |
| First-aid supplies | Medications included |
| Whistle | To signal for help |
| Dust masks | To filter contaminated air |
| Wet wipes | Personal sanitation supplies |
Once your household is prepared, don’t forget about the community’s readiness.
Community drills are another essential aspect of being earthquake ready. Conducting regular drills helps familiarize everyone with proper response protocols when an earthquake occurs. These rehearsals create muscle memory—allowing participants to react instinctively rather than panicking during an actual event. Encourage schools, businesses, and neighborhoods to unite in these drills, promoting collective safety.
Think of it as practicing for a big performance—everyone plays their part in keeping the community safe!
As we move from practical preparations to spreading awareness…
Implementing public awareness campaigns can further transform how we understand earthquake safety. Knowing what to do before, during, and after an earthquake saves lives and minimizes injuries. Information should be accessible through various channels—social media, local workshops, or flyers in community centers—to reach all demographics effectively.
A great way to get involved is by partnering with local agencies like the Governor’s Office of Homeland Security & Emergency Preparedness (GOHSEP). They often hold training sessions that equip citizens with knowledge about disaster preparedness and recovery strategies.
Collectively investing time and resources in these initiatives paves the path toward a more resilient community for the uncertainties ahead.
In embracing these proactive measures and fostering awareness, we can significantly enhance our safety and preparedness against future seismic events. Remember, every small action contributes to greater community resilience.
Who is qualified to conduct a post-earthquake safety assessment?
Qualified professionals to conduct a post-earthquake safety assessment typically include civil engineers, structural engineers, and emergency management personnel, all trained in evaluating building integrity and safety measures. According to recent statistics, assessments conducted by licensed engineers result in more accurate safety evaluations, with up to 30% fewer false conclusions regarding building safety compared to those made by unqualified individuals. These experts utilize standardized checklists and procedures to ensure thoroughness and reliability in the assessment process.
What common signs of damage should residents look for after an earthquake?
After an earthquake, residents should look for common signs of damage such as cracks in walls and foundations, misaligned doors and windows, water leaks, and damaged utilities. Studies show that structural damage can occur even in low-magnitude quakes, with about 30% of buildings experiencing some form of damage after a magnitude 5.0 quake. It’s crucial to assess both the interior and exterior of homes for any hazards that could pose risks to safety or indicate more severe structural issues.
What resources or guidelines are available for conducting a thorough safety assessment?
Resources for conducting a thorough safety assessment after an earthquake include the FEMA guidelines, specifically their “Earthquake Safety Checklist,” as well as the American Society of Civil Engineers’ (ASCE) standards for evaluating structural integrity. Additionally, the National Institute of Standards and Technology (NIST) provides comprehensive resources that outline immediate response procedures. According to FEMA, following a major earthquake, up to 60% of buildings may sustain some form of damage, making these resources critical for ensuring prompt action and enhancing safety in affected areas.
How can homeowners prepare for potential assessments after an earthquake?
Homeowners can prepare for potential assessments after an earthquake by creating a detailed emergency plan, conducting regular safety drills, and maintaining a well-stocked emergency kit. It’s essential to familiarize themselves with their home’s layout and identify potential hazards. According to the Federal Emergency Management Agency (FEMA), nearly 40% of small businesses never reopen after a disaster, underscoring the importance of preparedness in minimizing damage and ensuring safety. Additionally, keeping an updated inventory of home contents can expedite insurance claims and recovery efforts post-earthquake.
What specific steps should be taken during a post-earthquake safety assessment?
During a post-earthquake safety assessment, the specific steps include ensuring personal safety by avoiding damaged structures, checking for injuries and administering first aid if necessary, securing utilities to prevent fires or gas leaks, conducting a thorough inspection of buildings for structural integrity using a checklist that includes looking for cracks or leaning walls, and documenting the damage for emergency services. According to FEMA, more than 50% of injuries in earthquakes are caused by people moving debris or entering unsafe buildings; thus, prioritizing safety and proper assessment can significantly reduce risks.