When disaster strikes, whether it’s a burst pipe or a storm that damages your roof, the last thing you want to deal with is a complicated insurance claims process. You might think all you need is your insurance policy and hope for the best, but without proper property documentation, claiming what you’re owed can quickly become a daunting task. Take it from someone who’s navigated this tricky terrain; having a solid plan for documenting your belongings will make all the difference when you need to file a claim. By approaching the documentation of your property as an ongoing process—rather than a one-time chore—you set yourself up for success, ensuring that when troubles arise, you’re ready to tackle them head-on with clarity and confidence. This guide will walk you through every step of effectively preparing your property documentation for insurance claims, so let’s dive in!
Property documentation for insurance claims involves collecting and maintaining records of your property’s value and condition to support claims after a loss or damage occurs. It is crucial because thorough documentation can prevent disputes with insurers and ensure that you receive the full coverage you are entitled to during the claims process.
Preparing Your Property Documentation
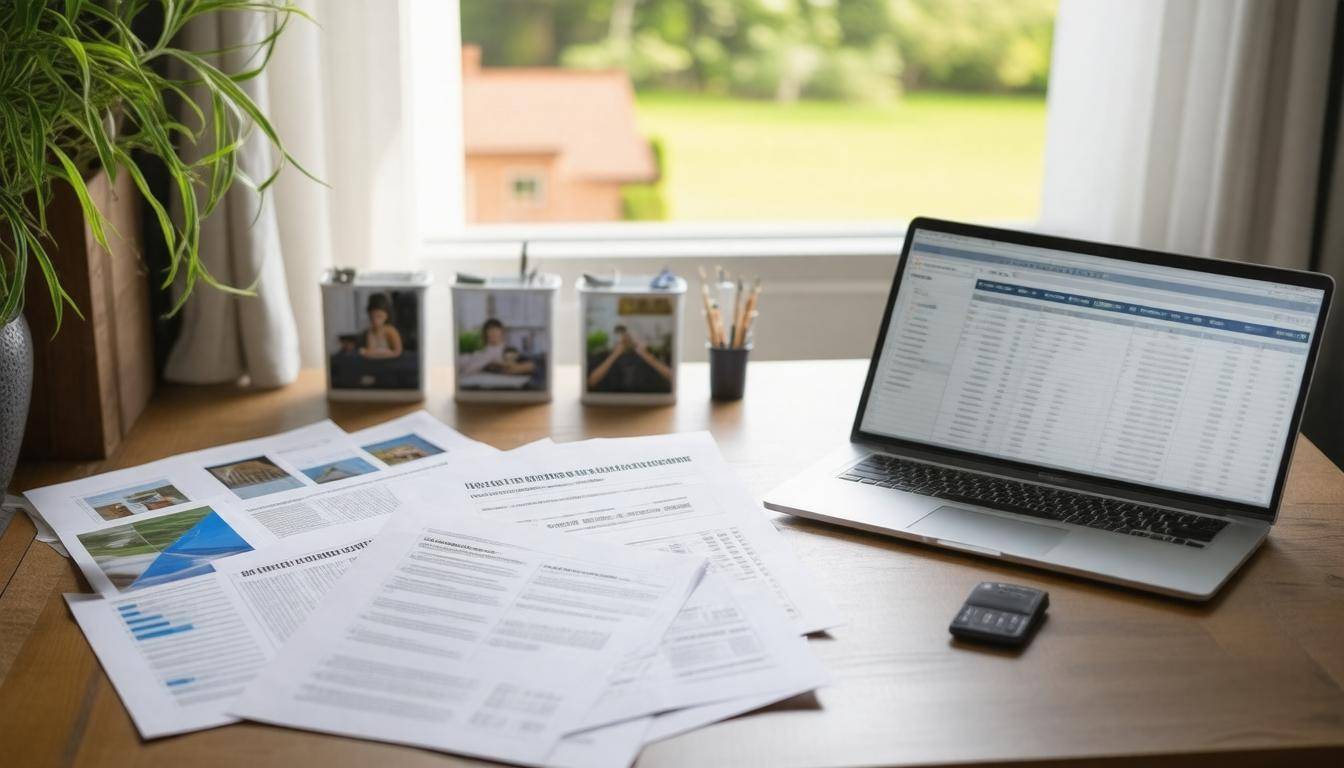
A well-prepared inventory can be your greatest ally when it comes to navigating the claims process. Begin by creating an extensive inventory list of every item in your home. This isn’t as daunting as it may sound; think of it like hosting a scavenger hunt in your own living space.
Start room by room—list items such as electronics, furniture, and kitchen appliances, paying special attention to those that hold significant value. Using a spreadsheet not only keeps everything organized but also allows you to categorize items efficiently. You might be surprised to discover how much you own once you start this exercise!
Once you’ve established your inventory, the next natural step is to collect receipts and purchase records. These documents serve as tangible proof of ownership and provide essential evidence of each item’s value. High-value items like your appliances or jewelry represent significant investments. If original receipts are lost, don’t worry! Bank statements indicating the date and amount of purchases can also suffice. It’s all about compiling as much information as possible to substantiate your claims.
With an organized inventory and receipts in hand, it’s now time to visually capture the story behind your belongings.
Documenting condition goes beyond just listing items—it’s about painting a clear picture of their state before any potential damage occurs. Take high-resolution photographs of each item, making sure to show distinguishing features and any wear and tear existing at the time. This visual evidence provides a solid baseline comparison should damage ever occur. Don’t forget to timestamp these photos; this detail can play a pivotal role in showing that your belongings were in good shape before any incident unraveled.
Thorough preparation lays the groundwork for efficient claims processing down the line. A cohesive documentation strategy acts not only as protection but also as peace of mind when facing unexpected events. By investing time now to document your property meticulously, you are significantly enhancing your chances of a smooth recovery should disaster strike.
As we transition into discussing the critical role that visual documentation plays in fortifying your claims, it’s evident that capturing every angle becomes vital in advocating for your interests during unexpected circumstances.
Importance of Photos and Videos
Visual evidence plays a pivotal role in substantiating your claims. Photos serve as irrefutable proof of your property’s state before and after any damage occurs. An image can capture the current condition of your property in extensive detail, highlighting unique architectural features or valuable antiques that could be easily overlooked.
For instance, if a sudden storm damages your roof, clear photographic evidence taken before the incident will help depict the roof’s original condition, supporting your claim of loss or damage. The stark contrast between pre-damage and post-damage photographs often reinforces your position with insurers.
Why Photos Matter
When you’re snapping pictures for an insurance claim, every little detail matters. Document not only large visible damage but also hidden aspects—like water stains behind furniture or cracks in walls that might develop over time. Detailed close-ups illustrate the extent of the damage; these subtle indicators can make all the difference when claims adjusters evaluate your case.
Having photographs from various angles allows for a more comprehensive understanding of the space, which is favored by claims adjusters seeking clarity.
Best Practices for Photos
To ensure effective documentation, take clear, high-resolution photos of each room and any high-value items. Good lighting is crucial; natural light offers true representation without harsh shadows or glares that distort reality. Taking multiple angles helps provide a holistic view of the property.
I highly recommend using timestamps on your photos—this feature is easily accessible on most digital cameras and smartphones and acts as verification for when they were taken. It adds credibility to the timeline of events surrounding your claim.
The Power of Videos
In many cases, videos offer even more depth than static images by showing the flow and connectivity of spaces within your home. A walkthrough video captures a room’s entirety in motion, making it easier to understand how each space interacts with the others. By verbally describing what you see while recording, you document physical conditions and articulate concerns more clearly to the insurer later on.
This added context can be incredibly beneficial during discussions with claims adjusters since they can visualize the impact of damage rather than simply reading a report.
Transitioning from visual evidence, it’s equally important to grasp the intricacies of your coverage to ensure you’re well-prepared for any potential claims.
Understanding Your Insurance Policy
A thorough grasp of your insurance policy goes beyond merely signing on the dotted line; it’s about setting realistic expectations and knowing precisely what protection you’re entitled to. For instance, imagine facing a natural disaster and discovering, much too late, that your policy does not cover specific events or has insufficient coverage limits. This situation can easily turn into a financial nightmare.
Key Components to Know
-
Coverage Limits: Knowing the maximum payout for different types of claims is essential. This figure dictates what you can receive in the event of a loss. You should be sure to ask yourself whether these limits match the value of your property or possessions.
-
Exclusions: Every policy comes with exclusions, which describe situations where coverage won’t apply. Common exclusions may include damage due to neglect, or normal wear and tear. It’s important to read this section carefully because it could save you from frustration down the line when making a claim.
-
Deductibles: This is the amount you must cover out-of-pocket before your insurer kicks in to help with costs. Understanding how high or low this amount is will greatly impact your finances after filing a claim.
Given this complexity, it’s wise to reach out for personalized guidance. An agent can explain intricate details, clarify confusing jargon, and help navigate through any grey areas in your policy.
Regularly review your policy with your insurance agent – not just when disaster looms but as an annual practice – to ensure you understand shifts in coverage or changes in your needs. This proactive approach can provide peace of mind and reinforce your understanding of exactly what help is available when you need it most.
With a solid understanding of your insurance policy, we can now explore how to gather the necessary documentation for claims effectively.
Gathering Proof and Evidence
When filing an insurance claim, proof and evidence serve as the backbone of your case. Without them, your claim may suffer delays or denials, leaving you frustrated at a time when clarity is critical.
Imagine losing valuable possessions in a fire; subsequently proving their existence and value will pave a smoother path through the claims process. Failing to gather solid documentation could jeopardize your chances of receiving the compensation you deserve.
Step 1 – Collect Recent Bills
One of the first steps in documenting your property is to compile recent utility bills, mortgage statements, and property tax assessments. These documents not only confirm your residence but also provide insight into the property’s current value. Collecting this paperwork early on can establish a clear picture of ownership and ensure that you’re on solid ground when it comes to demonstrating monetary worth.
I remember a friend who was meticulous about saving these records; during a brief home leak incident, he was quickly able to demonstrate his property’s value using those very documents whenever necessary.
Step 2 – Secure Expert Evaluations
For items that carry significant worth—think antiques or high-end electronics—securing professional appraisals can be invaluable. An independent evaluation adds credibility to your claim, as insurers often view expert opinions favorably. If you have art pieces or collections, consider consulting with certified appraisers who can establish current market values.
I once had a colleague who inherited some family heirlooms; by investing in proper evaluations upfront, he was amazed at how much easier it was to manage claims should anything happen to these precious items.
Step 3 – Save Communication Records
Maintaining records of all communications with your insurer is equally important. Emails, written correspondence, and notes from phone conversations will form a complete paper trail that can prove vital if disputes arise later on.
By an accident at my workplace, I once observed how crucial these records were when an employee experienced issues with their claims process; they had meticulously documented every interaction and were finally able to resolve the issue promptly. A simple folder dedicated to this correspondence can save you from potential headaches down the line.
Prioritizing the collection of proof and evidence not only reinforces your claim but also creates a comprehensive profile of your property that serves you well in any future discussions. With this groundwork laid out, we now shift our focus to how effectively organizing your documentation can further streamline the claims process.
Organizing Your Records

An organized submission can speed up the claim process significantly, making it essential to have a structured approach to managing your documentation.
Begin by considering the format of your records. Both digital and physical methods have their pros and cons. For instance, digital storage solutions like Google Drive or Dropbox allow you easy access from anywhere and offer protection against loss due to disasters. On the other hand, physical records, securely kept in waterproof folders or fireproof safes, can serve as invaluable backups in case of technology failures. Thus, utilizing a combination of both methods often provides the best security.
Digital vs. Physical Records
When weighing digital versus physical records, think of convenience and durability. Digital records can be easily updated and shared with your insurance adjuster remotely, while physical documents might offer peace of mind for those who prefer tangible backups. Just ensure that whatever system you choose remains accessible yet secure—consider encrypting sensitive information if you opt for digital spaces.
After settling on your record-keeping method, you can dive into the actual steps involved in organizing these essential documents.
Step-by-step Organizing
Start by categorizing your documents by type. This includes separating photos of damages, receipts for valuable items, inventory lists detailing property contents, and any correspondence with your insurer. By having everything sorted from the beginning, you’ll save time later when you need to retrieve specific documents during the claim process.
Notably, creating a timeline can also enhance clarity. Arrange documents in chronological order to map out the history of your property and any relevant incidents leading to the claim. This could be as simple as creating a timeline document or using stored photographs that visually represent changes and events over time.
Navigating through organized records should be intuitive—this is where labeling becomes vital. Use clearly marked labels or tabs to define sections, enabling both you and the claims adjuster to quickly find necessary information without digging through piles of paperwork. A well-organized submission ultimately reflects thorough preparation and can significantly impact how efficiently your claim is processed.
Now that you’ve organized your records effectively, it’s time to explore the steps needed to present your claim to the insurance company.
Submitting Your Claim

The actual submission of your claim requires precision and attention to detail. One misstep can turn a straightforward situation into a frustrating delay. The first crucial step is filling out the claim forms correctly; it may seem mundane, but getting this right is essential. Ensure that every section of the form is completed thoroughly and accurately, as missing information can significantly slow down the entire process. Think of it as laying a solid foundation—you wouldn’t build a house on shaky ground, would you? In fact, I once heard of a homeowner whose claim was delayed for weeks due to a single omitted digit in their phone number!
Once you’ve filled out the claim form to the best of your ability, it’s time to attach all necessary documentation. This includes your inventory list, photographs showcasing damages, receipts that serve as proof of ownership and value, and any other required proof of loss forms. The accuracy and thoroughness of these attachments will bolster your claim’s validity. For instance, having dated photographs can dramatically support your case—that timestamp tells the story of when damage occurred.
| Required Document | Status |
|---|---|
| Completed Claim Form | [ ] |
| Inventory List | [ ] |
| Photos and Videos | [ ] |
| Receipts/Purchase Records | [ ] |
| Proof of Loss Form | [ ] |
| Communication Records | [ ] |
As you prepare this checklist, ensure every item is marked off before you submit. Missing documents can stall your claim or leave room for misunderstandings with the insurer.
The next important step is to submit your claim using the method recommended by your insurance provider—be it online through their portal, mailing the documents, or even delivering them in person. Each method has its advantages; online submissions may offer quicker processing times, while personal delivery might provide immediate confirmation. Regardless of the approach taken, always confirm receipt! You can do this by requesting a tracking number for mailed claims or a confirmation email for online submissions. This way, you safeguard yourself against any potential mishaps where claims may be misplaced.
By following these steps meticulously and proactively communicating with your insurer throughout the process, you’re setting yourself up for success in fluidly navigating through what can often be a daunting task. As you engage further with your insurance provider, understanding how to effectively interact with their representatives will be an invaluable advantage.
Interacting with the Insurance Adjuster
Your interaction with the adjuster can significantly affect the outcome of your claim. Think of this person as a key player in your insurance journey; they are responsible for evaluating your claim and determining its validity. Proper preparation and response during each phase of this interaction can ensure you receive fair compensation.
Before the Adjuster Visit
Preparation is paramount. Before the adjuster’s visit, gather a copy of all submitted documents and keep them at hand. This includes your original claim submission, inventory lists, high-quality photos of damaged property, and any correspondence you’ve had with your insurer so far. These materials can be incredibly useful if the adjuster has questions or needs specific clarifications about what you’ve reported. It’s like having a safety net; when unexpected questions arise, you won’t be left scrambling for answers.
Organizing your documents is just the first step, however; it sets the stage for how your meeting will unfold.
During the Visit
When the adjuster arrives, conduct a walkthrough of the property together. This is an opportunity for you to point out damaged areas while remaining factual rather than emotional. While it might be tempting to express frustration over the losses you’ve experienced, focus instead on calmly detailing each damage point and relating it back to your documentation. For instance, if you lost an expensive piece of artwork in a fire, show them where it was located and provide proof of its value—such as receipts or appraisals—to substantiate your claim effectively.
Remember that clarity and transparency go a long way in establishing trust with the adjuster. When they feel confident that you have accurately documented everything, they’re more likely to advocate on your behalf within their evaluation process.
After the visit wraps up, it’s not time to let go entirely.
After the Visit
Following up with the adjuster is equally important as preparing for their visit. After they leave, don’t just sit idly by; reach out to clarify any outstanding questions they may have regarding your claim. This not only shows that you’re engaged but also helps ensure that nothing falls through the cracks during processing. A simple email or phone call can reaffirm that both sides are aligned on what has been discussed and further streamline the workflow.
According to industry insights, claims are often delayed due to lack of follow-up communication from policyholders. Staying proactive in this phase can significantly speed up your claim processing.
With these strategies in place, you set yourself up for a more efficient claims process, but there’s still much more to consider once the dust settles from an initial claim interaction.
Post-Claim Activities
Once your insurance claim is settled, there are several critical post-claim activities that you must address. These steps help you maintain an organized approach and ensure you are protected in the future.
The first thing to do is to confirm receipt of your settlement. It may sound straightforward, but it’s essential to verify that the funds agreed upon have indeed made their way into your hands. If you haven’t received the payment yet, reach out to your insurance company for clarification on when and how your payment will arrive.
After ensuring that everything regarding the financial settlement is squared away, it leads us to another significant action: keeping your records up to date.
Regularly updating your property inventory is crucial, especially after a claim. This involves documenting any significant purchases or improvements made to your property. When I had a major water damage incident in my home, I learned firsthand how vital this step is. Immediately after the process, I made it a habit to keep a running list of valuables and important items, noting down their replacement cost and attaching receipts when possible. This proactive approach not only helps streamline any future claims but also gives you peace of mind knowing that your records are current.
As you navigate through these administrative tasks, there’s an important aspect many overlook: reviewing your insurance coverage.
Receiving a settlement can be an eye-opener; it might reveal gaps or shortcomings in your existing policy that weren’t apparent before. Post-claim is an excellent time to assess whether your current insurance coverage adequately protects you against potential risks. For instance, if you found during your recent experience that specific belongings were underinsured or overlooked altogether, now is the perfect opportunity to enhance those areas in your policy.
Remember, life changes and so does your property’s value—seasonal changes, renovations, or even acquiring new possessions! By being proactive about assessing and adjusting your coverage based on experiences from recent claims, you’ll position yourself better for any future incidents.
Taking these post-claim activities seriously will not only help solidify your current situation but also prepare you for whatever life throws at you next. Each step builds on the last, ensuring you’re informed and ready for the future while making claims processes much smoother should they recur.
By remaining diligent with these efforts, you greatly enhance your protection and readiness for unexpected situations that may arise.
How often should homeowners update their property documentation to reflect changes in value or condition?
Homeowners should update their property documentation at least annually, or immediately after significant changes such as renovations, new acquisitions, or market fluctuations. According to a survey by the Insurance Information Institute, 60% of homeowners underestimate their home’s value, which can impact insurance coverage and claims. Regular updates ensure that the insured amount reflects current market conditions and helps in avoiding underinsurance, ultimately providing better protection and peace of mind.
What role do photographs and videos play in property documentation for insurance claims?
Photographs and videos play a crucial role in property documentation for insurance claims by providing visual evidence of the property’s condition before and after damage occurs. They help substantiate claims, making it easier for insurance adjusters to assess damages accurately. According to a study, claims supported by detailed photographic evidence are processed 30% faster than those without, reinforcing the importance of thorough documentation in expediting the claims process and ensuring fair compensation.
Are there any common mistakes to avoid when preparing property documentation for an insurance claim?
Yes, common mistakes to avoid include failing to document damages thoroughly, neglecting to keep copies of all submitted documents, and not adhering to deadlines for claims submission. Approximately 60% of claim denials are related to insufficient documentation or inconsistencies in the information provided. To prevent these issues, it’s essential to take clear photographs of damages, maintain organized records, and understand your policy’s requirements and timelines.
How can individuals effectively document their property for insurance purposes?
Individuals can effectively document their property for insurance purposes by maintaining a detailed inventory that includes photos, receipts, and descriptions of valuable items. According to the Insurance Information Institute, 30% of homeowners do not keep an inventory of their belongings, which can complicate claims. Regular updates to this inventory, especially after significant purchases or renovations, and using apps designed for home inventory can streamline the process and ensure accurate claims when needed.
What specific types of documents should be gathered for a successful insurance claim?
To ensure a successful insurance claim, it’s crucial to gather specific types of documents including your insurance policy, proof of ownership (like receipts or warranties), detailed photos of the damaged property, repair estimates, and any correspondence with your insurer. According to industry statistics, claims that are well-documented have a 40% higher chance of being accepted without delay, highlighting the importance of thorough documentation in speeding up the claims process.