
Rainwater collection might sound like a simple idea, but it holds a powerful potential that can transform the way we see water use, especially in emergencies. Think about it: tapping into nature’s own resource not only helps save money on water bills but also ensures you have a reliable supply when municipal sources run dry. When I first set out to create my own rainwater harvesting system, I didn’t realize just how rewarding and necessary it could be. After spending time researching and installing my setup, I found peace of mind knowing I was prepared for those unexpected moments when clean water becomes scarce. It turns out that every drop counts, and being proactive about this resource can truly make a difference in our lives—so let’s dive into how you can build your own effective rainwater collection system.
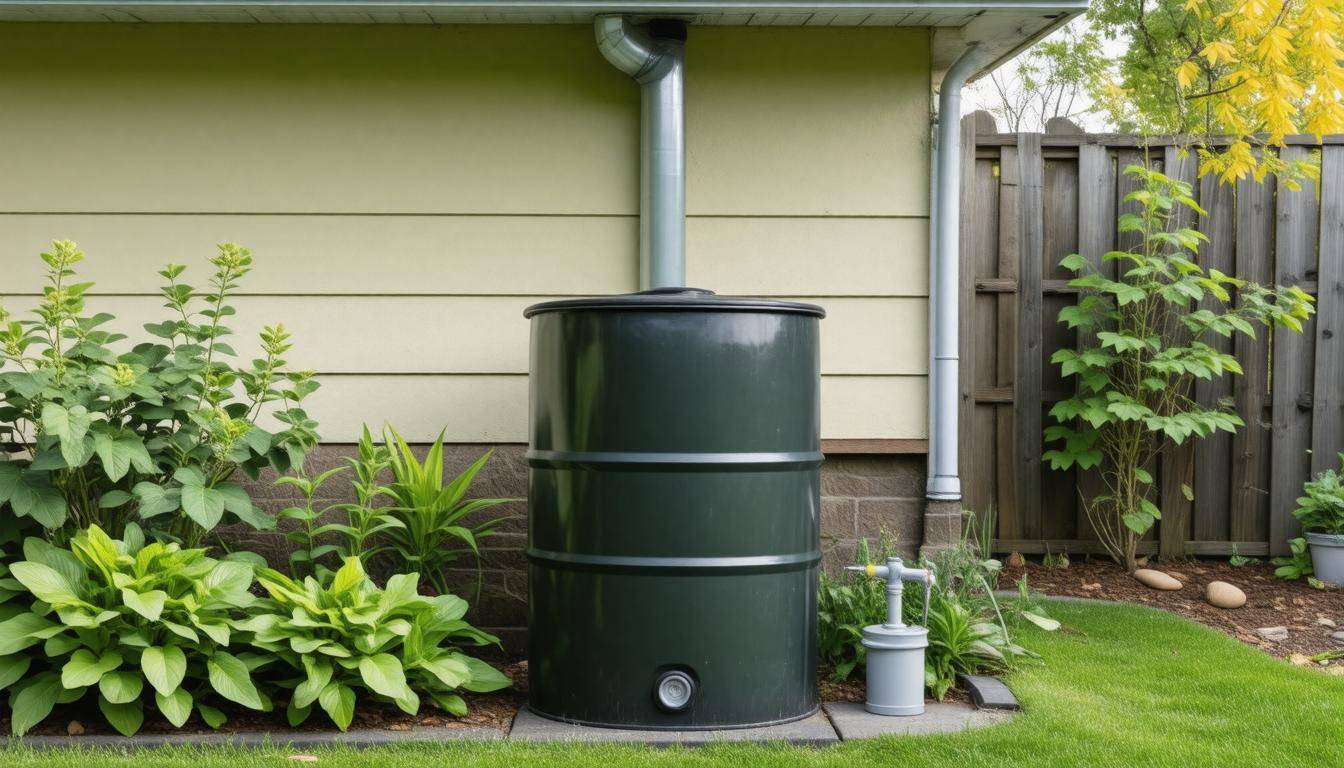
To set up a rainwater collection system for emergency use, start by installing a clean roof with appropriate gutters that direct water into storage tanks. Incorporate essential components such as a first flush diverter to prevent initial contaminants from entering your tank, and ensure the tank is large enough to meet your expected water needs during emergencies. Regular maintenance checks are crucial for optimal performance and ensuring the collected water remains safe for use.
Essential Kits for Rainwater Collection
When you think about starting your rainwater collection journey, investing in a well-rounded kit is often the best first step. These kits streamline installation and ensure you receive all necessary components bundled together. Most kits will include essential elements like gutters, first flush diverters, and storage tanks tailored to meet the diverse needs of your property.
Basic Components
One standout element in any good rainwater collection system is the gutter system. Half-round gutters are a popular choice for many homeowners because they are self-cleaning and effective at reducing debris accumulation, which plays a crucial role in keeping your collected water clean.
Imagine having to climb that tall ladder multiple times just to clear out your gutters! By using half-round designs, you’ll spend less time worrying about clogs.
Next comes the first flush diverter—an important device that acts as the gatekeeper of your rainwater system. This device ensures that during the initial moments of rainfall, when contaminants like dirt and leaves wash off your roof, this “first flush” isn’t making its way into your pristine storage tank. It effectively cuts off this contaminated water, allowing only cleaner rainwater to be directed toward your tank.
Additionally, screen filters are essential for preventing larger debris from getting into your system. Keeping these screens clean is critical; otherwise, you risk clogging up the system and reducing the quality of collected water.
As someone who has enjoyed experimenting with various kits, I can easily recommend options like the RAIN CATCHER Ultimate Roof-Kit. Numerous users have shared their positive experiences with it, noting improvements in both efficiency and water quality. One pleased customer shared: “After setting up the RAIN CATCHER kit, I noticed an immediate difference in the quality of our stored rainwater. It’s been a lifesaver during water shortages.”
Choosing the right kit provides a strong foundation for your system; understanding how to configure it properly with your roof and downspouts becomes paramount for achieving optimal performance. As we proceed, we’ll explore vital techniques for effectively integrating these systems into your home setup.
Setting Up Your Roof and Downspouts
Preparing the Roof
Ensuring that your roof is suitable for rainwater harvesting is the first step in the process. It’s essential to use materials that won’t contaminate your water supply.
For instance, opting for clean, newly painted roofs is ideal; however, avoid lead-based paints or unsealed copper surfaces, as these can leach harmful substances into your collected water. Consider using metal or asphalt shingles, which are generally safer options for this purpose.
Additionally, a gentle slope can facilitate efficient water runoff, thus enhancing your collection efforts.
Once you’ve confirmed that your roof is appropriate for collecting rainwater, it’s crucial to focus on the design and positioning of your downspouts.
Installing Downspouts
Positioning the downspouts correctly can make all the difference when directing rainwater into your storage tanks or barrels. Make sure they are oversized—about 3×4 inches for larger roofs—to handle significant rainfall without clogging. An adequate slope is equally important; aim for at least a quarter-inch decline for every ten feet of gutter to ensure smooth flow.
Remember, a well-designed downspout not only moves water effectively but also mitigates the risk of overflow during heavy downpours.
Quick Tip: Extend your downspouts several feet away from the building to prevent water pooling near the foundation—a practice that protects both your home and offers a reliable source of collected water.
Moreover, installing gutter guards can keep larger debris out and further optimize your system.
Gutter Guards and Leaf Screens
Installing gutter guards and leaf screens is an effective way to significantly reduce maintenance needs while improving the functionality of your rainwater collection system. These additions serve as barriers that block leaves and other large debris from clogging your gutters and downspouts.
Regular cleaning might still be necessary but will require much less frequent attention compared to systems without guards or screens in place.
According to a study by the Environmental Protection Agency, homes with properly installed gutter guards see a 50% reduction in maintenance requirements.
With your roof and downspouts now optimally set up for better rainwater capture, it’s time to connect these components effectively to ensure seamless water collection into storage units.
Connecting to Collection Barrels or Tanks
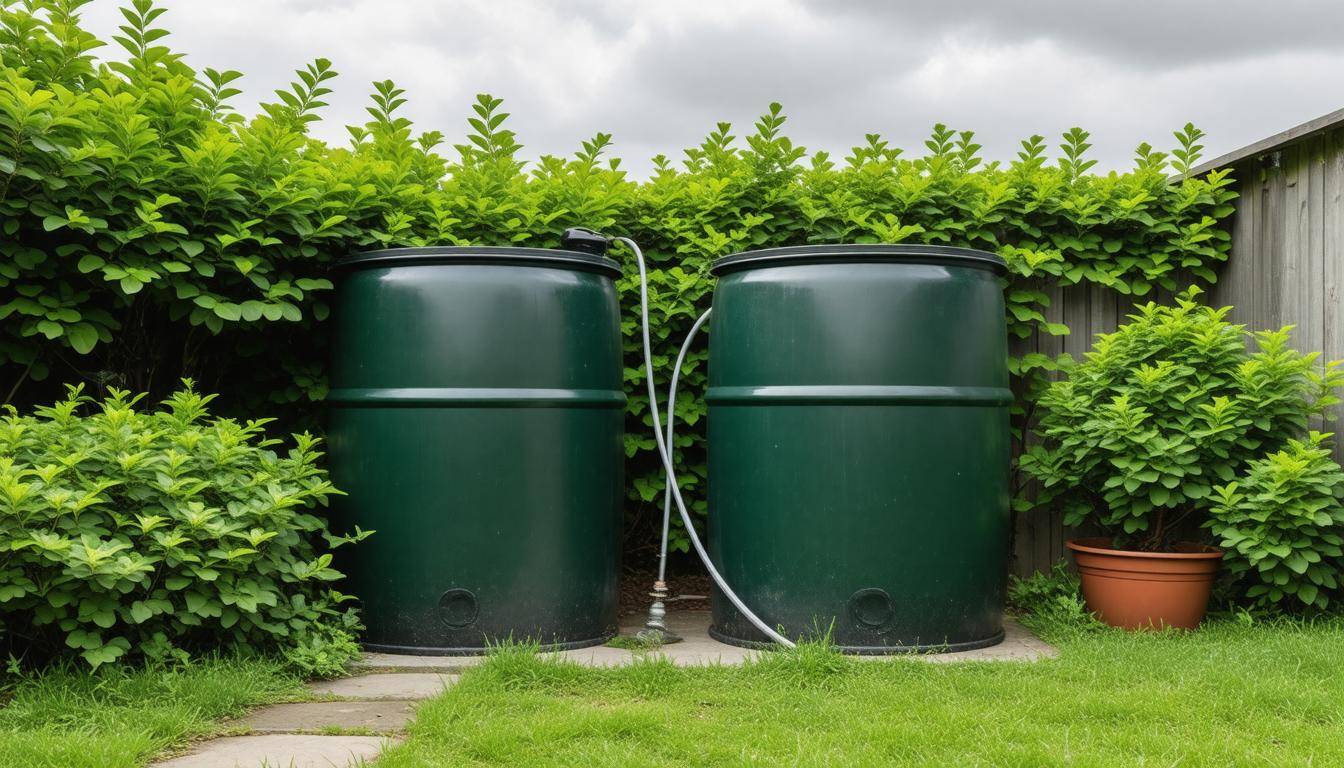
The process of connecting downspouts to your rainwater collection barrels or tanks should feel seamless and logical, yet it sets the foundation for a successful water harvesting system. Whether you’re using simple rain barrels or sophisticated tanks, each connection moves you closer to having a reliable source of water. One commonly used material is PVC piping, which offers both durability and ease of installation. When connected properly, these pipes can redirect rainfall directly from your gutter system into your storage solution.
Using Fasteners and Durable Pipes
While PVC pipes are often the go-to choice, it’s essential to invest in high-quality fasteners when connecting these components. Reliable fasteners not only hold the pipe securely in place but also contribute significantly to the longevity of your setup. As you establish these connections, ensure that every piece of the piping is adequately supported and secured. Consider utilizing joints that can be easily tightened and adjusted as needed, preventing unwanted movement that could lead to disconnections over time.
Secure Connections
Another crucial aspect to remember is maintaining watertight integrity at all junctions. Nobody wants to lose precious rainwater due to leaks. To fortify your setup, apply waterproof sealants around joints during assembly; this will significantly reduce the chances of any water escaping. Regularly checking these connections for leaks also cannot be overstated—what might seem like a small drip can turn into substantial water loss over time.
“Diligence in simple tasks often pays off richly in the long run.”
Beyond ensuring watertight connections, there are practical enhancements you can make to optimize your rainwater harvesting system further. For instance, installing tight-fitting lids on your collection barrels helps prevent evaporation and keeps contaminants at bay. Additionally, adding taps at the bottom of barrels will allow you easy access to stored water without needing to lift heavy containers each time you need some.
Managing Excess Water
As you connect your collection system, don’t forget about managing excess water during heavy rains:
-
Make sure overflow outlets are installed correctly; these will redirect excess water away from your home’s foundation and help prevent potential flooding.
-
Ensure that the outlets can accommodate large bursts of precipitation, directing it safely away without creating erosion issues.
Now that you’ve successfully connected your downspouts and incorporated smart features for easy access and overflow management, we turn our attention to effective strategies that will enhance the quality of the captured rainwater through optimal storage and filtration techniques.
Storing and Filtering Collected Rainwater
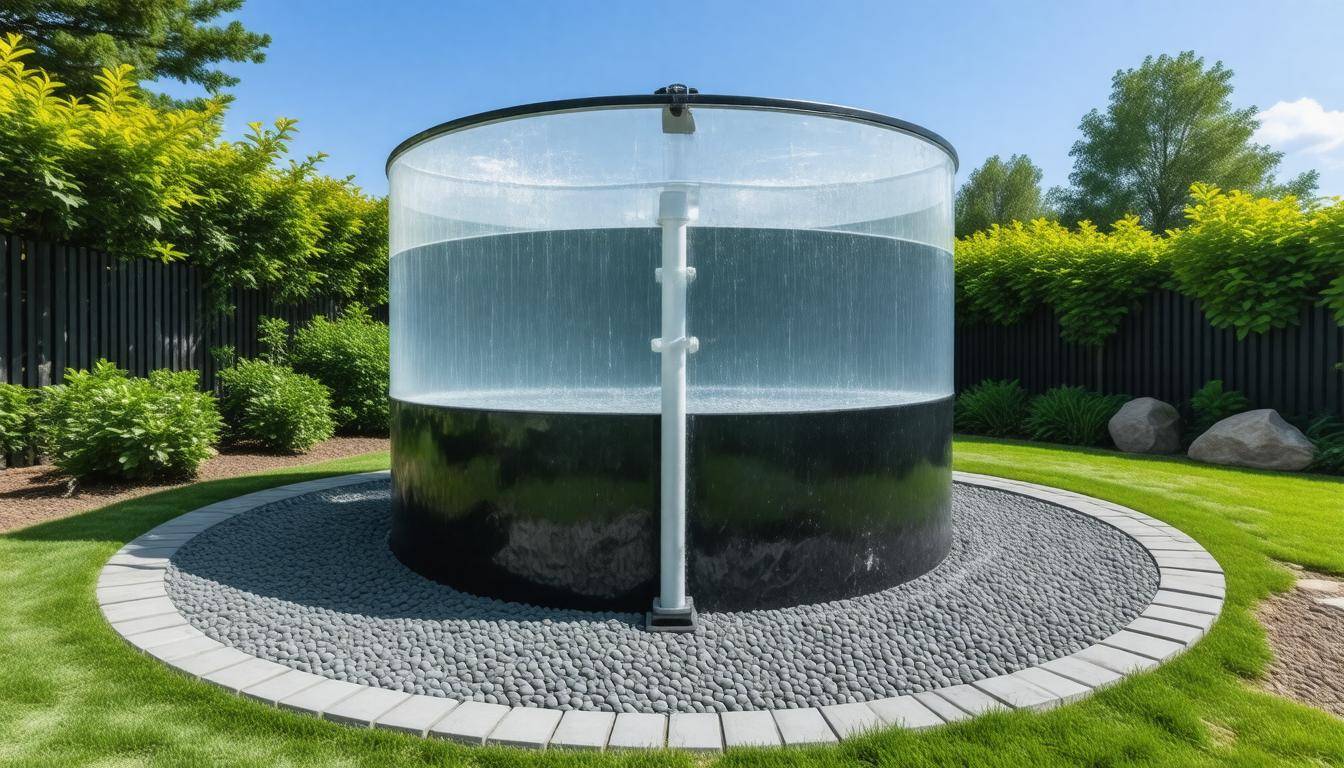
Proper storage techniques are essential for maintaining the quality of your collected rainwater. Storing this precious resource in dark, cool places is crucial because exposure to light can lead to algae growth, which can contaminate the water. For this reason, using opaque tanks rather than translucent ones is highly recommended.
Think of it as keeping leftovers in a sealed container—without that cover, things can spoil much faster than you might hope.
Now let’s talk about the right type of tank material. Polyethylene tanks are lightweight and UV-resistant, making them a popular choice for many homeowners. Fiberglass tanks are durable and resistant to corrosion but come at a higher price point. Concrete tanks, while heavyweight and necessary for long-term use, indeed require proper sealing to prevent leaks.
It’s like choosing a sturdy umbrella; different options serve different needs! The size of your tank should also be carefully considered; for a family of four, a minimum of 1,000 gallons is generally sufficient for emergency use. Larger systems (ranging from 2,500 to 5,000 gallons) offer even more capacity for extended emergencies or larger households.
Effective Filtration Systems
As water quality directly affects your health and that of your family, an effective filtration system is essential when collecting rainwater. Equip your system with a series of filters that work in tandem to ensure optimal quality.
- Sediment Filters: These filters play an important role by removing larger particles such as leaves and sand before they make their way into your storage tank.
- Activated Carbon Filters: Not only do these improve the taste of the water, but they also remove unpleasant odors that could linger from contaminants.
- UV Filters: When it comes to sterilizing water, UV filters are an excellent choice—they effectively neutralize bacteria and viruses, providing peace of mind regarding your water safety.
Ensuring water safety requires even more rigorous measures. Regular maintenance of these filters is crucial; replacing filters every 3 to 6 months ensures that your system remains efficient and effective against various contaminants.
When you think about it, taking simple steps like cleaning out gutters regularly or using first flush diverters during rainfall not only enhances the quality of your collected rainwater but also prolongs the life of your filtration system—saving you time and money in the long run. If those basic tactics seem overwhelming at first glance, remember: consistency goes a long way in creating a safe collection system!
As we continue on this journey towards ensuring safe drinking options from our valuable resources, we’ll examine key practices that bolster confidence in utilizing collected rainwater safely.
Ensuring Water Safety for Drinking
When it comes to rainwater collection, the ultimate goal is to enjoy what you harvest with utmost confidence. However, drinking rainwater isn’t as straightforward as just filling a cup from your tank. It’s essential to implement stringent purification methods that effectively eliminate harmful pathogens. After all, your health and safety are at stake!
Advanced Filtration Systems
To achieve the safest drinking water possible, consider adopting a layered approach to filtration. This starts with standard filtration, which typically involves removing larger particles and debris from the water. However, to go the extra mile in safeguarding your health, incorporate more advanced purification methods.
-
Boiling Water: This classic method is incredibly effective against a broad range of pathogens. Simply bring your collected rainwater to a rolling boil for at least one minute (or three minutes at higher altitudes). Not only does this kill bacteria and viruses, but it’s also effective against parasites. You might even think of it as nature’s simple yet powerful purifier.
-
Chlorination: Incorporating unscented chlorine bleach is another viable option. By adding precisely 8 drops of bleach per gallon of water, you can effectively purify the water without compromising its safety—just be mindful not to exceed this amount, as too much chlorine can introduce its own set of health risks.
-
Reverse Osmosis Systems: For those looking to ensure maximum purity, reverse osmosis systems present a sophisticated solution by filtering out contaminants down to their molecular level. This method improves safety and can significantly enhance the taste of your water.
According to the CDC, boiling water kills 99.9% of harmful pathogens—a reassuring statistic that underscores the importance of this method. Nevertheless, combining different purification approaches provides an extra layer of assurance that should not be underestimated.
Beyond these purification techniques, proactive strategies are necessary for maintaining your system’s efficiency and ensuring consistent safety in your drinking water supply as we explore ways to protect your setup over time.
Maintenance Tips for Longevity
Establishing a routine for maintaining your rainwater collection system will help avoid costly repairs in the future and ensure the system functions efficiently. The first step is to schedule inspections routinely. Aim to check your system at least quarterly, paying close attention to critical areas such as tanks, pipes, and filters. Look for any cracks in tanks as they can lead to leaks that compromise your entire system’s integrity. Ensuring that your pipes are free of blockages is equally important since clogs can impede water flow, which defeats the purpose of your collection efforts. Developing a checklist for these inspections can be particularly helpful; this way, nothing gets overlooked during each visit.
Scheduled Inspections
For those familiar with home maintenance, think of your rainwater system like the preventive care you do for your vehicle—regular checks can prevent bigger issues down the road. While you’re inspecting, also consider checking the connection points between pipes and tanks; loose fittings can create leaks that go unnoticed until they’ve caused significant water loss. Making it a household routine to inspect during months with heavy rainfall ensures you’ll catch potential problems early on.
Cleaning Routine
Moving on to cleaning, make sure to clean gutters and downspouts every 3 to 6 months. Leaves and debris can easily accumulate, and if left unattended, they can block water from flowing freely into your collection system. Regularly clear these areas not just as a chore but as a proactive step toward preserving the health of your entire setup.
Additionally, tank cleaning should not be overlooked—it’s wise to empty and scrub out your rainwater storage tank annually to prevent mold and algae growth. A mixture of vinegar and water often works wonders for this task, ensuring microorganisms have less chance to thrive.
“By performing regular maintenance, I’ve kept my rainwater system running smoothly for years without major issues,” notes a seasoned rainwater harvester.
This kind of testimony reinforces the importance of consistency in maintenance tasks. Furthermore, while you are cleaning the tank, take time to check filter screens or other barriers that keep sediment from contaminating your precious water supply. These should be checked monthly; a dirty filter can drastically reduce water quality and hamper your system’s performance.
With these maintenance tips in mind, you’ll be well on your way to ensuring that your system remains in top shape. Exploring further, let’s uncover how effective rainwater collection practices can offer numerous advantages beyond simple preparedness.
The Benefits of Rainwater Harvesting
Rainwater harvesting offers numerous advantages, transforming a simple collection system into a powerful tool for sustainability and self-sufficiency. One of the most significant impacts is environmental. By harnessing rainwater, households can dramatically reduce their dependency on municipal water supplies. This approach conserves precious freshwater resources and helps mitigate the pressure on increasingly strained water systems.
In drought-prone areas like California, where water scarcity has become a persistent issue, rainwater harvesting stands out as a viable solution to alleviate shortages and contribute to the ecosystem’s health.
Consider this: every inch of rain that falls on a 1,000 square foot roof can yield about 600 gallons of water. That’s an impressive amount that can be redirected for use in irrigation or other non-potable applications! It’s an opportunity to make a tangible impact right from your roof while nurturing your garden with natural, chemical-free water.
In addition to the environmental benefits, rainwater harvesting brings remarkable cost savings for households.
Utilizing collected rainwater can lead to a dramatic decrease in water utility bills. Many homeowners report reducing their consumption of tap water by over 50%, using harvested rainwater for irrigation, flushing toilets, and even washing clothes. Imagine the relief of seeing lower monthly bills while contributing to sustainability! Moreover, investments in a rainwater system tend to pay off quickly; in regions with varying annual rainfall patterns, systems designed correctly can yield thousands of gallons throughout the year.
The sense of self-sufficiency gained through a robust rainwater collection system is another noteworthy benefit. Homeowners gain peace of mind knowing they have access to emergency water provisions during unforeseen circumstances like severe storms or public water supply failures. This reliability fosters greater independence and confidence in facing disasters when traditional sources may be disrupted or unavailable.
To truly harness these advantages, understanding how to enhance operational efficiency is essential moving forward. Implementing effective practices ensures that your rainwater harvesting system remains productive and reliable for years to come.
Efficiency Tips for Prolonged Use
One effective way to maximize collection is by strategically positioning multiple barrels around different sections of your property. By doing this, you’re essentially leveraging various roof areas to catch rainwater, which significantly boosts your overall storage capacity. If one section of the roof experiences abundant runoff during a heavy downpour, those extra barrels will ensure that you’re not letting valuable water simply flow away.
Additionally, consider investing in overflow systems for your tanks. These mechanisms can channel excess water to other containers or even your garden during storms. Implementing these systems reduces waste and ensures that every drop is utilized effectively while alleviating stress on your main storage tank, preventing potential overflows.
Another simple yet impactful way to maintain efficiency is to install low-flow fixtures throughout your home. You might be surprised to know that low-flow showerheads and faucets can cut domestic water use by almost 50%. With this adjustment, you’re conserving water and extending the longevity of your stored rainwater supply.
| Product | Benefit | Cost Efficiency |
|---|---|---|
| Low-Flow Showerhead | Reduces water usage | $30 saves 2,900 gallons/year |
| Rain Barrel | Increases water storage | $100 saves utility costs |
| Smart Irrigation System | Automates water use | $200 saves 7,600 gallons/year |
Beyond installations, maintenance plays a crucial role in ensuring that your rainwater system remains at peak efficiency. Make it a habit to check and clean filters and gutters regularly—aim for every six months—as this can increase system efficiency by nearly 30%. Keeping these parts free from debris means better water quality and helps prevent clogs that could hinder operation.
By integrating these efficiency tips into your routine, you’ll not only optimize your rainwater harvesting system but create a sustainable resource that benefits both your household and the environment over time.
In taking these steps towards efficient rainwater collection, you position yourself not just as a user but as a proactive steward of resources. Your investment in such systems can lead to significant long-term savings and sustainability.
What maintenance practices should I follow to keep my rainwater collection system functioning properly?
To ensure your rainwater collection system functions properly, conduct regular maintenance practices such as cleaning gutters and downspouts every few months to prevent debris accumulation, inspecting and cleaning the filter screens to maintain water quality, and checking for leaks in pipes and storage tanks. It’s also advisable to flush the first flush diverter with each rainfall to remove contaminants. A well-maintained system can yield up to 50% more usable water compared to a neglected one, significantly enhancing efficiency during emergencies.
Are there any legal restrictions or regulations I should be aware of before collecting rainwater?
Yes, there can be legal restrictions and regulations regarding rainwater collection that vary by state or country. For example, in the United States, some states like Colorado have historically had strict laws requiring permits for rainwater harvesting, while others encourage it with minimal regulations. A 2020 report indicated that over 50% of U.S. states support rainwater collection with guidelines, reflecting a growing acceptance due to its environmental benefits. Before setting up a rainwater collection system, it’s important to check your local laws to ensure compliance and avoid potential fines.
What equipment and materials do I need to set up an effective rainwater collection system?
To set up an effective rainwater collection system, you’ll need essential equipment including a clean catchment area (like a roof), gutters to direct the water, downspouts for transport, storage tanks (preferably made of food-grade material), and a filter to ensure water quality. Supporting this setup with first-flush diverters prevents initial contaminants from entering your storage. Statistics show that a 1,000-square-foot roof can collect approximately 600 gallons of rainwater during a one-inch rainfall, making it a sustainable and resourceful option for emergency use.
How much rainwater can I realistically collect in my area, and how does this affect my emergency preparedness plan?
The amount of rainwater you can realistically collect depends on your local rainfall patterns and the size of your collection system. For instance, in areas receiving an average of 30 inches of rain per year, a 1,000 square foot roof could theoretically yield approximately 18,000 gallons of water annually if properly harvested. This collected rainwater can significantly enhance your emergency preparedness plan by providing a sustainable water source for drinking, irrigation, and sanitation during droughts or disruptions in municipal supplies, allowing you to remain self-sufficient when it matters most.
How do I ensure the collected rainwater is safe to drink during an emergency?
To ensure that collected rainwater is safe to drink during an emergency, you should first use a clean collection system, such as food-grade barrels or tanks, and make sure to cover them to prevent contamination from debris or animals. After collection, filter the water through a proper filtration system and consider treating it with UV light, boiling for at least one minute, or using water purification tablets. According to the World Health Organization, untreated rainwater can contain pathogens that pose health risks; hence effective treatment methods are critical before consumption.