
Natural disasters can turn our lives upside down in an instant, leaving us scrambling to find safety and shelter. After the chaos settles, the thought of returning home may feel daunting—like stepping into the unknown. Ensuring your safety during reentry is essential, but how do you navigate that uneasy transition from evacuation back to everyday life? Following a clear checklist can help you regain control and protect yourself against hidden hazards still lurking in the aftermath. As someone who has delved into these topics deeply, I understand the significance of structured guidance during such precarious moments. Let’s take a look at some vital steps for safely reentering your home after an emergency.
When returning home after an evacuation, it’s crucial to ensure your safety by following key measures such as awaiting official clearance from authorities, inspecting your property for hazards like weakened structures or gas leaks, and being vigilant about potential flash floods. Additionally, assess the safety of utilities like water and electricity before usage, and take precautions regarding food and water contamination risks.

Preparing for Reentry
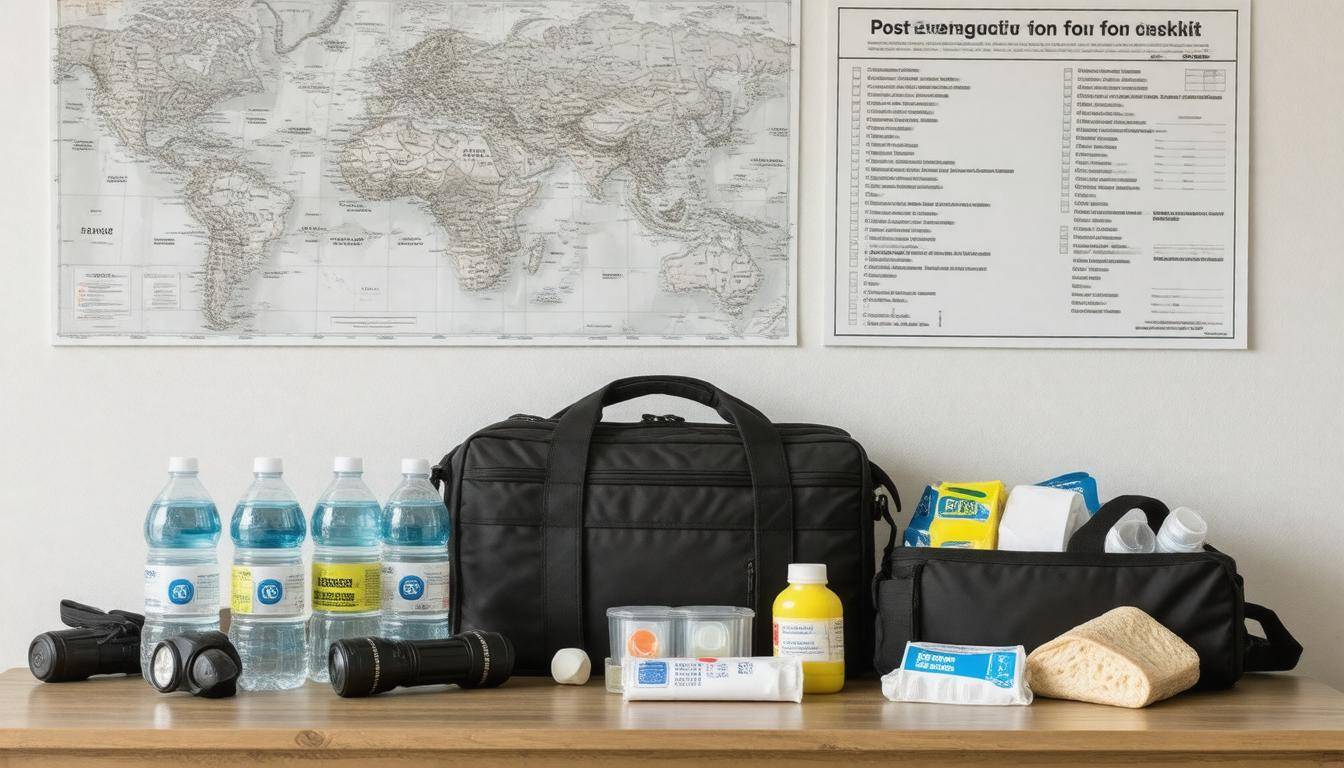
As you prepare to return home after an evacuation, gathering essential supplies is the first crucial step in ensuring your safety and comfort. The atmosphere may still be precarious; remnants of smoke might linger, or debris could pose hazards. Hence, equipping yourself properly not only aids in your immediate navigation but also provides peace of mind. Imagine walking into a space where you feel adequately prepared, instead of overwhelmed by uncertainties.
Here’s a breakdown of some must-have items:
-
Gloves and Masks: Protect yourself from ash and potential toxic fumes that could still be present.
-
Flashlight with Extra Batteries: Power may still be out, and a reliable light source is vital for visibility, especially in dark spaces filled with potential hazards.
-
Bottled Water and Snacks: After evacuation, it’s wise to have something to hydrate and sustain your energy during the return journey.
-
Camera or Smartphone for Documentation: Take photographs of any damage to your property for insurance claims or reporting purposes.
-
Notepad and Pen: Jotting down observations or important contacts can be invaluable as you navigate this challenging time.
A woman returning to her wildfire-devastated home in California found it invaluable to have a flashlight and a face mask to protect against lingering smoke and soot.
Now that you’re kitted out with the essentials, the next step is verifying safe reentry. Before setting out on your journey back home, it’s paramount to check with local authorities about the safety of returning. Whether through community bulletin boards or official websites, ensure you’re informed about things like road closures or specific hazard zones that could remain dangerous. Follow any guidelines they provide thoroughly.
Once confirmed that it is indeed safe to return, checking the immediate environment should become your next priority upon arrival. This mindfulness will help you quickly identify any remaining dangers, allowing you to focus on assessing any damages without anxiety about potential hazards lurking in your surroundings.
With safety measures firmly established, it’s essential to stay informed about any ongoing risks and remain coordinated with those guiding community recovery efforts.
Coordination with Authorities
Establishing communication with local, state, and even federal authorities can play an essential role in your safe return. Whether it’s after a wildfire, flood, or other disasters, the importance of receiving accurate information cannot be overstated. Staying updated on evacuation orders, safety reports, or active hazards helps ensure that you and your loved ones are adequately protected.
Stay Informed
One of the best practices is to keep a battery-powered radio handy. During emergencies, power outages are common, and relying solely on mobile devices may limit your access to crucial updates.
Alongside that, make sure your mobile device has plenty of charge. Websites and social media channels of local emergency services serve as invaluable resources for real-time information regarding the status of your area.
Remember to follow local authorities on social media for announcements—they often provide the quickest alerts regarding changing conditions.
Contact Local Officials
Take John’s experience after Hurricane Harvey as an example. By reaching out to his local city council shortly after the disaster struck, he was able to gain insights into potential hazards like contaminated water and gas leaks in his neighborhood.
This proactive approach not only kept him informed but also allowed him to make quick decisions to protect his family. Sharing experiences like John’s emphasizes that engaging local officials can illuminate issues you might overlook if only relying on media outlets.
Once you’ve coordinated effectively with various authorities, it’s essential to set the stage for ensuring your surroundings are safe before stepping back into your home.
Inspecting the Immediate Environment
The area surrounding your home can be fraught with unforeseen dangers that could pose serious risks if overlooked. As you approach your property, it’s essential to conduct a thorough inspection to identify potential hazards. Look around for downed power lines, which can carry lethal electricity, and make sure to maintain a safe distance until professionals handle the situation. Gas leaks are another pressing concern; if you smell gas or hear a hissing sound, evacuate immediately and alert local authorities.
In addition to checking for these immediate dangers, be vigilant about structural damage in the vicinity. Take note of any collapsed walls, buckling roofs, or fallen trees nearby. If you notice any signs of instability or damage, it’s wise to stay away from those areas until they can be assessed safely. As you’ve likely seen in reports, many unfortunate accidents stem from individuals ignoring such warnings after a disaster.
Always observe your surroundings carefully. A keen eye can mean the difference between safety and jeopardizing your well-being.
While assessing your immediate environment, it’s also important to look for signs of wildlife that may have sought shelter during your absence. As unlikely as it may sound, you might find creatures like raccoons or even snakes have made a temporary home on your property. Keep an eye out for either tracks in the mud or disturbances among your plants that could indicate their presence.
Once you’ve completed your visual assessment outside, it’s time to evaluate the condition of access paths leading to your home to ensure they are safe to traverse.
Make sure that walkways and driveways are stable and free from debris such as branches, rocks, or shattered glass that can create tripping hazards. If there are stairs leading into your dwelling, examine them closely for any visible cracks or instability that may suggest they are unsafe. Clearing a pathway not only makes entry easier but also prompts a quicker response in emergencies should you need to evacuate again.
This initial inspection phase is key to securing safety before entering your home. By taking the time to identify hazards outside and ensuring safe pathways lead up to its entrance, you’ll be preparing yourself for a more secure return. Following these recommendations will allow you peace of mind as you transition back into your living space amidst any lingering chaos caused by recent events.
With the area around your home secured and pathways evaluated, the next step will focus on assessing the condition of the building itself and the utilities connected within.
Checking Building Structure and Utilities
The integrity of your home’s structure and utility systems can significantly impact safety when returning after an evacuation. As you approach your home, take a moment to observe whether the foundation appears stable, if the walls are standing straight, and the roof seems intact. These elements are fundamental to your home’s overall safety.
Assess Structural Integrity
Before stepping inside, visually inspect key areas: start with the foundation for any obvious cracks or settling, which may suggest shifting or unstable ground beneath. Next, examine the walls—warped surfaces or noticeable bulges could indicate internal damage resulting from water intrusion. Pay particular attention to sagging ceilings as these could signal serious issues overhead.
If you feel unsure about what you’re seeing or suspect more severe problems, it’s better to err on the side of caution and call in a professional inspector. They have the expertise to identify hidden issues that may not be immediately apparent to the untrained eye.
After confirming that your home’s structure appears solid, turn your attention toward utility systems—after all, a safe space depends not just on strong walls but also functional utilities.
Utilities Check
Begin by using your senses: sniff around for any signs of gas leaks. If you detect a sulfur-like odor (often described as rotten eggs), it’s crucial not to ignore it; this could signal a dangerous situation that requires immediate action. Sound is another important indicator—listen for hissing sounds from gas lines or gurgling noises in water pipes, both of which can suggest leaks or blockages.
If there’s standing water nearby, never turn on electric switches or plug devices back in. Instead, unplug appliances to avoid electrical hazards within a wet environment. It’s best practice to consult with an electrician who can safely assess the situation without risking further complications.
As you complete these structural and utility checks, remember that accurate documentation plays a vital role in navigating repairs and insurance claims with efficiency. This use of thorough notes and photos will prepare you for subsequent discussions with professionals or insurance representatives.
Damage Assessment and Documentation

Thorough documentation is not just a bureaucratic task; it acts as your shield when navigating the complex post-disaster world—especially regarding insurance claims and repair planning. When faced with the aftermath of a disaster, meticulous documentation can mean the difference between receiving prompt assistance or grappling with delays. Taking the time to record every little detail can save you much heartache down the line.
Detailed Documentation
An effective strategy begins with capturing comprehensive photos and videos of every damaged area. Think about it this way: If you’re sitting at your kitchen table, with charred wood visible nearby, snap a photo that shows both the overall scene and close-ups of the affected materials. This visual evidence will serve as a robust reference for you and your insurance adjuster. Don’t overlook documenting serial numbers of pivotal electronics or appliances—these details can expedite the claims process by confirming their condition and ownership.
“Thorough documentation is essential for filing insurance claims and planning repairs,” said Jane from Florida, who experienced firsthand how meticulous details helped her streamline her claim after Hurricane Irma.
Additionally, creating a written list will be incredibly valuable. Note everything visible that has sustained damage along with descriptions of needed repairs—this will provide context that images alone cannot convey. For instance, detailing that “the roof shingles have holes” is more informative than a less specific note like “roof damaged.” This level of precision improves clarity when discussing matters with contractors or insurance personnel.
Beyond filing claims, documentation also aids in creating a cleaning and sanitization plan that directly addresses hazard mitigation while restoring your home.
Creating a Cleaning and Sanitization Plan
Having an accurate account of damages helps prioritize which areas need immediate attention and what kinds of cleaning efforts will suffice. For example, if you’ve identified water-soaked drywall among your damages, knowing the exact dimensions will guide your restoration plan effectively. Moreover, specifics like identifying items that are salvageable versus those that need disposal can help you manage resources wisely while ensuring health safety throughout the cleaning process.
Furthermore, when hazards such as mold or smoke residue emerge, understanding which areas were affected allows you to zero in on those spots during cleanup. For instance, if smoke permeated through specific rooms noted in your documentation, you should focus your initial cleaning efforts there first, which reduces potential airborne pollutants throughout your home.
By systematically assessing damages and thoroughly documenting each element, you set yourself up for effective management of cleanup processes that follow natural disasters. Let’s explore practical steps needed to make your space safe and enjoyable once more.
Cleaning and Sanitizing Your Home
It’s an unfortunate reality that after an emergency, your home may be littered with debris, dirt, and potentially hazardous materials. To ensure a safe return, start by addressing the basics. Before diving into a deep clean, it’s crucial to remove any debris and contaminated water from your space. Wearing protective gear—gloves, a mask, goggles—is essential to shield yourself from exposure to harmful substances and contaminants you might encounter.
While cleaning up can feel overwhelming, breaking it down into manageable steps can help you stay organized and focused on what needs to be tackled first.
Start with the Basics
Begin by thoroughly assessing each room. Move through your home methodically, starting from the entry point to avoid recontamination of previously cleaned areas.
Collect any loose debris like fallen branches or broken glass carefully; remember that safety comes first. If you find stagnant water, use a wet/dry vacuum or mop it up promptly. Stagnant water can harbor bacteria and lead to mold growth, which poses serious health risks.
After clearing out debris, the next logical step is to deep clean your living spaces.
Deep Clean and Disinfect
With surfaces cleared, it’s time to disinfect. Focus on areas prone to absorb moisture such as bathrooms and kitchens. A mixture of bleach and water works wonders—typically a ratio of one cup of bleach per gallon of water—but always check your local guidelines for safety measures regarding its use.
As you scrub surfaces such as countertops, cabinets, and floors, pay special attention to crevices where germs may linger.
Insider Tip: For fabrics like curtains or upholstered furniture that might have been exposed, if possible, launder them as soon as you can to prevent mold.
Another important area to concentrate on is ventilation systems; they often trap dirt and mold spores as air circulates through the house. Change filters immediately after cleansing the rest of your home – this helps maintain good air quality.
Involving the community is also vital during this process; sharing responsibilities among neighbors can speed up the recovery considerably.
One powerful example comes from flood-affected families in Missouri who banded together to sanitize their houses using a bleach solution. This collective effort dramatically reduced their homes’ risk of mold growth and subsequent damages significantly.
As you tackle each task systematically, remember: thoroughness now saves time later. Each surface sanitized contributes greatly towards restoring your home’s initial integrity post-disaster.
Having ensured your living space is safe and sanitary, turning your attention to protection measures will further fortify your home against potential future threats.
Securing Your Property from Further Damage
The immediate aftermath of any disaster can leave your property vulnerable not just to the elements but also to opportunistic damage or theft. To protect your home, taking proactive steps is vital. One of the first actions you can take is to assess the exterior of your property for any visible hazards that could cause further issues. For instance, check if there are any sagging branches from nearby trees that may fall in high winds or additional rain. It’s necessary to either remove these branches entirely or at least trim them back, just to ensure there are no added dangers.
Temporary Fixes
After the initial assessment, focus on implementing temporary fixes to safeguard your home effectively. A tried-and-true method involves using tarps effectively; they can offer a quick solution for covering gaps or holes in the roof, significantly reducing potential water damage during rains.
As you roll out those tarps, consider securing broken windows with plywood—this not only prevents the elements from getting inside but also discourages burglars by making it more challenging to gain entry.
And while we’re talking about securing things, it’s a good idea to gather up loose items scattered in your yard. These items can become dangerous flying debris during storms, so stashing them away is a smart move and keeps them safe.
Remember, every small effort counts in protecting what you’ve worked hard for.
Prevent Theft
Making sure your home isn’t just weather-proofed but also secured against theft is paramount. If there’s a chance your keys were lost during your evacuation, change the locks immediately; this step alone can greatly reduce the risk of unauthorized access.
Moreover, consider investing in temporary security cameras. It’s an extra layer of protection that can offer peace of mind while you work on longer-term solutions.
A family I know from North Carolina discovered this firsthand after they had secured their home with plywood after a hurricane. Despite their precautions, they still faced minor theft incidents. “It was demoralizing,” the mother shared when recounting their experience of finding their store of emergency supplies rifled through.
The game-changer came when they installed a set of temporary security cameras; not only did it deter further break-ins, but it also allowed them to monitor their property remotely. Their experience highlights how even simple measures can lead to significant benefits.
As we continue exploring ways to enhance home safety in the wake of disasters, understanding the proactive strategies we can implement will pave the way for improved preparedness when future emergencies strike.
Preparing for Future Evacuations
When thinking about evacuations, the importance of having a well-structured emergency plan cannot be overstated. If one evacuation has happened, the chances of another increase, particularly in areas prone to natural disasters. Finding ways to streamline preparation can lead to effective responses when seconds count.
To start off, let’s discuss creating an Emergency Kit.
Create an Emergency Kit
Your emergency kit should contain essentials such as:
-
Medications and vital documents: Include prescriptions, medical records, and any other crucial paperwork in waterproof containers.
-
Flashlights and batteries: Electricity may not be restored quickly, so have functional flashlights with extra batteries handy.
-
Non-perishable food and bottled water: Aim for at least three days’ worth of necessary supplies, considering dietary restrictions and preferences.
-
First-aid supplies: Stock up on band-aids, antiseptics, pain relievers, and any specific items that cater to your family’s needs.
Having a well-stocked emergency kit ensures that you won’t be scrambling at the last minute or wishing you had something crucial while you’re in transit. It’s also important that everyone in your household knows about the kit’s contents to hasten evacuation efforts during stressful times.
Have a Plan
Now let’s move onto establishing a communication plan that includes evacuation routes. Coordinate with your family and discuss multiple routes to nearby evacuation centers. Consider factors such as traffic patterns or potential hazards along these routes. Ensure everyone knows where to meet if you’re separated and how to communicate if cell service is compromised.
Building a robust plan ensures resilience for both you and your loved ones.
Discussing emergency scenarios might not seem exciting, but these conversations are pivotal during crises. Each family member should feel comfortable knowing their role in the plan—whether it’s gathering essential items or navigating through unfamiliar areas. This familiarity breeds confidence and prepares individuals mentally for an actual event.
Finally, remember that each of these steps is interconnected; preparing your kit aligns directly with establishing your plan. Following them methodically creates a structured approach to ensuring safety when it matters most.
Maintaining a proactive stance rather than a reactive one will significantly enhance your family’s safety during evacuations. Embracing preparedness transforms uncertainty into confidence for future emergencies.