
In times of crisis, having access to fresh and nutritious food can feel like a distant dream. Yet, what if I told you that with just a few simple seeds, some water, and a little patience, you could grow your own food right at home? Sprouting seeds is not only easy but also offers a quick way to add vital nutrients to your meals, especially when regular grocery shopping isn’t an option. I’ve explored this practical method of growing food, and trust me—it’s incredibly satisfying to watch tiny seeds transform into greens packed with vitamins and minerals. Let’s dive into the basics of sprouting, so you can ensure you’re well-prepared no matter what challenges come your way.
The “Sprouting Guide for Emergency Nutrition: How-To” offers step-by-step instructions on the various methods of seed sprouting, nutritional benefits of different sprouts, and tips for growing them efficiently in limited space. This guide ensures that you can cultivate nutrient-dense sprouts at home, which serve as a valuable food source during emergencies when access to fresh produce may be compromised.
Sprouting for Emergency Nutrition
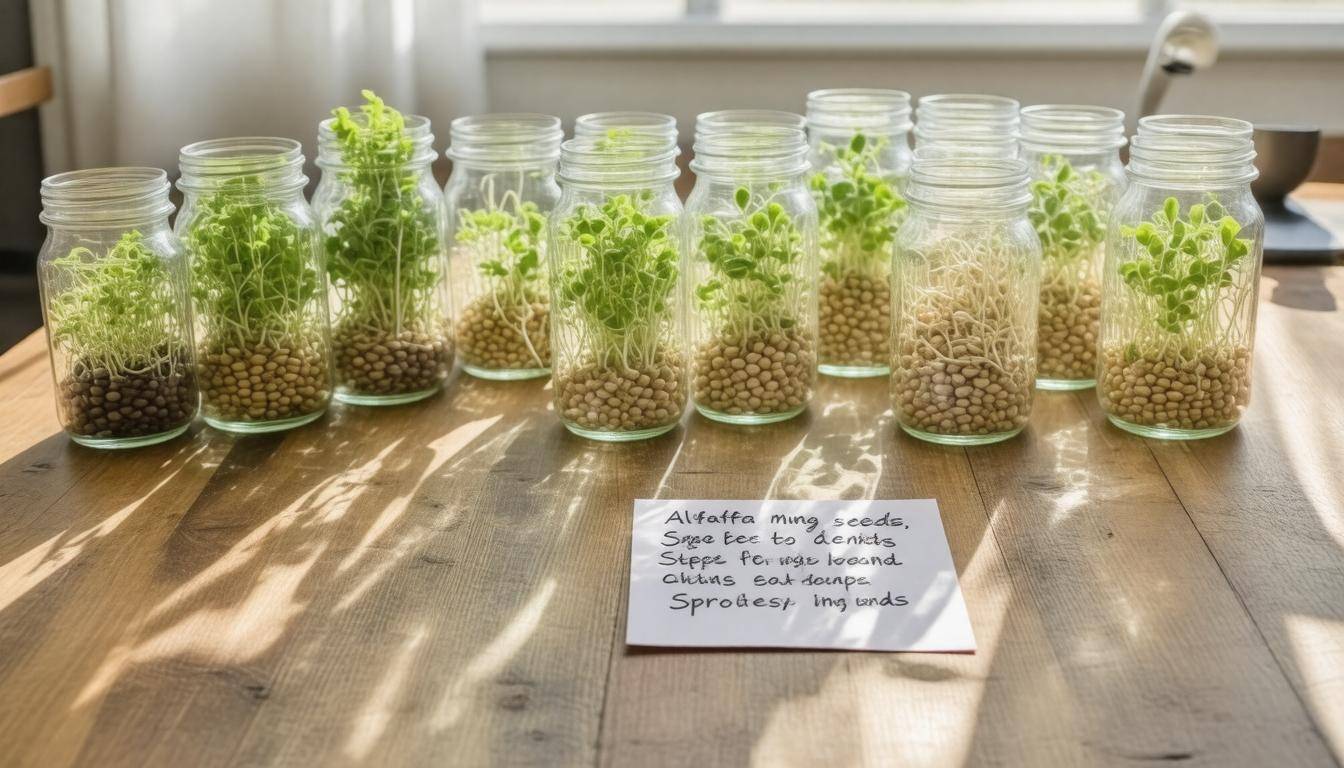
When it comes to sprouting, simplicity is the name of the game. All you need is a few basic items, and you’re on your way to cultivating a fresh source of nutrition right at home, even in challenging times.
First, ensure you have clean containers or jars with a lid or mesh cover — this allows air to circulate while keeping pests out. Mason jars are particularly popular because they are easy to clean and readily available.
Step II – Prepare Your Equipment
Next, rinse your seeds with cold water before placing them in your jar. This action not only cleans them but also preconditions the seeds, giving them a greater chance of sprouting effectively. After rinsing, place the seeds into your container and fill it with enough water to cover them fully. Leave them to soak for the recommended time — typically around 6-12 hours depending on the seed type.
The soaking step activates the seed’s hydration process, which is crucial for germination.
Once soaking is complete, it’s time to drain and rinse your seeds again.
Step III – Drain and Rinse
After soaking, thoroughly drain the water from the jar while ensuring only the seeds remain inside. Next, give them a good rinse under running water to eliminate any debris or contaminants that may hinder growth. This rinsing process can be repeated two to three times a day; this will help keep your seeds hydrated and prevent mold formation during their growth period.
Step IV – The Growing Process
Place your jar at an angle in a well-lit spot, such as a kitchen windowsill, where it can receive indirect sunlight. If natural light is insufficient due to weather conditions or location, consider using fluorescent grow lights; they are very effective in promoting healthy growth without overexposing the seedlings to harsh light.
Keep an eye on temperature; ideally, sprouts thrive best between 68°F and 75°F (20°C – 24°C). Extreme temperatures can inhibit growth.
As days pass by, you’ll notice little green shoots beginning to emerge.
Step V – Harvesting Your Sprouts
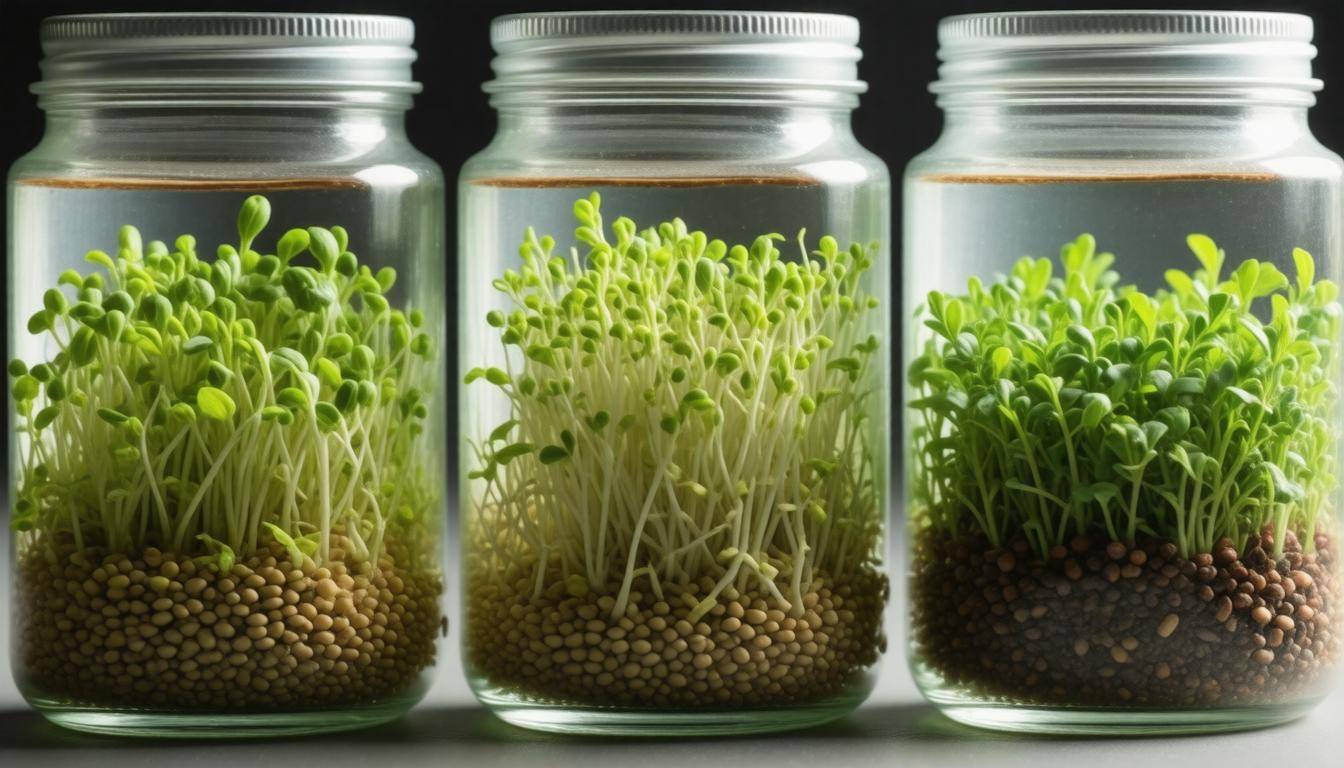
Usually, within just a few days, those tiny seeds will unfurl into respectable sprouts ready for harvesting—typically around five days for rapid-growing varieties like alfalfa and mung beans. When they reach about one to two inches in height and feature good leaf development, they’re ready for enjoyment! To harvest fresh sprouts, simply remove them from their container and give them another rinse under cool water.
It’s fascinating how something so small can become such a powerhouse of nutrients!
The Nutritional Impact
What makes these homegrown microgreens so vital? They’re incredibly nutrient-dense; packed with vitamins A, C, E, K as well as proteins and dietary fiber. These nutrients are not only essential during everyday life but become indispensable during emergencies when food supplies might run low.
Keep in mind: although sprouting requires some initial setup and care, producing your own nutrient-rich food source at home cannot be understated—especially when grocery access may be limited. Sprouted greens serve as an economic hedge against uncertainty while enriching your diet with fresh flavors tailored perfectly to meet survival needs.
Understanding these practical steps sets a solid foundation for grasping their pivotal role in maintaining nutrition during tough times.
Benefits of Sprouting in Emergencies
One of the most attractive aspects of sprouts, especially during emergencies or food shortages, is their extraordinary nutrient density. Packed with vitamins A, C, K, and various B vitamins, they also boast essential minerals like iron, magnesium, and zinc. This means that a handful of sprouts can provide significant health benefits without taking up much space or time in your diet. It’s akin to having a concentrated source of nutrition at your fingertips—a small investment for a big payoff in well-being.
Nutrient-rich sprouts act almost like tiny powerhouses, providing immediate boosts when traditional food sources may be limited.
In addition to being nutrient-dense, sprouts are remarkably easy to store. The seeds required for sprouting occupy minimal space and have a long shelf life—often lasting for years if kept in cool, dry conditions. This makes them ideal candidates for your emergency stockpile. Think about it: a simple jar of seeds can evolve into a substantial supply of fresh greens in just a week! It’s a strategic move that not only saves you space but also ensures you have a viable food source when access to fresh produce is compromised.
Beyond their efficient storage capabilities, the rapid growth of most sprouts is another key factor worth highlighting.
Most varieties are ready to eat within just 3-7 days after soaking—a remarkable turnaround time compared to traditional gardening methods. This quick turnaround allows you to establish a sustainable source of nutrition that keeps replenishing itself periodically. Imagine relying on garden produce that takes months to grow versus cultivating nutritious greens that sprout right before your eyes within a week! Not only does this instill a sense of accomplishment, but it also boosts morale during challenging times when every meal counts for its nutrition and flavor.
- For example, alfalfa sprouts contain up to 15% protein, which can significantly contribute to nutritional needs during shortages.
- Sunflower sprouts provide healthy fats and amino acids as well.
As I’ve learned through my experiences with sprouting, it’s about finding what works best for you while maximizing the potential these little plants offer. By embracing the art of sprouting, you’re creating a dynamic solution tailored perfectly for times of crisis that nourishes both body and spirit.
With this understanding of the nutritional power inherent in sprouts, let’s explore the seeds that offer the best benefits for survival and overall health.
Best Seeds for Survival and Nutrition
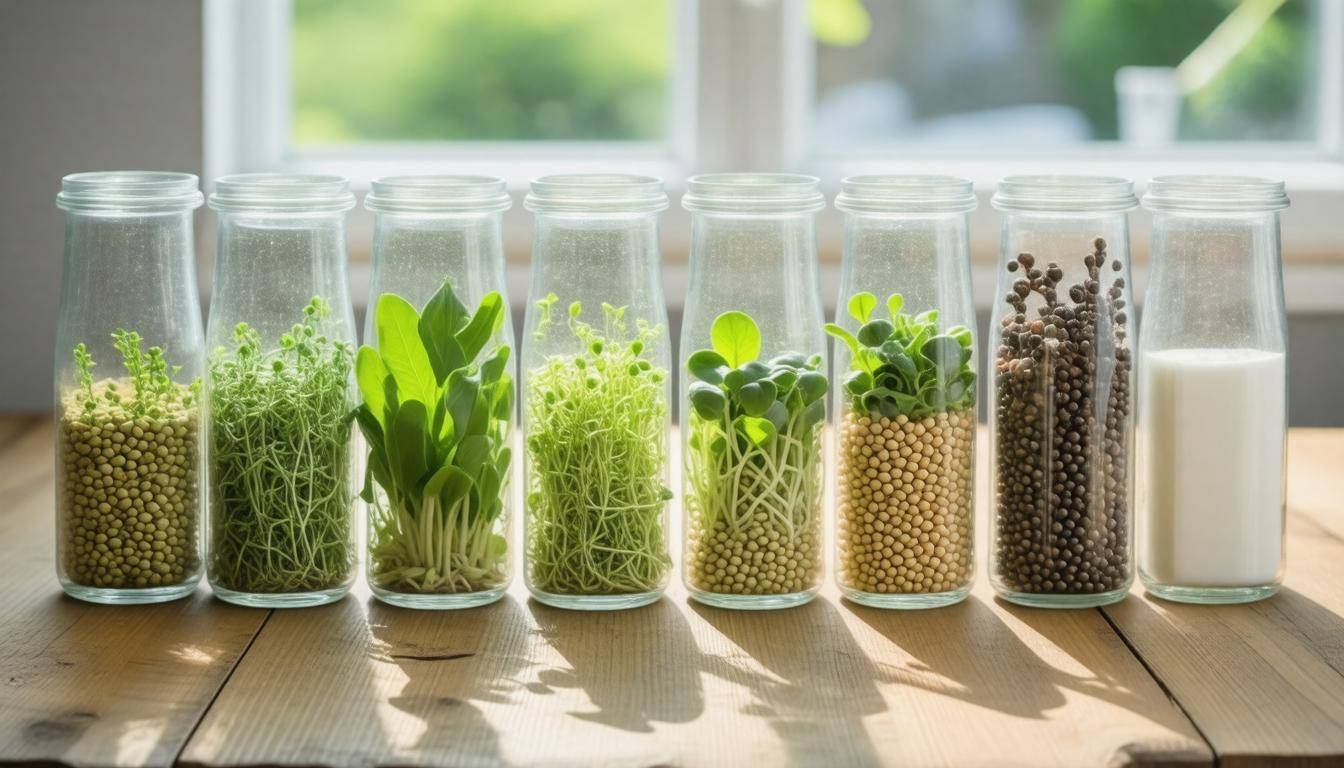
When selecting seeds for sprouting, it’s essential to focus on those that provide a balanced nutrient profile and are simple to grow. The right seeds will not only supply crucial vitamins and minerals but also thrive under varying conditions, making them perfect for emergencies when access to fresh produce might be limited.
Top 3 Seeds
First up is the Mung Bean. These small but mighty legumes are rich in protein and boast significant amounts of vitamin C. They germinate quickly, usually in just three to five days, providing immediate nutritional support. Their mild flavor makes them versatile in salads, sandwiches, or even stir-fries.
Next on our list is Lentils, known for their impressive nutritional benefits. High in protein, iron, and fiber, they deliver essential nutrients that can help build strength during tough times. Lentils typically sprout in just two to four days, making them an excellent option for quick nourishment. You can enjoy them raw in salads or cook them into hearty soups—they’re incredibly adaptable!
Lastly, we have Broccoli seeds. These tiny powerhouses are packed with antioxidants and crucial vitamins like A, C, and K. Broccoli sprouts contribute anti-inflammatory properties while being highly nutritious. These seeds take about five days to grow and can easily enhance almost any meal for an impressive health boost.
It is worth noting that seeds with a high germination rate and minimal risk of mold are ideal for survival situations. As you embark on your sprouting journey, prioritizing these attributes ensures success even when conditions aren’t perfect. Healthy sprouts mean better nutrition, serving as a cornerstone of overall well-being during challenging times.
With your seed selection complete, the next step involves gathering the essential tools needed for successful sprouting.
Essential Sprouting Equipment
Investing in the right equipment doesn’t just make the sprouting process easier; it enhances your chances of success. Let’s explore the basic tools you’ll need to get started on this rewarding path.
First, you have your jars or containers—Mason jars are a favorite among many homesteaders due to their versatility and availability. Opting for jars that come with mesh lids allows for excellent air circulation, which is crucial for preventing mold and ensuring your seeds get the air they need to germinate successfully. As you watch those tiny sprouts begin to emerge, you’ll appreciate how significant a well-ventilated jar can be.
Next up, trays play an equally critical role in the sprouting process. Choosing trays with drainage holes is non-negotiable. Without proper drainage, excess water can sit at the bottom of your tray, creating a haven for mold. A shallow tray will provide ample space for larger seeds or microgreens without overwhelming them. This also allows you easy access to monitor moisture levels as the seeds start to sprout.
Many sprouters swear by the use of mesh or cheesecloth to cover their jars during the germination phase. This keeps the seeds aerated and prevents unwanted pests from making themselves at home in your budding plants. It creates a gentle barrier while allowing light and air to flow freely—a perfect environment for healthy growth.
Numerous seasoned gardeners emphasize investing in quality, reusable equipment like stainless steel sprouting lids and BPA-free plastic trays. These durable items enhance sustainability; they last longer than traditional materials and significantly reduce waste. Therefore, even though initial costs might seem higher, their longevity makes them economical in the long run.
Each piece of equipment contributes to creating optimal conditions for your seeds to thrive. With your arsenal ready, you’re now primed to embark on an exciting journey that promises not only flavor but essential nutrition.
The Step-By-Step Sprouting Process
The journey of sprouting seeds begins with an essential first step: soaking. Typically, larger seeds like mung beans require a soak time of about 8-12 hours. This hydration facilitates germination—think of it like waking your seeds up after a long sleep! Use a simple ratio of 1:2: one part seeds to two parts water. It’s vital to ensure they are well-submerged, as this rehydrates them and kickstarts the sprouting process.
After soaking, it’s time for the next crucial phase, which focuses on rinsing and draining.
Once the soak time has elapsed, drain off the water carefully. But remember, a simple drain isn’t enough; rinsing is key to success. Thoroughly rinse the seeds under fresh, cool water to remove any lingering debris that might impede their growth. Aim to repeat this rinsing process 2-3 times daily. Keeping the seeds washed helps prevent unwanted bacteria from spoiling your efforts—you want healthy sprouts, not a science experiment gone wrong!
With your seeds clean and happy, let’s ensure they have what they need to thrive by providing proper ventilation.
Now, ventilation is paramount in the sprouting world. Place your sprouting container at a 45-degree angle, ideally upside down over a bowl or sink to allow excess water to drain out while still enabling airflow around your seeds. Proper ventilation reduces humidity in the jar and strengthens sprouts. When plants breathe freely, they grow healthier—think of it as opening a window on a sunny day!
As you provide care to your little green miracles, keep an eye on their growth because soon it’ll be time for the big moment: harvesting.
When your sprouts reach 1-2 inches in length—this typically takes about 3-7 days depending on the seed type—it’s time for harvest! This stage feels rewarding: you’ve nurtured these tiny plants from dormant seeds to lively greens. Before consuming them, give them one last rinse to wash away any remnants of soil or debris. Just imagine enjoying those fresh homegrown sprouts sprinkled over your salads or sandwiches; it’s like bringing a bit of nature right into your kitchen.
Cultivating your own food through sprouting offers both nourishment and satisfaction, allowing you to engage in a fulfilling process even when resources are limited. Now let’s shift our focus to how best to maintain and secure your freshly grown sprouts for optimal enjoyment and usage.
Storing and Preserving Your Sprouts
After you’ve put in the effort to grow your sprouts, preserving them correctly is crucial to maintaining their freshness and nutrient density. The methods of storing your sprouts can significantly impact their longevity. One of the simplest yet most effective ways is to refrigerate them. By placing your sprouts in airtight containers within your fridge, they can remain fresh for about one to two weeks. Not only does this help ward off pests and prevent spoilage, but it also keeps moisture levels stable.
When storing sprouts, think of it like tucking them into a cozy bed—secure, sheltered, and away from harsh conditions.
But maybe you’re looking to keep your sprouts around for longer. In that case, consider some alternative techniques.
Storage Tips
If you want to explore preservation methods more deeply, dehydrating your sprouts is an excellent option for those who wish to stock up. Dehydration extracts moisture, which can prevent mold and spoilage. Once adequately dried, you can store the sprouted seeds in vacuum-sealed bags that lock out air and maintain quality. A dehydrator works best here; if you don’t have one, using the oven on low heat can also do the trick—just keep an eye to avoid over-drying.
For those adventurous enough to experiment further, freezing is another route. While it’s less common due to potential texture changes—sprouts may become softer once thawed—it can preserve their nutritional value for several months when done correctly. Just wash them thoroughly first, blanch quickly in boiling water, cool rapidly, and finally freeze in moisture-proof containers.
No matter which storage method you choose, a small paper towel inside the container will help absorb excess moisture that could lead to spoilage. This simple addition acts like a sponge, keeping your sprouts fresh longer and preventing unnecessary waste.
With your sprouts now properly stored and preserved, let’s transition into exploring some delicious ways to boost their benefits even further within your meals.
Incorporating Sprouts into Your Meals
Sprouts are not just healthy additions; they are highly adaptable and can elevate the taste and texture of various dishes. Think of them as tiny flavor powerhouses that can transform everyday meals into something extraordinary. For instance, starting with salads, sprouting seedlings lend an undeniable crunch and burst of flavor. Tossing them in a simple green salad adds both visual appeal and a nutrient boost that makes it even more satisfying. You want vibrant colors on your plate, and microgreens provide that.
A helpful tip: Consider mixing different types of sprouts for unique flavors and textures. Alfalfa sprouts bring a mild flavor, while radish sprouts can add a peppery kick to your salad.
Moving on from salads, sandwiches are another fantastic way to incorporate these little wonders into your diet.
Adding sprouts to sandwiches or wraps can instantly enhance their nutritional profile without adding significant calories. Whether you’re layering them into a veggie wrap or piling them high on a classic turkey sandwich, the sprouts provide not just health benefits but also create a pleasing contrast to other textures in the meal. If you’re building a sandwich, don’t be shy about loading it up with sprouts; they blend beautifully with creamy spreads or spicy mustards alike.
When making smoothies, don’t forget about sprouts! They may seem like an odd addition at first, but blending in some broccoli or mung bean sprouts can elevate your smoothie to new heights of nutrition without altering the wonderful fruit flavors you love.
Try blending banana, spinach, and a handful of broccoli sprouts for a nutrient-rich superfood smoothie that tastes delightful. The simplicity of fruits paired with nutritious greens opens up endless possibilities for your daily servings of vegetables.
If you want to get creative in the kitchen, whip up a sprout salad bowl featuring quinoa as the base. Combine it with slices of ripe avocado, chickpeas for protein, and don’t shy away from adding lemon juice or a drizzle of olive oil topped off with freshly harvested herbs. All topped with your choice of mixed sprouts to emphasize freshness! This dish doesn’t just hold together well nutritionally; it’s also eye-catching and satiating.
By creatively integrating sprouts into various dishes, you’ll discover how versatile they truly are. As we continue our journey through the world of sprouting, let’s now address some common challenges and solutions you may encounter along the way.
Troubleshooting Common Sprouting Issues
Sprouting, while generally straightforward, sometimes comes with its own set of challenges. One significant issue is mold growth, which can occur due to insufficient ventilation or overly wet seeds. The ideal conditions for sprouting include good air circulation; when sprouts don’t receive enough air, mold may take hold.
To prevent this, rinse your sprouts regularly and reduce soak times when preparing your seeds. Remember, hydration is essential, but moderation is key.
Foul odors emanating from your sprouts indicate bacterial contamination, a common hurdle that can dampen the excitement of sprouting. If your sprouts have a bad smell, it’s often a sign to step up your rinsing game. Ensure you rinse them frequently and store them in a cool, clean space for effectiveness. A clean environment not only prevents odor but also promotes healthier growth.
Another major issue that novice sprouters encounter is poor germination rates. This could stem from using old or low-quality seeds that won’t sprout efficiently. It’s vital to use fresh seeds specifically designed for sprouting to maximize your chances of success; think of this as investing in a good foundation for your home garden. Fresh seeds typically provide higher germination rates, leading to more vibrant and nutritious sprouts.
Summary of Considerations
| Problem | Cause | Solution |
|---|---|---|
| Mold Growth | Excess moisture | Increase ventilation; reduce soak time |
| Poor Germination | Old or low-quality seeds | Use fresh, high-quality sprouting seeds |
| Foul Odor | Bacterial contamination | Rinse frequently; store in a clean, cool area |
If you find yourself grappling with these persistent issues, consider experimenting with different water sources or seeds. Sometimes the simplest changes can yield remarkable results in the sprouting process, as fresh water quality or varying seed types can reveal what works best for you.
Addressing these common issues will help ensure successful sprouting in future attempts.
Happy sprouting!
Every effort you put into refining your sprouting techniques will lead to better outcomes and increased resilience during emergencies. A thriving source of nutrition is just within reach through careful attention and practice.