
Water damage can be a homeowner’s nightmare, often appearing like an unwelcome guest that crashes your party and wrecks everything in sight. You might think, “It’s just a little water, what’s the big deal?” But that small leak or flood can lead to significant issues down the line if not addressed quickly and properly. In my experience, I’ve seen how swiftly tackling water damage can save you from headaches—and hefty repair bills—later on. This guide will walk you through every essential step in the water damage restoration process, ensuring you’re prepared to reclaim your space safely and effectively. From the assessment of the damage to final repairs, each step is vital to restoring your home back to its pre-damage glory while preventing future mishaps. Let’s dive in!
The water damage restoration process typically involves five key steps: first, an assessment to identify the extent of damage and source of water; second, extraction of excess water using pumps or vacuums; third, thorough drying using dehumidifiers and fans; fourth, cleaning and sanitizing affected areas; and finally, repair to restore any damaged structures. Following these steps is crucial for preventing mold growth and ensuring a safe environment.
Assessing the Extent of Water Damage
The first step in tackling a water damage issue is identifying precisely how far the damage has spread. This isn’t just about looking at obvious water stains on walls or soggy carpets; it’s about understanding the underlying causes and effects that might not be immediately visible. For instance, when assessing your home, pay close attention to the areas where water is most likely to enter, such as around windows, doors, or any plumbing fixtures. Remember, even a small leak can lead to significant problems over time if left unchecked.
With a thorough inspection underway, it’s crucial to pinpoint the specific source of the water intrusion.
Identifying Water Source and Type
Determining the source of water intrusion is vital. Common culprits include broken pipes, malfunctioning appliances, and weather-related issues like heavy rains or floods. Each scenario poses distinct challenges and requires tailored solutions. If you notice standing water in your basement after a storm, for example, this indicates you might be dealing with surface water leaks that could be exacerbated by groundwater seepage during heavy rain.
Once you’ve identified the source of the intrusion, your next task is to classify the type of water involved.
Water damage is categorized into three types:
-
Category 1 (Clean Water): This comes from a clean source, such as a broken water supply line. While it may not pose immediate health risks, swift action is still necessary.
-
Category 2 (Gray Water): Slightly contaminated water emanating from sources like dishwashers or washing machines. While usually not dangerous, it can develop into more serious contamination if left untreated.
-
Category 3 (Black Water): Heavily contaminated and hazardous, often from sewage backups or overflow from toilets. This type poses significant health risks and should be handled with extreme caution.
After determining both the source and classification of the water involved, you can begin inspecting affected areas thoroughly.
Inspecting Affected Areas
Utilizing moisture meters and infrared cameras is invaluable in this regard. These tools help locate hidden moisture behind walls, under floors, and in insulated areas where water may have penetrated but isn’t immediately visible. For instance, after a pipe burst in a home, inspectors found hidden moisture lurking beneath the subfloor using infrared imaging technology. Identifying such concealed issues early on helps prevent mold growth and long-term structural damage.
It’s essential to look for signs of swelling or discoloration in materials that seem dry on the surface but may be harboring moisture underneath. For example, peeling paint might signify an underlying water problem rather than just a cosmetic issue. By being vigilant in your assessment and utilizing advanced detection methods and tools, you can create an effective plan for restoration before more considerable damage occurs.
By thoroughly assessing the extent of water damage through diligent inspection practices and careful classifications, you’re positioning yourself for effective remediation strategies to follow next.
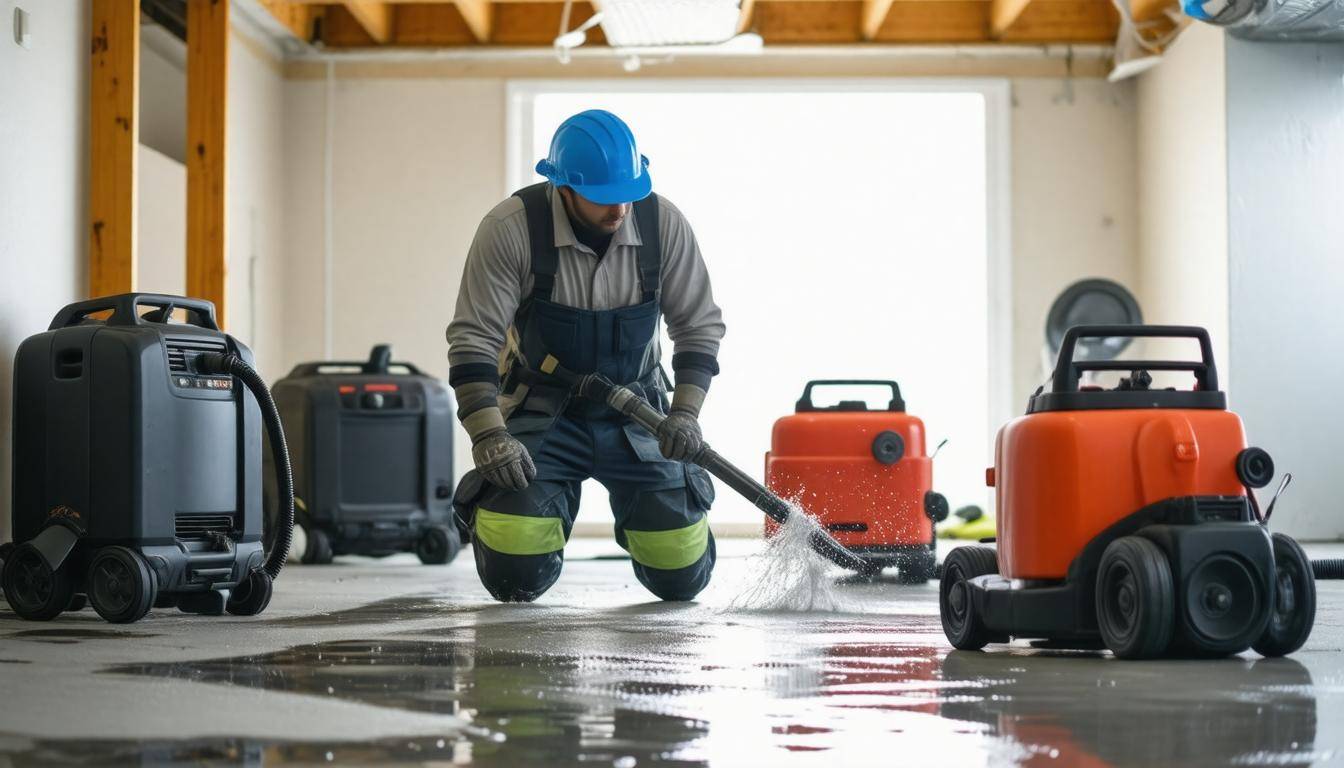
Emergency Water Removal
Quick water removal is not just a good idea; it’s an essential first step to mitigate further damage such as mold growth and structural instability. When faced with water intrusion, time becomes a critical factor. The longer the water remains, the greater the likelihood of deep-set stains, weakened structures, and harmful mold development.
Equipment Used
| Equipment | Purpose |
|---|---|
| Industrial Vacuums | Remove standing water from floors |
| Submersible Pumps | Extract large volumes of water efficiently |
| Moisture Meters | Detect hidden moisture levels |
Professionals often deploy high-powered equipment to tackle extensive water accumulation. For example, industrial vacuums are particularly effective for floors that need immediate attention. They can suck up sizable pools of water quickly without leaving much behind. Conversely, submersible pumps come into play when addressing larger flood situations; they have the capacity to handle significant amounts of water with efficiency that regular household tools cannot match.
Another vital aspect is using moisture meters after employing these extraction tools. While pumps and vacuums may remove most of the standing water, moisture can seep into various materials like wood or drywall and remain hidden beneath the surface. By measuring moisture levels, you can ensure you’ve thoroughly extracted all excess water and prevent invasive mold from taking root later on.
Water Extraction Methods
As you begin your extraction process, start by deploying those submersible pumps for large areas where substantial water has gathered—this is particularly important in basements or ground-level spaces prone to flooding. For smaller areas like kitchens or bathrooms where a pipe might have burst, industrial vacuums are ideal since they can handle leftover moisture effectively.
“Every minute counts when dealing with water damage—act fast and use the right equipment.”
After you’ve moved most of the visible water, making certain there’s no moisture left behind should be your next priority. This means checking corners and ensuring surfaces are completely dry before considering your job done. Each step taken toward quick removal significantly contributes to restoring your property back to its original state. In emergencies like these, diligence pays off in priceless value for your home.
With successful water removal completed, attention must shift towards eliminating all traces of lingering moisture to safeguard your property from future issues.
Drying and Dehumidification Process
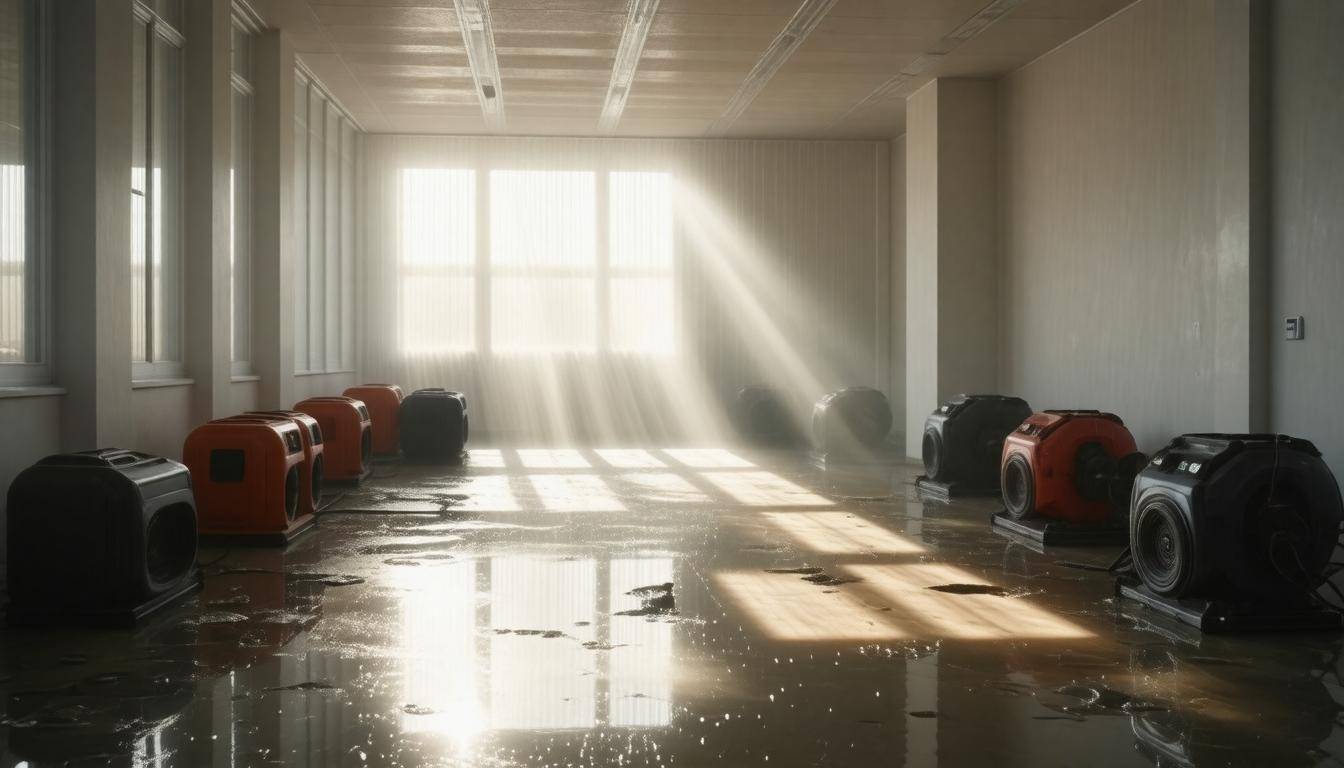
The task of thoroughly drying your space can be both critical and intricate. Once you’ve extracted excess moisture, it’s essential to set up an effective drying environment. This is where industrial equipment shines; utilizing commercial-grade dehumidifiers and high-speed air movers will make all the difference in a prompt recovery.
These machines provide the robust airflow necessary to evacuate trapped moisture from walls, floors, and furniture. By directing airflow strategically—toward wet surfaces—you create a virtual whirlwind that speeds up evaporation rates, making your job significantly easier.
To illustrate the importance of this process, consider how the humidity in your indoor environment can impact drying times. Indoor humidity levels should ideally be kept between 30% and 50%. If they’re higher than that, drying can slow and encourage the growth of mold spores lurking in hidden corners.
When setting up your dehumidifiers, keep in mind their capacity; a standard model removes about 30 pints of moisture each day within a thousand square feet. Position them wisely around the area to enhance their efficiency further.
Setting Up Drying Equipment
Correctly positioning your drying equipment is crucial for effective restoration. Ensure that air movers are placed with space between them to allow unimpeded air distribution. You want to create a continuous flow of air across all wet surfaces; think of it like turning on a fan in a stuffy room—it helps circulate fresh air while pushing out the stale, moist air gathered in corners.
Regular checks on these tools help prevent bottlenecks in the drying process. It’s not uncommon for professionals to return at least once a day to monitor conditions and fine-tune settings as needed.
Monitoring Progress
Monitoring moisture levels is an integral part of ensuring successful drying, as restoration specialists utilize specialized tools like moisture meters to gauge progress effectively. They focus on keeping wood and drywall moisture content below 15% for safe restoration practices.
Beyond just checking numbers, seasoned restoration experts read the signs: sagging spots on ceilings or warped materials indicate that there’s more work to do.
Studies indicate that maintaining dryness within 48 hours can lower mold risk by as much as 80%. This statistic underscores how essential it is to act swiftly during this stage. If you’re taking on restoration yourself, aim for those metrics—invest in quality monitoring equipment if you can and don’t hesitate to call in professionals if things feel overwhelming.
Moving forward through this phase requires both patience and vigilance as you focus on safeguarding your space from future water damage complications. Understanding the next steps will further enhance your preparedness in tackling lingering concerns related to sanitation and safety.
Cleaning and Sanitizing Procedures
Once the water has been removed and the area is dried out, the focus shifts to cleaning and sanitizing. This phase is essential not only for restoring your home to its former state but also for minimizing potential health risks. Hidden contaminants under surfaces can promote mold growth or spread pathogens if left unchecked. Therefore, it’s crucial to tackle this step with care and precision.
Using Personal Protective Equipment (PPE)
One of the first tasks before diving into cleaning is ensuring you’re equipped with the right protective gear. Safety should always come first; therefore, wearing N-95 masks, gloves, and goggles is vital. These protect against chemical exposure during cleaning and shield you from fine particles that may have accumulated since the water intrusion.
Always remember: Your health is paramount; taking simple precautions can prevent serious repercussions.
Sanitizing Protocols
Moving on to the actual cleaning process, start with a thorough inspection of affected surfaces. Certain areas—especially where water was in contact—will require more attention. Use a spray and wipe method to effectively reach every corner while focusing on high-contact areas like floors, walls, and any furniture that absorbed moisture.
For spaces exposed to Category 2 or 3 water—dirty water from appliances or sewage—a rigorous disinfection protocol should be followed. Use antimicrobial cleaners to neutralize any harmful bacteria or viruses lingering from contaminated sources.
To maximize effectiveness, consider these crucial elements:
| Crucial Elements | Details |
|---|---|
| Cleaning Agents | A mixture of 1 cup of bleach per gallon of water serves as an excellent disinfectant for hard surfaces. |
| Contact Time | Let the solution sit on surfaces for at least 10 minutes to thoroughly kill off any lurking germs. |
| Temperature Considerations | Clean surfaces at temperatures between 70°F and 120°F (21°C to 49°C) for best results in activation of cleaning agents. |
Implementing these procedures sets the stage for a safe and sanitary environment in your home. After addressing cleanliness, the next step focuses on preventing future issues that may arise from moisture.
Effective Mold Prevention
One of the greatest challenges that arises after water damage is the looming threat of mold growth. Mold can form within a staggering 24-48 hours if the environment is right, creating not just an unsightly issue but potential health hazards as well. With that in mind, it’s crucial to act quickly and implement effective mold prevention strategies to safeguard your home.
Immediate Steps
As soon as drying begins, consider incorporating mold-inhibiting solutions into your restoration efforts. Products such as anti-fungal sprays and mold-resistant paints can be applied to surfaces immediately after drying is complete. These treatments create a protective barrier that inhibits mold growth effectively.
For instance, after dealing with a flood in my own basement, I acted quickly to apply a mold inhibitor on all exposed surfaces within the first 24 hours. This proactive measure made all the difference; there was no visible mold growth afterward, serving as a testament to the effectiveness of timely intervention.
Long-Term Monitoring
Prevention is not a one-time effort; it requires vigilant maintenance over time. Regularly monitoring humidity levels in affected spaces is vital because mold thrives in high humidity. You should aim to keep indoor humidity levels below 50%. A simple hygrometer can help you measure this easily over time.
Moreover, investing in a high-quality dehumidifier can make a world of difference. Dehumidifiers work tirelessly to extract excess moisture from the air, automatically maintaining optimal humidity levels. In my experience, having installed one in my basement not only helped prevent mold growth after previous water events but also improved overall air quality.
Practical Tips for Home Maintenance
Here are some practical tips to further enhance your mold prevention efforts:
-
Ventilation: Ensure good airflow in rooms prone to moisture, like bathrooms and kitchens. Install exhaust fans for areas that often get steamy.
-
Leak Check: Regularly inspect plumbing fixtures and appliances for any signs of leaks or drips, as even small amounts of water can encourage mold.
-
Cleaning Routine: Implement a cleaning routine that includes washing down surfaces with vinegar or commercial mold removers periodically to combat potential spores before they start growing.
-
Window and Door Seals: Inspect seals around windows and doors regularly; replace any damaged seals to prevent moisture intrusion during rainstorms.
By prioritizing these practices post-water damage and integrating them into your regular home maintenance routine, you create a robust defense against mold growth.
As we move forward, it’s essential to detail the necessary steps for finalizing your repairs while ensuring long-term protection against future damage.
Final Repairs and Restoration
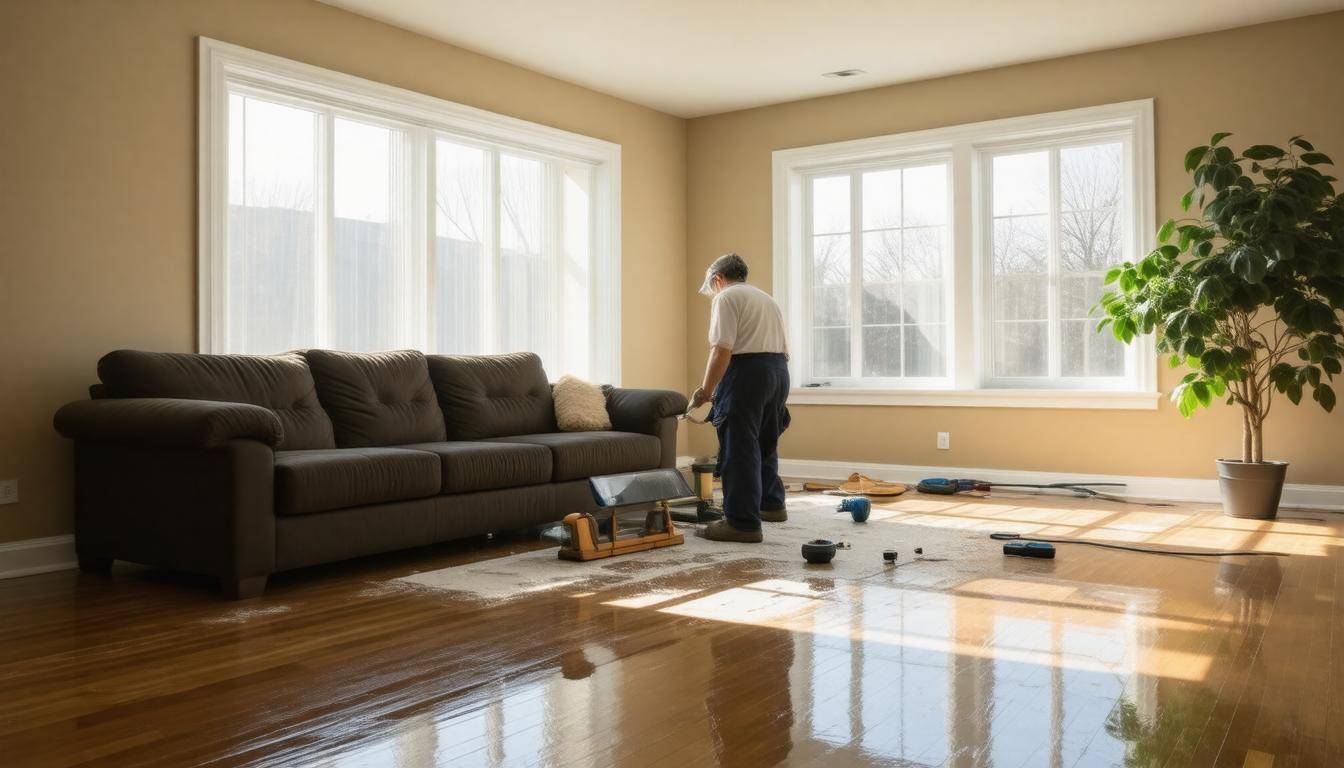
The final step in your water damage restoration journey is crucial; this is when the transformation takes place. It isn’t merely about putting a band-aid on the issue; it’s about returning your home to its original, pre-damage condition. This may involve structural repairs or cosmetic enhancements—or sometimes a combination of both. Understanding the specifics of each repair can be vital for ensuring that similar issues don’t arise again.
Repair Recommendations
Let’s dive deeper into how to decide between repairing or replacing damaged materials. When assessing damage, take note of key indicators like material warping, visible mold growth, and texture changes. For instance, drywall that appears slightly swollen can usually be dried out and repaired if the water exposure was minor. However, if you notice significant sagging or prevalent mold growth, replacement becomes necessary. In some instances, older materials might not be worth salvaging due to the risk they pose to health and safety.
A recent project perfectly illustrates this point. A family experienced severe water damage in their kitchen ceiling, which they initially thought could be patched up. As the restoration specialists evaluated the situation, they concluded that complete replacement was the best course of action. Once finished, they painted the new drywall to match the existing decor, resulting in a stunningly restored kitchen that felt fresh and safe.
Quality Assurance
After repairs are made, quality assurance must not be overlooked. It’s about ensuring every job meets high standards so future damage is unlikely to occur. During this phase, conducting a thorough inspection helps identify any lingering moisture or imperfections from the restoration work. Look out for signs such as peeling paint or damp patches—they can denote hidden issues.
One satisfied homeowner described their experience: “The restoration team not only fixed our ceiling but also improved its appearance significantly. Their thorough work gave us peace of mind.” This sentiment reflects how crucial it is to find a reliable restoration service that goes beyond fixing just what’s broken; they should enhance your home’s value and livability too.
Focusing on these repairs and maintaining high-quality standards not only revitalizes your home but also strengthens its defenses against future risks. Now, let’s explore how proactive measures can assist in avoiding similar challenges down the line.
Preventing Future Water Damage
One of the simplest yet most effective strategies to keep your home safe from water damage begins with regular maintenance. Think of it like tending to a garden: if you regularly prune, weed, and nourish your plants, they will thrive instead of becoming overgrown and unmanageable. Similarly, taking proactive measures in your home can significantly reduce risks associated with water intrusion.
Regular Maintenance Tips
-
Inspect Roofing Annually: Make it a habit to climb up or hire a professional to inspect your roof each year. Missing shingles or small cracks may seem insignificant, but they can quickly lead to leaks that compromise the integrity of your home.
-
Check Plumbing Regularly: Don’t wait for leaks to show themselves through a water stain on the ceiling. Keep an eye on visible pipes, looking for any signs of wear or corrosion. If plumbing fixtures are old or showing signs of leakage, replace them promptly.
-
Install Sump Pumps: If your basement feels damp or has flooded in the past, a sump pump is a worthwhile investment. These devices can efficiently remove accumulated water, especially during heavy rains.
Remember, according to insurance data, homeowners who conduct regular maintenance reduce their risk of significant water damage by 40%. That’s not just a statistic; it’s a genuine opportunity to safeguard your home against potential disasters.
Expanding on this idea, consider investing in smart home devices designed for leak detection. These devices can alert you early on when moisture levels build up in specific areas, allowing you to take immediate action before damage escalates into costly repairs. Much like having an alarm system for intruders, leak detectors provide peace of mind that keeps your home secure against the silent threat of water.
By implementing these preventive measures consistently, you can enjoy the serenity and comfort of knowing your property is well protected from the ravages of water damage.
Taking steps to prevent future water damage is not only wise but essential for maintaining a safe and comfortable environment in your home. With regular vigilance, you can effectively shield against the unpredictable nature of water intrusion.
What common mistakes should be avoided during the water damage restoration process?
Common mistakes to avoid during the water damage restoration process include neglecting to cut off the water source, which can exacerbate damage; failing to remove affected materials promptly, leading to mold growth (with a potential 30% increase in remediation costs); and using improper drying techniques that may leave hidden moisture, resulting in further structural issues. It’s crucial to adhere to industry standards and timelines to ensure effective restoration and prevent long-term consequences.
How can I assess the extent of water damage before starting the restoration process?
To assess the extent of water damage before starting the restoration process, begin by visually inspecting affected areas for discoloration, warping, or mold growth. Use moisture meters to gauge humidity levels in walls and flooring, as a reading above 20% suggests significant water damage. Remember that 14% of homes experience some form of water damage each year, so prompt evaluation is critical to prevent further deterioration and costly repairs. Document findings with photos to aid in the restoration planning and insurance claims process.
What are the first steps to take immediately after discovering water damage?
The first steps to take immediately after discovering water damage include ensuring your safety by turning off the electricity in the affected area, stopping the source of water, and removing any valuables or items that could be damaged. According to the Institute of Inspection, Cleaning, and Restoration Certification (IICRC), addressing water damage swiftly can prevent further issues—mold can begin to grow within 24 to 48 hours, highlighting the urgency of immediate action.
How do I determine if professional water damage restoration services are needed?
To determine if professional water damage restoration services are needed, assess the extent of the damage—if the affected area is larger than 10 square feet or if the water has been sitting for more than 24-48 hours, it’s wise to seek professional help. According to the Institute of Inspection, Cleaning and Restoration Certification (IICRC), even minor leaks can lead to significant structural issues and mold growth, with 30% of homes at risk experiencing mold within 48 hours. Therefore, when in doubt about your ability to manage the situation safely and effectively, enlisting professionals can save time, stress, and potentially costly repairs.
What equipment is essential for effective water extraction and drying?
Essential equipment for effective water extraction and drying includes a high-capacity water extraction pump, industrial-grade dehumidifiers, and air movers. The water extraction pump efficiently removes standing water, while dehumidifiers help reduce humidity levels to prevent mold growth—statistically, a 20% reduction in humidity can significantly decrease mold risks. Air movers facilitate faster drying by increasing airflow, cutting down the total drying time significantly, often reducing it from days to hours when used effectively. Incorporating this equipment is crucial for successful water damage restoration.