
Water is a basic need for all of us, but what happens when the water we have isn’t safe to drink? Whether you’re camping in the great outdoors, preparing for emergencies, or just looking to ensure the quality of your tap water, knowing how to purify it can make a world of difference. But don’t worry—we’ve got you covered! This guide will walk you through the essential methods and safety tips for DIY water container purification. We’ll break down everything from choosing the right containers to effective filtration techniques, helping you feel confident about having clean drinking water whenever you need it. Ready to take control of your water quality? Let’s dive in!
The Complete Guide to DIY Water Container Purification offers step-by-step instructions on various effective methods for purifying water, including filtration techniques, boiling processes, and disinfection options. This guide also highlights essential safety precautions, important considerations for different water sources, and tips for optimizing your purification setup using containers.
Selecting the Right Water Container
When embarking on your DIY water purification journey, the type of container you choose plays a crucial role in both functionality and safety. First and foremost, it’s essential to select containers made from food-grade materials. High-Density Polyethylene (HDPE) is a fantastic choice because it’s lightweight, durable, and resistant to impact. However, one critical point to remember is that you should avoid any containers that have previously held chemicals, as residues can compromise your water quality.
Commonly recommended options include 5-gallon buckets for everyday use or larger 55-gallon drums for those looking to store significant quantities of water. Some even opt for large storage tanks specifically designed for potable water. Whichever option you choose, always check for food-grade labeling to ensure safety. You might be surprised how many containers look appealing but may not meet the necessary standards for safe drinking water storage!
According to the CDC , improperly stored water can rapidly become a breeding ground for bacteria. This highlights the importance of using suitable containers in maintaining long-term water quality.
Additionally, let’s consider the size of the container. The general recommendation is to range from 1 to 5 gallons based on your needs and available space. For practical applications, smaller containers are more manageable when gathering sources of dirty water, while larger tanks facilitate longer-term storage after purification.
Having settled on the right sizes and types of containers, we can now explore effective management strategies for these vessels during the purification process.
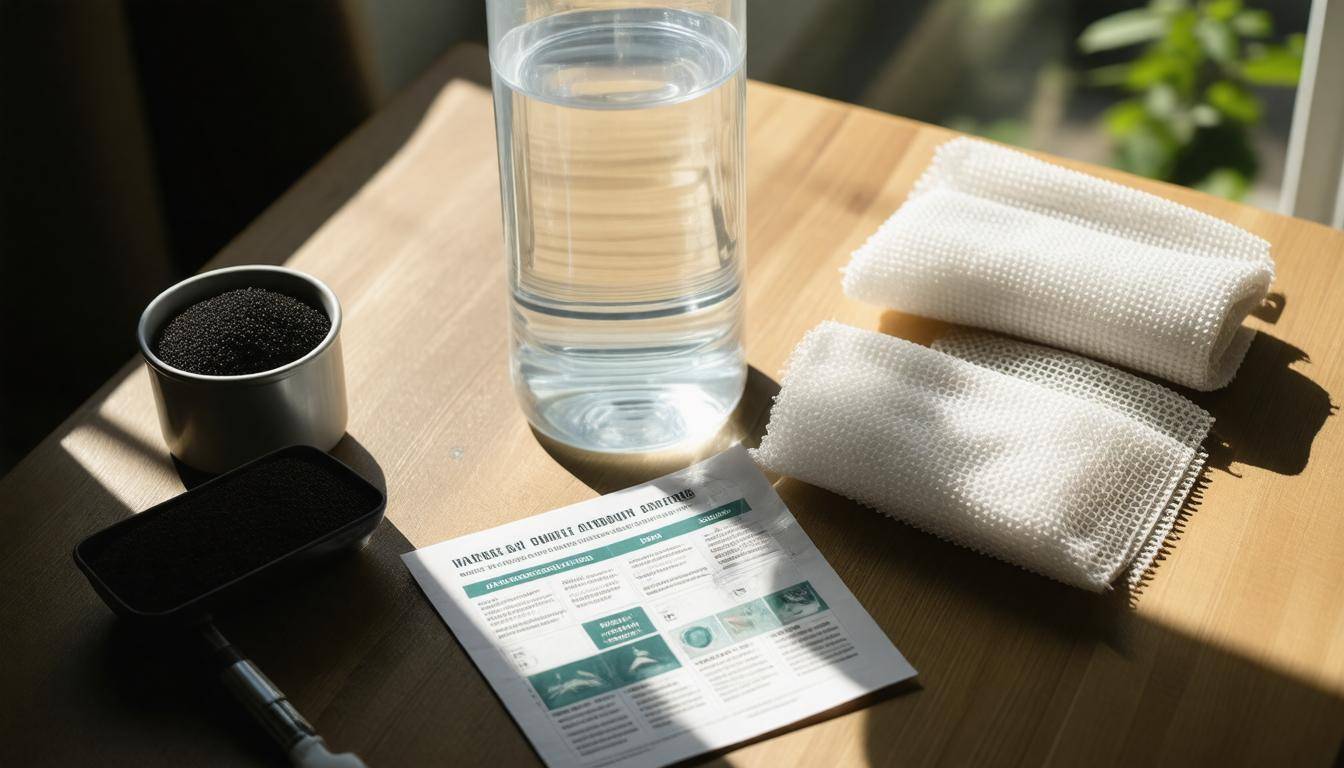
Materials Needed for Purification
The effectiveness of your DIY water purification system heavily relies on the quality and variety of materials you choose. Think of these materials as the backbone of your setup, each playing a crucial role in ensuring that the water you end up drinking is clean and safe.
Essential materials include:
-
Activated Charcoal: This is an incredible powerhouse when it comes to absorbing toxins and impurities in water. Just one cup (around 100 grams) can make a significant impact by attracting and trapping harmful compounds.
-
Sand: Not just any sand will do; you’ll want a combination that includes both coarse and fine grains. This layering is important because coarse sand will catch larger particles, while finer sand filters out the smaller ones, creating a multi-tiered barrier against contaminants.
-
Gravel: Acting as both a supportive structure and additional filtration, gravel is necessary underneath your sand layer to encourage proper drainage and prevent clogging. Use about two cups (200 grams) for optimal results.
-
Cheesecloth or Fine Mesh: This protects your precious filtered water from sediment re-entering the container. It’s like putting a safety net in place to ensure that none of those unwanted particles sneak back in after you’ve done all that hard work.
-
Plastic Hose: A simple yet essential tool. Connecting hoses from your purification system helps direct the flow of clean water into holding containers without making the process messy or cumbersome.
-
Optional Chemical Disinfectants: While not strictly necessary if you’ve done a great job filtering, having something like unscented bleach or iodine tablets on hand can be comforting for that extra layer of safety when treating potentially contaminated sources.
Moreover, it’s invaluable to have a water testing kit to verify the effectiveness of your purification system. This will provide peace of mind and confirm that your efforts are yielding safe drinking water.
Having gathered these key materials, you’re well on your way to creating an effective method for transforming questionable water into a safe source for hydration. Let’s now explore how to effectively construct this system.
Building Your Filtration System
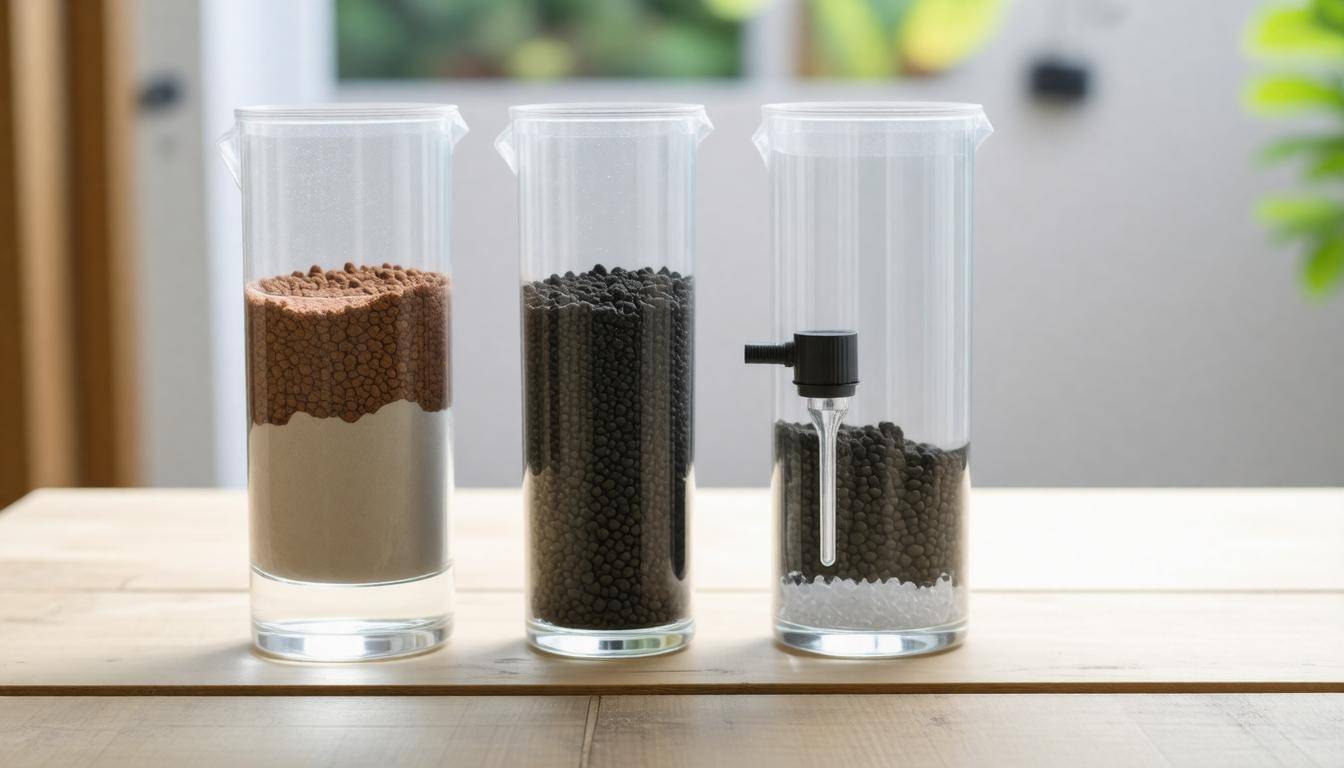
Constructing a reliable filtration system is not just a task; it’s an essential process that ensures the safety of your drinking water. Picture yourself ready to build your own water purification system, where each layer plays a critical role in making sure contaminated water transforms into something safe for consumption. Let’s explore the steps intricately so you can understand how to put together a system that works effectively.
Step I – Layering the Filter
Begin by placing a fine mesh or cheesecloth at the bottom of your chosen container. This foundational layer serves as a protective barrier against larger debris that may fall into the filter. It acts like a bouncer at an exclusive club, preventing unwanted guests from entering while still allowing what’s necessary to pass through. Choosing a strong material here is crucial, as this first line of defense will catch things like leaves, sticks, and larger sediments.
Remember: Without this initial layer, your filtration efforts could be undermined by particles clogging up the works later on.
Step II – Adding Gravel and Sand Layers
Next, add the gravel layers, which provide structural support to the filter. Start with bigger gravel stones at the bottom, at least two inches thick, followed by smaller gravel. Each layer should also be around two inches thick. This method creates space for water to flow freely while filtering out larger sediments. Then comes sand, layered in such a way that it starts coarse on top and transitions to fine at the bottom—maximizing how well each type performs its duty.
Think of it like building a multi-layer cake: each ingredient has a specific purpose and contributes to the whole. If you don’t layer them correctly, you might end up with a disappointing result.
Step III – Including Activated Charcoal
On top of the sand layers, spread a generous amount of activated charcoal to capture chemical impurities. Activated charcoal has incredibly porous properties that allow it to adsorb toxins and odors lurking in water. Make sure this charcoal layer is applied thickly over all areas for maximum effectiveness in capturing harmful contaminants.
This layer not only cleans but also enhances the flavor of the water—making your purified water taste fresh and crisp.
Step IV – Securing the Setup
At this stage, ensure all layers are properly compacted and securely held in place. If any layer shifts when pouring water over it, you risk mixing materials that could disrupt filtering efficacy. Consider using additional cheesecloth to seal everything tightly once you’ve layered optimally. This reinforces stability and adds another filtration level before water flows through.
After constructing this multi-faceted filtration system, it’s equally important to test and verify its effectiveness to ensure that your hard work yields safe drinking water.
Testing and Ensuring Effectiveness
Regular testing of your purified water is not merely a formality but a critical necessity to ensure it remains safe for drinking. Over time, even the best systems can experience changes in their effectiveness due to factors like sediment buildup or filter degradation. By routinely assessing your water quality, you can identify potential hazards before they manifest into serious health concerns.
A good starting point is to utilize a reliable water testing kit. These kits typically provide insight into essential parameters such as pH levels, chemical contaminants, and microbial presence. Many will also allow you to assess more advanced metrics like hardness and turbidity, giving you a well-rounded view of your water’s purity. For instance, kits like the Safe Home Ultimate Drinking Water Test Kit are comprehensive enough to evaluate over 200 contaminants, making them invaluable to any water-conscious individual.
The U.S. Environmental Protection Agency (EPA) sets specific limits on contaminants found in drinking water. Therefore, your test results should always align with these established standards before consumption, ensuring your water purification efforts meet the highest safety benchmarks.
After receiving your test results, what should you do next? If readings indicate high concentrations of harmful substances—such as per- and polyfluoroalkyl substances (PFAS) or polychlorinated biphenyls (PCBs)—it’s time to take action and possibly reconsider your filtration strategy. This might involve investing in higher-grade filters designed specifically to combat these issues or re-evaluating your entire purification setup altogether.
Furthermore, regular monitoring not only ensures adequate treatment but also offers peace of mind. Knowing that you are actively maintaining the integrity of your water system allows you to enjoy clean drinking water without anxiety. Monitoring becomes part of your routine just like checking smoke detectors or changing batteries in emergency devices; it’s a proactive rather than reactive approach to health and safety.
With testing complete and necessary adjustments made, it’s essential to investigate various purification methods that may elevate the quality of your drinking water significantly.
Natural vs. Chemical Purification Techniques
Understanding the difference between natural and chemical purification techniques can profoundly influence your decision as you strive to ensure safe drinking water. Natural purification methods utilize elements already present in our environment, while chemical techniques rely on artificial substances to eliminate contaminants. Each approach has its pros and cons, and knowing them will help you select the best option for your situation.
Natural Techniques
Methods such as solar disinfection (SODIS) are quite ingenious—they exploit UV rays from the sun to kill pathogens present in contaminated water.
All you need is a clear plastic bottle filled with water, placed in direct sunlight for about six hours. It’s a fantastic option if you’re somewhere sunny and can afford the time. This method not only uses renewable energy but also eliminates the need for chemicals, making it an environmentally friendly choice.
Another remarkable technique is passive acid farming, which employs natural acids from organic sources—like citrus or vinegar—to neutralize harmful contaminants. If you’ve ever squeezed lemon into your water, you might have unknowingly engaged in a method of combatting bacteria! It’s fascinating how nature can provide solutions that we often overlook.
Chemical Techniques
On the flip side, chemical techniques like using chlorine or iodine tablets are prevalent in various emergency kits around the world. According to the CDC, these methods effectively neutralize microorganisms but come with their own baggage: they can impart a notable aftertaste to water that some find off-putting.
Still, they require less effort than collecting sunlight or sourcing organic materials, making them appealing for those who prioritize speed and reliability over taste.
However, it’s essential to note that while effectiveness is critical, frequent use of chemical methods may lead some to worry about long-term exposure to chemical residues.
When contemplating which route to take, it’s worth considering personal preferences. Some people lean towards natural methods because they appreciate avoiding chemicals in their diet; others prefer chemical methods for their simplicity and reliable performance under uncertain circumstances. Often, this debate boils down to choosing between what feels more intuitive versus what seems pragmatically efficient.
Regardless of your preference, mastering the appropriate techniques to disinfect your water containers is vital in ensuring purity before consumption. This knowledge paves the way for exploring additional strategies that enhance water safety even further.
Methods to Disinfect Water

The final step in the purification process is disinfection, a critical practice that ensures all pathogens are eliminated while providing peace of mind. Effective disinfection methods are your allies in breaking the cycle of contamination and keeping you and your family healthy. Each method has specific applications suitable for different situations.
One of the most reliable methods is boiling. Bringing water to a rolling boil for at least one minute effectively kills most bacteria and viruses, making it a go-to solution during emergencies or natural disasters. As someone who has spent many nights camping in the wilderness, there’s something comforting about watching those bubbles rise, knowing you’re ridding your water of harmful microorganisms. Just remember, at higher elevations, where boiling points are lower, extend the time slightly for maximum effectiveness.
Boiling water not only purifies but can also enhance the taste by expelling unwanted odors present in untreated tap water.
Another effective option is UV light disinfection. Portable UV light devices like SteriPEN have become increasingly popular among outdoor enthusiasts and survivalists because they’re compact, fast, and do not add any taste to water. As the UV light penetrates the water, it disrupts the DNA of bacteria and viruses, rendering them harmless. However, don’t forget that these devices require batteries; thus, it’s wise to have some spares handy on longer trips.
If you decide to utilize chlorination, this method involves adding household bleach—make sure it’s free from fragrances or additives. For optimal effectiveness, mix in eight drops per gallon of water, stir thoroughly, and allow it to stand for at least 30 minutes before consumption. Take note: if your water appears cloudy or murky, double the amount of bleach used until the water clears up.
Each of these methods works well independently; however, combining them may provide an additional layer of safety—like boiling and then using a filter or UV light for further assurance. Always keep in mind that the objective is to reduce any potential risks associated with drinking unsafe water while maintaining its essential properties.
Embracing these purification techniques empowers you to ensure access to clean drinking water—be it at home preparing for unexpected changes or when venturing into nature and savoring what Mother Nature offers. As we explore how to sustain this level of cleanliness over time, there are further steps you can take to keep your drinking water safe for the long haul.
Long-term Maintenance and Troubleshooting
Ensuring your water filtration system remains effective is much like tending to a garden; it requires attention, care, and knowledge. Regular maintenance is vital in keeping your purification system working optimally. Just as any gardener knows when to prune or water, you need a routine that includes cleaning and replacing filter materials, such as sand and gravel, every six months. This prevents clogging and inhibits potential bacterial growth. Think of these materials as the lungs of your system; if they get congested, the entire operation suffers.
An important part of your routine should involve checking for cracks or leaks, particularly in containers and hoses. A tiny crack can lead to significant issues down the line, undermining all your efforts to maintain water quality. Replacing damaged parts immediately is crucial as it mitigates further complications from leaks.
Many users report a decrease in water flow as an unmistakable sign that the layers within their filtration system require replenishing or rearranging. The flow of water is like a whisper from your system, hinting at its needs. When you notice this subtle change, it’s an indication that immediate action is needed.
“Regular maintenance not only extended the life of my system but also improved water quality over time.”
This testimonial highlights the rewards of dedication—better quality water and longer-lasting equipment.
Additionally, troubleshooting becomes an essential skill in your homeowner’s toolkit. Have you ever wondered what to do if the water tastes funny or has an unusual odor? These issues might indicate that residual particles have lingered longer than expected, necessitating a more urgent cleaning of filters than planned. Take note: maintaining cleanliness sometimes means being proactive rather than reactive.
By staying alert to these signs and performing regular upkeep, you’ll ensure that your DIY purification system doesn’t just survive but thrives in providing you with safe drinking water for years to come.
In summary, ongoing care and proactive measures are key to ensuring the longevity and effectiveness of your water purification efforts. Your commitment today ensures clean, safe drinking water for tomorrow.
How long can purified water be stored in containers before it becomes unsafe to drink?
Purified water can generally be stored safely in clean, food-grade containers for up to six months. Over time, even purified water can become contaminated through the container itself or environmental factors, so it’s essential to keep the storage space cool and dark, and regularly check for any signs of algae or sediment. For optimal safety, it’s recommended to label containers with the purification date and replace them periodically.
Are there specific tools or supplies that are essential for successful DIY water purification?
Yes, several specific tools and supplies are essential for successful DIY water purification. Key items include a clean container for collecting water, a filtration setup (such as activated charcoal or sand), and purifying agents like iodine tablets or chlorine drops. A study published by the World Health Organization indicates that effective filtration can remove 99% of contaminants from water sources, ensuring safety for consumption. Always prioritize using food-safe materials and thoroughly cleaning all equipment to achieve the best results in DIY water purification.
What are the most effective methods for purifying water in containers?
The most effective methods for purifying water in containers include boiling, which kills 99.9999% of pathogens, using water purification tablets containing chlorine or iodine, and employing UV light sterilization, which can eliminate up to 99.9% of viruses and bacteria within minutes. Boiling is particularly reliable as it requires no chemicals and is effective at killing all types of harmful microorganisms. For convenience and portability, UV devices provide fast results, while chemical treatments are useful when heat isn’t available. Combining methods enhances safety, especially in emergency circumstances.
How can different types of container materials affect the purification process?
The type of container material can significantly influence the purification process due to factors such as chemical leaching, thermal conductivity, and microbial growth. For instance, plastic containers may leach harmful chemicals into the water, especially under sunlight (with studies indicating chemical release rates increase by about 30% in heat), whereas glass or stainless steel containers are less reactive and provide a more stable environment. Additionally, materials with porous surfaces can harbor bacteria, adversely affecting water quality. Using non-reactive materials like food-grade stainless steel or glass is recommended for optimal purification outcomes.
What common mistakes should be avoided when attempting DIY water container purification?
Common mistakes in DIY water container purification include failing to properly clean the containers before use, which can lead to recontamination, and neglecting to use appropriate purification methods for specific contaminants present in the water. For instance, using only simple filtration without chemical treatment may not effectively remove pathogens or heavy metals. Additionally, many individuals underestimate the necessary contact time for disinfectants like chlorine or iodine; according to the CDC, a minimum of 30 minutes is required for effective disinfection. Avoiding these errors ensures better safety and effectiveness in your purification efforts.