
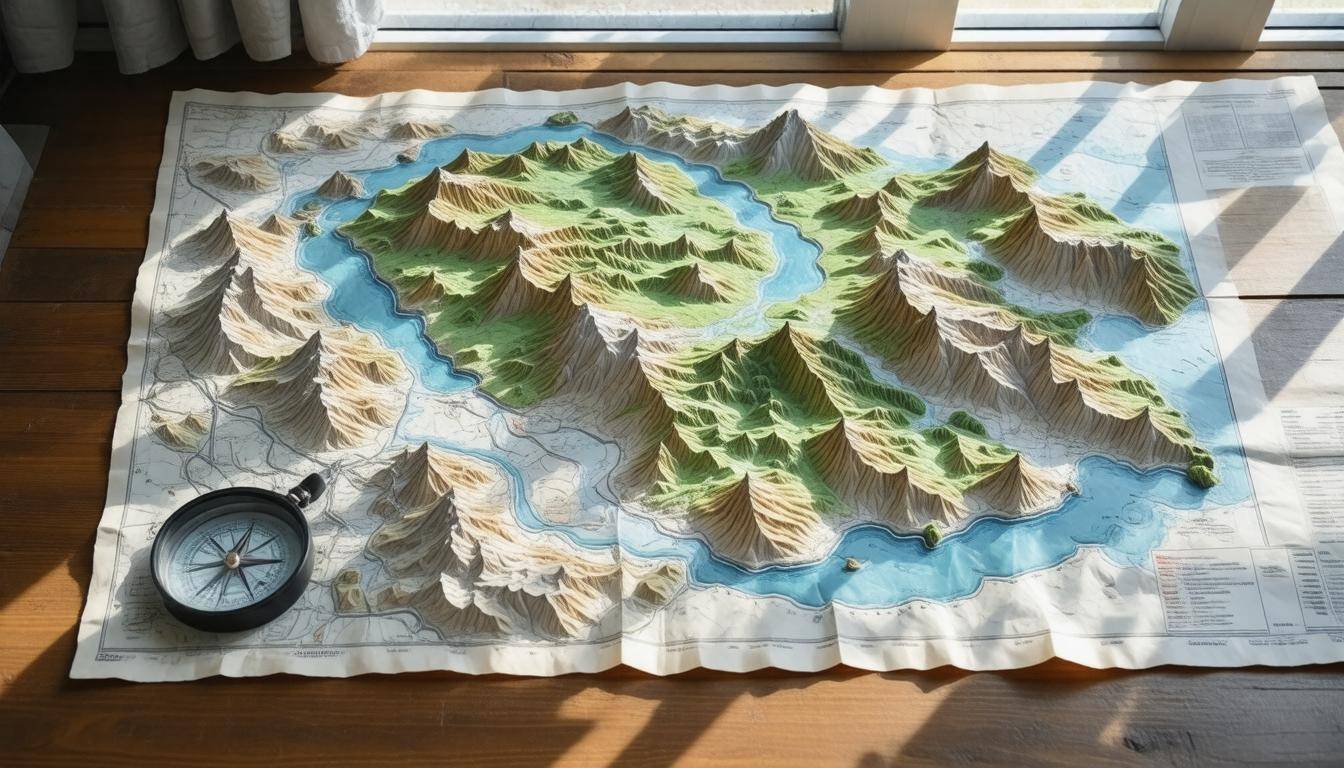
Navigating the outdoors can feel both exciting and daunting, especially when faced with just a map and your instincts. It’s like stepping into an epic adventure, armed only with a compass and a guide. The good news? Anyone can learn how to read a map, transforming what seems like gibberish into a clear pathway through nature’s beauty. As someone who has stumbled through shaded forests and crossed bubbling streams armed only with a map, I’ve experienced firsthand the frustration of getting lost—and the joy that comes from mastering navigation skills. That’s why I’m eager to share essential techniques that will not only improve your map reading abilities but also boost your confidence as you explore new trails. So let’s dive in and uncover the basics of map reading together!
The Basic Map Reading Skills: Illustrated Guide offers step-by-step instructions on essential navigation techniques, including how to interpret map symbols, use a compass effectively, and navigate using topographic maps. This guide is designed to empower readers with the confidence to explore the outdoors safely and independently.
Deciphering the Map Legend
The map legend serves as an essential guide, translating intricate symbols and colors into understandable language. Think of it as the key that unlocks the wealth of information contained within a map—without it, you’re left deciphering a foreign code. Each symbol tells a specific story about what lies ahead, be it a winding river, towering mountain, or a tiny road leading to who knows where. Symbols like blue lines for water features, green patches for forests, and brown shaded areas indicating elevation are universal markers that can dramatically enhance your navigation experience.
For example, if you see a little white triangle icon on your map, that typically denotes an elevation point, while a black dotted line might signify a footpath. These small but remarkable details are what separate successful navigation from guesswork. I recall getting lost on a hike because I overlooked those seemingly minor details. But once I grasped the importance of these symbols, everything changed.
While symbols provide vital information, understanding scale is equally important.
Scale indicators show how distances on your map correlate to actual ground distance. Often represented as a ratio—like 1:50,000—this means one unit measured on the map equals 50,000 units in reality. Understanding scale not only helps gauge how far you’ve traveled but also how much further you must go. A helpful tip is to carry a small ruler; when you measure distances on your map and compare them to the scale bar, you’ll gain clearer insight into your journey’s length.
By comprehending both the symbols and the scale, you’re implementing powerful tools that enable you to navigate efficiently and with purpose.
Let’s not forget the cardinal directions either; they are foundational to all navigation efforts.
The compass rose found within the legend indicates north, south, east, and west—helpful points of reference when orienting yourself. When you line up the direction of travel indicated by your compass with that of your map’s orientation toward magnetic north, you’re setting yourself up for success in creating an accurate route. Remember to consistently check your position relative to the compass rose; doing so will ensure that you don’t inadvertently veer off course while attempting to navigate through challenging landscapes.
Incorporating legends into your navigation practice transforms not just how you read maps but elevates your entire outdoor experience.
Feeling empowered with this newfound understanding is liberating. Instead of relying solely on technology, mastering the map legend brings back a sense of adventure—an engagement with nature that modern conveniences often overshadow. As outdoor enthusiasts become increasingly interested in self-reliance practices—like developing their navigation skills—manual navigation offers an unparalleled level of independence and connection to their surroundings.
With this groundwork in symbols and scale established, transitioning into further nuances of map reading will deepen your comprehension even more.
Recognizing Map Symbols
Map symbols serve as the universal language of navigation, offering users a compact way to interpret information without overwhelming them with text. These pictorial representations are designed to be understood at a glance, allowing for swift comprehension as you explore new terrains. For example, a simple image of a tent can signify a campsite, while a fork and knife indicate dining options nearby. It’s fascinating how much meaning can be packed into such small images; effectively, they act like signposts in our adventure.
However, recognizing symbols is just the beginning. Understanding their context significantly enhances your navigational skills. Most maps include a legend, which explains what each symbol means. Take a moment to familiarize yourself with common symbols from different types of maps. As you explore parks or hiking areas, you might encounter symbols unique to that region or even that specific map.
For instance, topographic maps use contour lines to represent elevation changes, which may not be found on standard road maps. Learning to read these contour lines allows you to navigate mountainous terrains more safely.
Let’s explore some common map symbols you might frequently encounter and explain their significance. While symbols like the tent for campsites and the fork and knife for restaurants are established icons, others are equally essential—like the ‘P’ for parking areas and ‘H’ for hospitals. Knowing these symbols can make your journey much smoother since you’ll quickly identify available resources without needing to rely entirely on technology.
| Symbol | Meaning |
|---|---|
| Tent | Indicates a designated campsite where travelers can pitch tents and rest. |
| Fork & Knife | Marks the location of restaurants or eateries. |
| ‘P’ | Represents parking areas, critical when planning your trip, especially in busy outdoor recreational spaces. |
| ‘H’ | Denotes hospitals or medical facilities nearby in case of emergencies. |
Mastering these symbols boosts your understanding of your environment and builds confidence in navigating unknown territories. With practice—whether it’s studying maps before heading out or actively using them during your expeditions—you will deepen your knowledge and empower your adventures as you continue exploring and honing these essential skills.
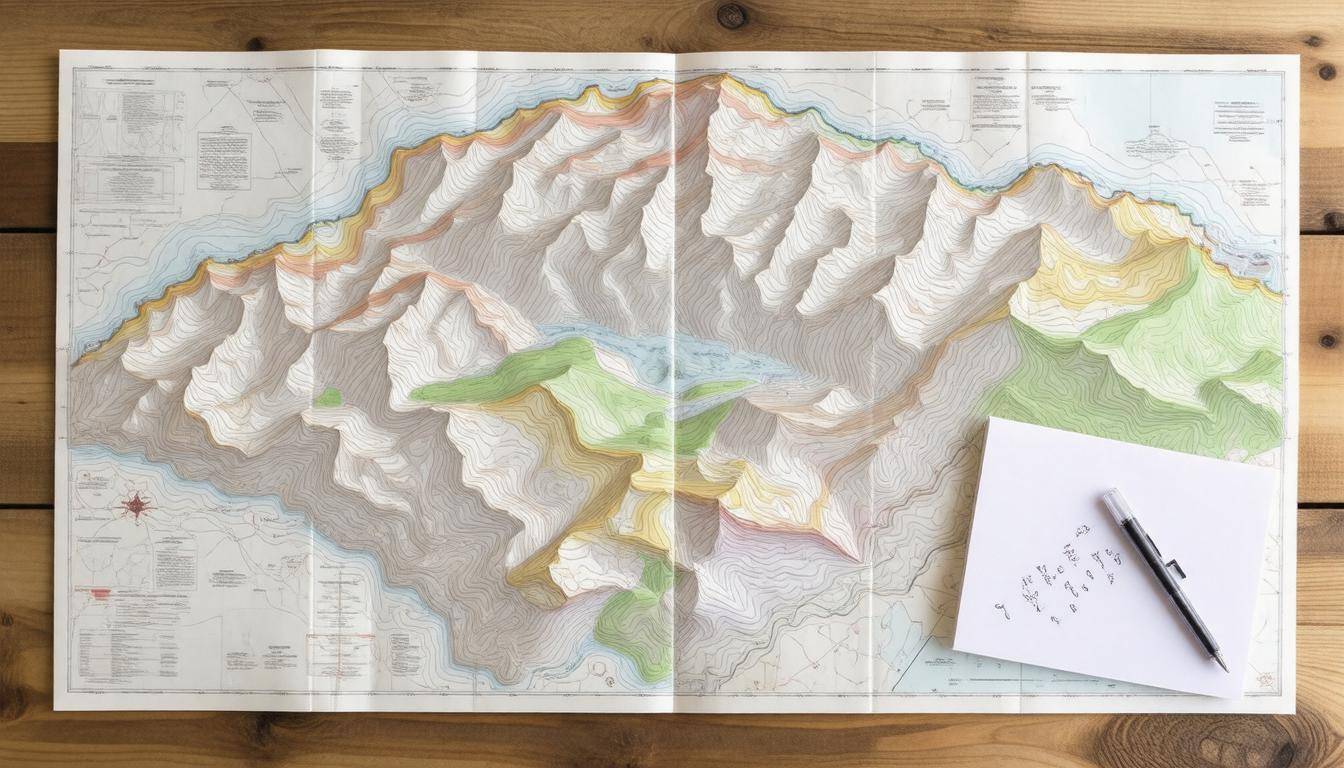
Identifying Topographic Features
Topographic maps are filled with valuable information that informs hikers about the lay of the land, and understanding these elements is crucial for effective navigation.
When you look at a topographic map, the contour lines tell stories about elevation changes. These are invisible lines that connect points of equal elevation, painting a picture of the terrain that can help guide your journey. For instance, when contour lines are tightly packed, they indicate steep slopes or rugged terrain; conversely, when they are spread apart, it suggests a more gentle incline. This distinction aids in understanding the landscape and estimating how difficult your hike might be.
One particularly useful aspect of these contour lines is the concept of index contours—the bolder lines on the map that specify elevations at regular intervals. By familiarizing yourself with these index contours, you can quickly gauge how high or low parts of your route will be at a glance. This practice empowers a hiker to choose their path wisely, perhaps electing for an easier descent instead of an arduous climb where possible.
Elevation changes can significantly impact your hiking experience; steep descents may require slower pacing and careful foot placement to avoid slips and falls.
Beyond just elevation, it’s essential to recognize various landform types depicted on topographic maps.
Types of Landforms
A key to mastering map reading lies in identifying the types of landforms outlined by contour lines: hills, valleys, ridges, and plateaus—all which have distinct patterns. For example, a hill appears as concentric circles that gradually get smaller as they near the peak. Valleys display U-shaped contours that can reveal whether you’re navigating through a dip in the land. Ridges often form elongated patterns resembling waves or undulating shapes.
The more you familiarize yourself with these representations on your map, the better you become at visualizing your hike before ever stepping foot on the trail. Recognizing potential pitfalls such as abrupt elevations or tricky drainage areas will keep you safe as you plan excursions into new areas.
To solidify this knowledge further, I suggest practicing with actual topographic maps in urban parks or local trails until you feel comfortable interpreting various features efficiently. With each outing, you’ll build confidence in navigating diverse terrains while enhancing your connection to nature—a skill that proves invaluable as your adventures expand into more challenging landscapes.
As we explore further into navigation skills, we’ll next uncover critical techniques for interpreting the nuances of terrain and elevation.
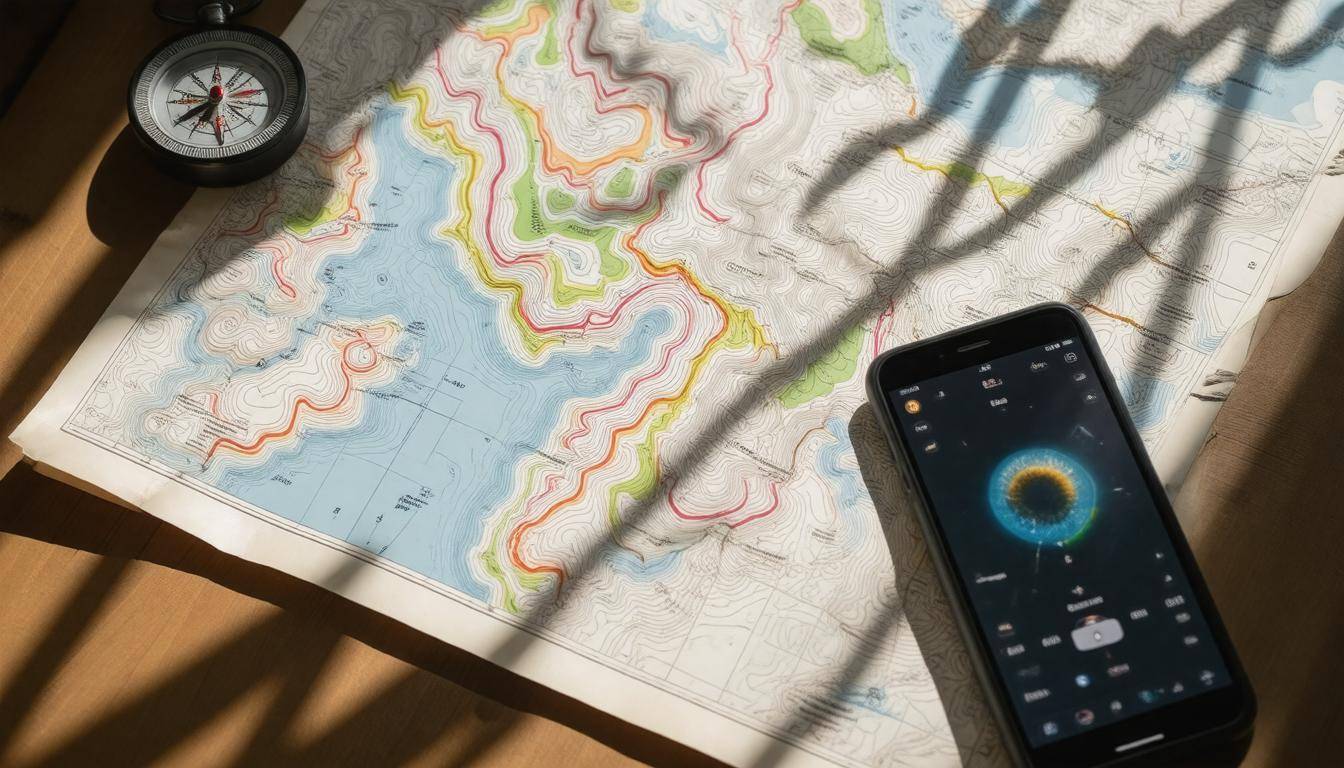
Reading Contours and Topography
Contour lines are much more than just squiggly marks on a map; they are the very language of the land. Understanding how to read them gives you an invaluable tool for navigating various terrains. Essentially, contour lines represent elevation changes on the landscape, and by learning to interpret them, you can decipher the slopes, hills, valleys, and other landforms that might be lurking in your outdoor adventures.
Step I – Find the Index Contour
To begin your journey with contour lines, first locate the index contour. This is typically every fifth line on the map and is distinguished by being thicker or darker. These bold lines indicate specific elevations labeled directly on them. For example, if the index contour is marked at 1,000 feet, then all surrounding contours help gauge smaller increments in elevation. Recognizing this reference point serves as an essential anchor while calculating height changes throughout your hike or exploration.
Now that you know how to find these critical markers, it’s time to calculate the elevation changes using the contour intervals.
Step II – Calculate Elevation Changes
Next up is understanding contour intervals, which are the vertical spaces between adjacent contour lines. Most maps will specify this interval—say, 10 feet or even 50 feet depending on how detailed the map is designed to be. When you travel from one line to another, multiply the number of intervals by the contour interval value to determine how much elevation you’ve gained or lost.
For instance, if you move from a line marked at 800 feet to another at 880 feet with a 10-foot interval, you’ve climbed a total of 80 feet! Being able to quantify these changes not only enriches your understanding of the terrain but also helps you prepare physically for upcoming slopes or drops that could impact your journey.
Armed with knowledge about index contours and elevation calculations, you can now explore how these patterns reveal crucial information about landforms.
Step III – Recognize Landforms
Now that you’ve grasped index contours and intervals, let’s focus on identifying landform types using the shapes of these contour lines. A great rule of thumb is that contours forming closed loops generally represent hills; when those loops possess short line segments (known as hachures) extending inward, they indicate depressions.
Moreover, look out for distinct patterns: U-shaped curves often signify valleys while V-shaped formations suggest ridge lines pointing upward. By honing in on these patterns, you’re not just looking at a map—you’re seeing a three-dimensional representation of the landscape before you. It enhances both safety and enjoyment in outdoor navigation.
Mastering these contour concepts lays down new pathways toward effective navigation as we continue to explore vital skills that will complement your newfound abilities.
Cardinal Directions and Compass Use
Knowing your cardinal directions—North, South, East, and West—is like having a built-in GPS for the great outdoors. These four directions are your compass points, guiding you as you venture into nature. Each direction corresponds to degrees on a compass: North is 0°, East is 90°, South is 180°, and West is 270°. Familiarizing yourself with these basic coordinates lays the groundwork for effective navigation. When you’re out in the wilderness or even just exploring unfamiliar areas, knowing how these cardinal points correspond can help you orient yourself on any map.
Now, let’s explore the compass itself. A modern compass often includes helpful features: a mirror for sighting distant landmarks and a rotating bezel that allows you to set specific bearings. The beauty of using a compass lies in its simplicity—a small device that brings you clarity in vast environments where everything can look the same.
Many outdoor enthusiasts debate whether digital compasses outperform their analog counterparts. While digital versions offer extra features and ease of use, many purists argue that traditional analog compasses are more dependable when it comes to reliability and accuracy. There’s something inherently satisfying about watching that needle settle into place as it responds to the Earth’s magnetic field.
Step I – Hold the Compass Level
The first step to using a compass effectively is ensuring it is level in your hand. Holding it flat is crucial; this allows the needle to spin freely and settle accurately on magnetic north. Your grip can often mean the difference between precise navigation and a detour into unfamiliar territory.
Step II – Align the Needle
Once you’ve got a steady hold, it’s time to align the needle with the orienting arrow. This step might seem trivial, but it’s necessary for achieving an accurate bearing. Rotating your body until both the needle and arrow line up provides a clear indication of your orientation relative to true north.
Step III – Set Your Bearing
With everything aligned, turn the bezel to your desired bearing and note the direction indicated on top of the compass. Following this bearing can guide you seamlessly through dense forests or across open fields—even in low visibility conditions like fog or rain.
“Learning to use my compass saved me countless times during night treks,” recalls avid hiker Jane Doe. Her experience highlights not only the practical benefits of mastering compass navigation but also how empowering this skill can be.
Mastering these foundational skills offers exciting opportunities as we move into a more complex but equally rewarding method of navigating with precision in various landscapes.
Navigating with Coordinates
GPS coordinates, typically expressed as pairs of numbers—latitude and longitude—give us the ability to describe any location on Earth’s surface precisely. It can feel a bit daunting at first, but breaking it down makes it easier to grasp.
Latitude tells us how far north or south we are from the Equator, while longitude indicates how far east or west we are from the Prime Meridian. For example, if you ever wanted to find your way to San Francisco, you would look for its coordinates: 37.7749° N (latitude) and 122.4194° W (longitude).
Each coordinate system element serves a specific purpose; latitude helps you understand your north-south position while longitude covers east-west positioning.
| Element | Description |
|---|---|
| Latitude | Measures north-south position |
| Longitude | Measures east-west position |
| Degrees | Each coordinate is expressed in degrees (°) |
| Minutes | Further broken down into minutes (‘) |
| Seconds | Further down into seconds (”) |
These elements are quite practical for navigation because they provide a framework to find your way around unfamiliar areas, especially when technological tools go awry—or worse, run out of battery! Converting these decimal degrees into degrees, minutes, and seconds simplifies the task of finding your exact position on a physical map. For instance, a decimal degree reading of 37.7749° converts to 37° 46′ 29″ N when expressed in a more detailed unit system. This meticulousness becomes crucial when reading topographic maps that may require accurately pinpointing locations.
But knowing how to read coordinates is only part of the equation; knowing how to plot them on a map is where those skills become truly valuable.
Plotting coordinates isn’t an overwhelming process either. Start by locating the latitude line on your map; trace it until you reach the corresponding longitude line. That intersection point indicates your destination. It sounds easy—and it is once you’ve practiced! You can think of this technique like matching up two puzzle pieces: fit them together correctly, and you’ve successfully navigated to your target.
Remember, practicing these skills doesn’t always have to happen in the wilderness. In fact, you can hone your map reading skills right in your local park or neighborhood by plotting out coordinates available online!
Whether you’re planning an outdoor adventure or simply trying to boost your confidence in using traditional navigation methods rather than relying solely on technology, mastering GPS coordinates equips you for successful exploration. As you continue to embrace this challenge, new realms of navigation will unfold before you.
Exploring the art of effective navigation further involves practical strategies that enhance your skills and confidence on any journey ahead.
Practical Map Reading Tips
Practical tips can make a world of difference when it comes to effectively reading a map, enhancing your confidence in navigating the outdoors. Always remember to keep your map aligned with the real world; this means familiarizing yourself with the terrain around you. By using prominent landmarks as reference points, you’ll not only verify your current location, but you’ll also build a better understanding of the area. This practice transforms the map from a mere guide into a roadmap for adventure.
When you venture into unfamiliar territory, ensure that you know how to orient your map correctly. The cardinal directions (North, East, South, and West) are crucial in this process.
A common mistake occurs when people rely solely on the markings of a map without looking up and assessing their surroundings. Here personal experience comes in handy. There was one instance where I found myself disoriented because I had gotten too fixated on the map’s details while ignoring the landscape ahead. To regain my sense of direction, I looked up and matched my surroundings to my map.
As you navigate, keep a pencil handy for any adjustments or notes. Marking changes directly onto your map can help you remember important details later on. When you’re exploring an area multiple times, certain paths become easier to navigate with small annotations.
Another pivotal moment arises when you realize you’re lost. Instead of panicking, pause and take stock of your last known position. Retracing your steps is one of the most effective strategies you can employ. During another hike, I took a wrong turn and ended up veering off onto an unmarked path. Recognizing my mistake, I retraced my steps and returned to where I felt confident in my navigation—this proved invaluable in avoiding further disorientation.
To enhance your navigation skills, become accustomed to interpreting map symbols and contour lines as they reveal essential information about elevation changes and terrain types. For example, closely spaced contour lines indicate steep hillsides while wider spacing points to gentler slopes. Understanding these nuances can bring clarity when traversing challenging landscapes.
Incorporating these practical tips lays the foundation for reliable map reading abilities across various environments and scenarios. As these foundational skills develop through practice, let us explore further insights into how illustrations can elevate navigation proficiency.
Illustrated Navigation Guide
Visual aids transform the daunting task of understanding maps into an engaging experience. An illustrated navigation guide encapsulates this idea, breaking down intricate concepts into manageable steps.
The first step involves orienting your map properly. This means using a compass to align your map with actual north, ensuring that you understand how the paper world correlates with the real one around you. To do this, open your compass and locate the needle; it will always point to magnetic north. Then, turn your map until all components are aligned, allowing you to see how landmarks in front of you correspond to what is depicted on the map.
After establishing orientation, it’s essential to connect the dots—or rather, the landmarks.
The next step focuses on identifying landmarks. Each symbol on a map represents a physical feature in your environment, whether it’s parks, rivers, or roads. Take a moment to match these symbols with their real-world counterparts; this will deepen your understanding and bolster your confidence in navigating. If you’re standing in a park, look for trees or pathways on your map that mimic those around you. This practice enhances your familiarity and strengthens your connection to nature as each symbol transforms into something tangible and meaningful.
Having identified your surroundings leads naturally to plotting a course.
Step three is all about drawing a route between your current location and desired destination. Start by marking where you are on the map and sketch an intentional route using a pencil. Consider different options—ask yourself if there might be simpler or more scenic paths to take or if there are obstacles that require detours. As you draw this route, reinforce your visual memory by imagining how each turn will feel when you navigate it in person.
For further exploration into illustrated navigation techniques, I highly recommend checking out resources from established websites like REI and National Geographic. They provide detailed guides created by experts who break down navigation skills into user-friendly segments.
Reflecting back on my own experiences, I remember how my initial encounters with navigation came alive through illustrated guides while attending my first survival camp as a teenager. Instead of simply being handed a map and told to learn, I engaged with vibrant images and practical exercises designed to make learning effective yet enjoyable.
Combining eye-catching illustrations with theoretical knowledge creates a holistic experience essential for mastering map reading skills, empowering outdoor enthusiasts to venture confidently into the wild. With these foundational skills in hand, exploring new terrains may grow not only easier but also immensely enjoyable.
How does understanding map symbols and legends contribute to effective navigation?
Understanding map symbols and legends is crucial for effective navigation as they provide essential information about terrain features, landmarks, and routes. Familiarity with these symbols allows navigators to quickly interpret maps, leading to reduced navigation errors and improved decision-making in the field. Studies indicate that individuals who are adept at reading maps make 30% fewer errors when following a route compared to those who rely solely on verbal directions, highlighting the importance of map literacy in successful navigation.
What common mistakes do people make when initially learning to read maps?
One common mistake people make when learning to read maps is misinterpreting the symbols and legends, which can lead to confusion regarding terrain features and navigation routes. Studies have shown that nearly 30% of novice map readers struggle with understanding scale, resulting in inaccurate distance estimation. Additionally, many fail to orient the map correctly with their surroundings, causing them to lose their sense of direction. Familiarizing oneself with these elements through practice can significantly enhance navigation skills.
How do different map projections affect the way we read maps?
Different map projections can significantly affect our interpretation of geographic data by altering the scale, shape, and area of landmasses. For instance, the Mercator projection distorts sizes near the poles, making Greenland appear much larger than it is relative to Africa. This can mislead readers about actual land sizes and distances; for example, while Greenland appears about 13% larger than it actually is, Africa’s true size is often underestimated since it covers approximately 14 times more area. Understanding these differences helps navigators accurately assess distances and spatial relationships in various contexts.
What types of maps should beginners focus on for improving their map reading skills?
Beginners should focus on topographic maps and road maps to enhance their map reading skills. Topographic maps provide detailed information about terrain, elevation, and natural features, which are essential for understanding geographical contexts. In contrast, road maps are excellent for honing navigation skills with clear representations of transportation networks. According to a study by the National Park Service, individuals who regularly use these types of maps demonstrate a 30% increase in navigational proficiency over those who rely solely on GPS technology, highlighting the importance of traditional map literacy in effective navigation.
Are there specific exercises or activities that can enhance map reading abilities?
Yes, specific exercises such as practicing with real maps, utilizing online mapping tools, and engaging in orienteering activities can significantly enhance map reading abilities. Studies have shown that hands-on practice can improve spatial awareness by up to 30%, while regular engagement with various map types helps individuals become more proficient in interpreting symbols and scale. Activities like treasure hunts or navigation challenges are particularly effective, as they incorporate problem-solving skills alongside practical application.