
In an age where we cherish our memories, documents, and artworks, protecting them from unexpected spills and moisture is more important than ever. Whether it’s a cherished family recipe or an important financial record, we all want our papers to stay safe and intact. Thankfully, there are simple DIY methods for waterproofing your valuable documents right at home. From using common household items like gelatin and beeswax to exploring various spray coatings, you can shield your belongings without breaking the bank. Let’s explore these proven techniques that offer lasting protection while keeping your documents looking great!
Proven DIY document waterproofing methods include using materials such as clear acrylic varnish spray, beeswax, or epoxy resin, each providing varying degrees of protection against moisture while maintaining the integrity of the document. Additionally, applying a matte top coat sealant can offer minimal splash resistance without altering the document’s appearance significantly.

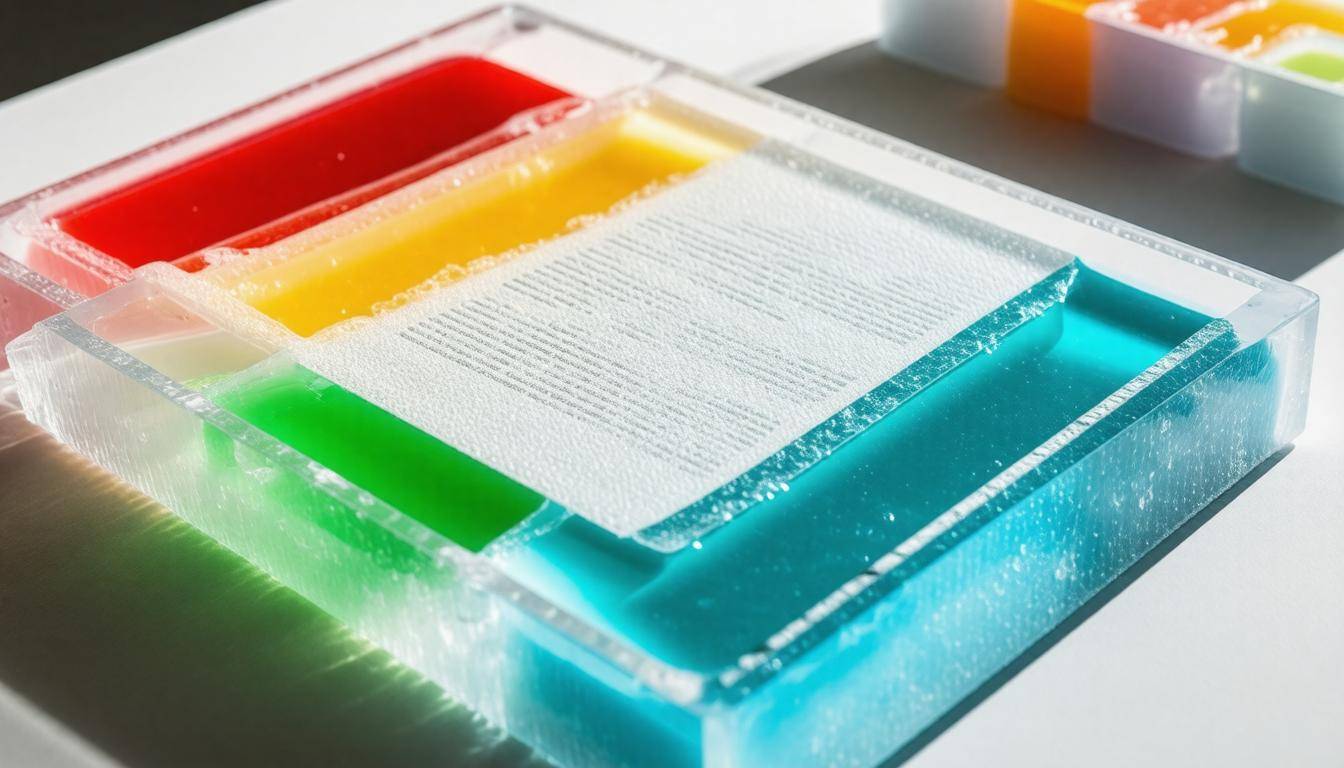
DIY Waterproofing Methods
When it comes to DIY document waterproofing, each method offers its own advantages and challenges. Understanding the specifics of each approach can empower you to select one that provides the protection you require and aligns with your aesthetic preferences.
For instance, the gelatin coating method is particularly user-friendly; when I first tried it, I mixed Knox unflavored gelatin with warm water to create a smooth, firm coating. After applying it gently with a soft brush, I found that it preserved the document’s original appearance beautifully. However, patience is key here—allowing it to dry completely is essential for an effective shield against moisture.
While gelatin might work well for lighter projects or art pieces, let’s consider another option: beeswax.
Method I – Gelatin Coating
To create your gelatin solution, you’ll need approximately one tablespoon of gelatin for every cup of warm water. Stir until fully dissolved, and then dip your brush into this mixture to begin applying it generously yet carefully on the surface of your document.
It’s crucial here to start from the center and work outward to minimize air bubbles and ensure an even coat. Depending on humidity levels, drying may take a few hours. Resist the temptation to rush this step—the longer it cures, the more effective the waterproof barrier will be.
In contrast to the subtle sophistication of gelatin, beeswax offers a more rustic charm while providing durable protection.
Method II – Beeswax Application
The process begins by melting an ample block of beeswax in a double boiler, ensuring that the wax does not overheat (you want just enough warmth to liquefy). Once melted, use a high-quality brush to apply a thin layer onto your document.
As you apply the wax, let it soak into the fibers; this helps achieve a stronger hold against moisture. After you’ve coated the surface, let the wax sit for a moment before using a soft cloth to buff away any excess residue. One thing I learned through trial and error is that this method can slightly stiffen paper—it’s essential to weigh this drawback against its long-lasting waterproof properties.
If you’re looking for something with added gloss and exceptional durability, consider diving into shellac.
Method III – Denatured Alcohol and Shellac Mixture
This method involves mixing shellac flakes with denatured alcohol until they fully dissolve into a clear solution—typically about one part shellac to four parts alcohol works well for an effective mix.
Applying this glossy coating requires using a clean brush and working on small sections at a time to avoid streaks as it dries quickly. Note that while this technique can enrich colors and enhance appearance, it may darken documents slightly—a trade-off worth considering for those aiming for robust moisture protection and longevity.
With these methods laid out in detail, think about your specific needs and aesthetic vision as you decide which approach will best serve your cherished documents.
As you transition towards exploring innovative coatings that offer even more benefits, it’s important to consider various options available on the market.
Protective Spray Coating
Spray coatings are a go-to option for anyone looking to protect documents without compromising their appearance. The beauty of these sprays lies in their simplicity and effectiveness; they create a uniform protective layer that keeps moisture at bay while allowing the original design and color to shine through. This means your cherished artworks or essential documents can remain intact against daily life challenges such as accidental spills or environmental humidity.
Acrylic Spray Sealer
Among the various options available, a clear acrylic spray sealer stands out as an excellent choice for DIY waterproofing.
These sealers come in both matte and gloss finishes, allowing you to choose one that best suits your aesthetic preferences. To apply, hold the can about 12 inches away from your document and use sweeping motions to cover the surface evenly. It’s key to focus on light applications, as multiple thin coats yield better overall results than a single heavy spray. Typically, two or three light coats will provide sufficient protection without altering the document’s characteristics.
Silicone-Based Sprays
If you’re seeking something specifically designed to repel water, silicone-based sprays like Scotchgard should be on your radar. They’re particularly effective for materials expected to see light exposure, such as outdoor maps or signage.
Not only do they create a robust barrier against moisture, but they also enhance durability by preventing deterioration from UV rays. However, it’s important to remember that while these sprays excel in waterproofing, they may require proper ventilation during application to prevent strong chemical fumes from lingering.
Choosing the right spray is just one aspect of ensuring your documents are protected; understanding application techniques and timing is equally critical for optimal results.
Timing and Application Tips
When applying these protective sprays, mind the environmental conditions—high humidity or damp settings can hinder drying time and lead to less effective sealing.
Ideally, aim to apply these coatings in a room with good airflow at temperatures around room temperature (65-75°F). It’s also wise to allow sufficient drying time between coats, typically ranging from 30 minutes to an hour depending on the product and environmental factors.
Incorporating these strategies into your waterproofing routine will enhance protection for your beloved documents and provide peace of mind knowing they’re safeguarded against life’s inevitable spills and weather changes.
As we continue exploring effective techniques, let’s now shift our focus toward methods involving natural finishes that further contribute to document preservation.
Wax and Oil Techniques
The allure of traditional methods in document waterproofing often lies within their simplicity and effectiveness, representing a rich history in preservation techniques.
Take beeswax and paraffin, for instance. By melting equal parts of these two ingredients together in a double boiler—keeping the heat low to prevent burning—you create an ideal concoction for safeguarding your cherished documents. Using a soft cloth, you can apply this warm mixture in thin, even layers. The key is to buff it gently until it no longer feels sticky; this process not only protects your document but also imparts a classic finish that showcases its natural beauty.
This approach offers excellent protection against moisture, all while preserving the document’s aesthetics.
Linseed oil serves as another wonderful natural alternative. Boiled linseed oil can be brushed directly onto the paper, allowing it to soak in deeply. While this technique is effective, patience is required because the drying time can stretch over several days. However, the payoff is worth it—once fully cured, linseed oil leaves a flexible and waterproof surface that can hold up against environmental elements while keeping the original texture and character of the paper intact.
It’s essential to note that both methods may alter the feel and appearance of your documents slightly. The wax provides an undeniable sheen while linseed oil infuses a richness you can’t ignore. If you prefer a more robust and flexible option without compromising on the document’s tactile qualities, liquid resin layers come into play as an alternative solution.
Understanding these techniques empowers you to choose the method that aligns best with your needs for document protection and aesthetics. We can now explore how to implement protective coatings that incorporate liquid mediums for even greater durability.
Liquid Resin Layers
Liquid resin, especially epoxy and polyurethane, is an excellent option for waterproofing documents while providing a sleek, professional finish. When applied correctly, these materials form a strong barrier that resists water damage and physical wear. Imagine wanting to preserve a precious family recipe or artwork; the right resin will ensure it remains unharmed even in humid conditions.
Epoxy Resin
To begin with epoxy resin, you must follow the manufacturer’s instructions closely when mixing. This step is crucial because a precise mix ensures optimal hardness and durability. Once mixed thoroughly, use a brush to apply a thin, even layer of resin onto the document’s surface. As the resin cures—typically taking around 24 hours at room temperature—you’ll witness the transformation of your paper into something more durable and water-resistant. However, keep in mind that while multiple layers can enhance protection, they will also make the document stiffer and less flexible. Therefore, balancing durability with desired flexibility is key.
An insider tip: if you want a less rigid result after curing, consider incorporating a fabric backing before applying the resin. This method maintains some flexibility while still offering robust protection against moisture and damage.
Polyurethane Coating
Another great option is polyurethane coating, which tends to provide a softer finish compared to epoxy. It’s particularly advantageous when you desire flexibility along with waterproofing. To apply, pour the polyurethane into a shallow container and dip a brush or roller into it. Coat the document similarly to how you would with epoxy resin; however, allow for several thin applications rather than one thick layer. This technique not only ensures proper adhesion but also prevents unsightly drips or bubbles from forming on the surface.
What makes polyurethane stand out is its resistance to cracking over time, which is especially beneficial for documents that may be frequently handled. Many users report satisfaction with the longevity of this method as they enjoy being able to keep their paperwork intact over the years without concern for degradation.
With these methods showcasing effective ways to protect your documents from moisture, let’s shift our focus to another reliable approach that offers both protection and a polished finish.
Lamination and Sealing
Lamination has become a preferred choice among many for waterproofing documents, combining practicality with effectiveness. By laminating, you’re creating a protective barrier that guards against moisture, tears, and fading. The most common form of lamination is hot lamination, which requires specific tools but promises impressive results.
Hot Lamination
To begin the hot lamination process, you’ll need a laminating machine and pouches. First, ensure that your document is clean and free from dust—this will help the adhesive stick better and keep the end result pristine. After placing your document inside a laminating pouch, feed it into the pouch laminator. As it passes through, the heat from the machine activates the adhesive in the laminate, sealing your document tightly within clear plastic. The outcome is a sturdy and durable finish that can last for years.
Keep in mind that while hot lamination offers exceptional protection, it may involve upfront costs for both the machine and materials. If your needs require frequently laminated documents, however, these costs can be justified by their longevity and resilience.
Heat-Free Sealing Tapes
If hot lamination seems beyond what you’re willing to invest or if you prefer a more nimble approach, consider heat-free sealing tapes as an excellent alternative. These clear, adhesive-backed sheets—like those made by 3M—are straightforward to use; simply peel and stick over your document for an instant layer of protection. They don’t provide the same robust shield against all types of damage as hot lamination does, yet they can effectively guard against light moisture and typical wear-and-tear.
One advantage of using heat-free sealing tapes is their rapid application—no waiting for machines to warm up or intricate setups required. This method is particularly useful when time is of the essence. However, while quicker, these tape methods might be less resilient over time than traditional lamination.
Regardless of which method you choose for laminating or sealing your documents, verifying their effectiveness is essential. This ensures you’ve achieved the protection you desire without compromising the integrity of your important papers while setting up your next exploration into evaluating waterproofing performance.
Testing Waterproofing Efforts
To truly ensure that your chosen document waterproofing method is effective, it’s essential to simulate real-world conditions. This approach allows you to see firsthand how well your materials hold up against water, which is vital for preserving important documents or cherished artworks.
Water Spray Test
A good starting point is the water spray test. Lightly mist a small area of the document with a spray bottle filled with water. As you do this, watch closely for how the water interacts with the surface. Ideally, you want to see the water bead up and roll off without soaking in. If it penetrates, this indicates that the waterproofing method may not be sufficient for protecting your documents.
Consider this: if water beads like morning dew on fresh grass, you know you’re on the right track.
Soak Test
Next comes the more comprehensive soak test, where you’ll want to take things a step further. Place a corner of your document in a shallow dish of water for about five minutes. Afterward, lift it out and check closely for any signs of moisture seeping through. Any discoloration or change in texture will tell you whether your waterproofing efforts were successful. You’re really putting your methods to the ultimate test here.
| Test Method | Duration | Expected Result |
|---|---|---|
| Spray Test | 1 minute | Water beads up |
| Soak Test | 5 minutes | No water marks |
These tests allow you to gauge not just immediate effectiveness but also longer-term durability as well. The weight or feel of the document after being subjected to moisture can also provide hints about its resilience and longevity.
With a clear understanding of how your waterproofing methods perform under various conditions, it’s time to explore how these techniques translate into practical applications across different creative projects.
Craft and Project Applications

Waterproofing isn’t just for safeguarding important paperwork; it can significantly enhance the durability and aesthetic appeal of various crafts and projects.
For instance, if you’re working on paper mache, applying a generous layer of beeswax creates an effective moisture barrier while preserving the paper’s natural look. Simply melt the beeswax and brush it on to provide a lasting seal that will keep your creations intact through showers or spills.
Similarly, those who engage in photography know how crucial it is to protect their prints from the elements. A thin layer of resin waterproofs larger prints and imparts a glossy finish, elevating the visual depth of the colors and making them pop while providing that sought-after tactile quality. You pour hours of effort into capturing the perfect image; why not apply a protective coating that ensures it looks stunning for years to come?
As you consider other applications, don’t underestimate the power of acrylic varnish sprays. They are incredibly versatile for various art projects, whether you’re sealing mixed media artwork or ensuring paper crafts remain vibrant despite exposure to humidity. Three quick coats can offer substantial protection without compromising the artwork’s original charm.
It’s important to remember that while waterproofing enhances durability, choosing the right method depends on both your material and desired outcome.
One technique gaining popularity among crafters is using silicone sealant. When applied correctly, this flexible coating provides a robust waterproof barrier that’s particularly useful for outdoor projects like garden decor or event invitations designed to be displayed at parties under sun or drizzle. Notably, silicone sealant allows you to create custom waterproof pockets for materials like recipes or instructional sheets, preserving their usability against splashes.
Common Projects and Waterproofing Methods
Here’s an overview of some common projects and their effective waterproofing methods:
-
Paper Crafts: Acrylic varnish spray offers good protection without altering appearance.
-
Textile Projects: Beeswax works wonders for fabric items like outdoor banners or reusable cloth bags.
-
Mixed Media Art: A layer of epoxy resin creates stunning visual effects while safeguarding your work.
-
Wooden Crafts: Using clear acrylic or wax coatings enhances durability while retaining the wood’s natural beauty.
Integrating these waterproofing techniques into your crafting routine will bolster the lifespan of your projects and ensure they stay beautiful regardless of environmental factors.
With each technique presenting unique advantages, exploring practical strategies for maintaining that protection over time is essential. This preparation lays the groundwork for ensuring your crafted treasures withstand whatever life throws at them.
Tips for Long-Lasting Protection
To start, it’s essential to avoid high humidity wherever you choose to store your documents. This is particularly crucial because excessive moisture in the environment can compromise even the best waterproof coatings.
When I store my own documents, I always opt for a cool, dry space—perhaps a cabinet or drawer that remains shielded from external fluctuations. The goal is to create a controlled atmosphere that works actively against dampness, thus enhancing the longevity of your protective measures.
Don’t underestimate the importance of using quality materials throughout your waterproofing process. Higher-grade products may come with a steeper price tag, but they often deliver superior results. For instance, opting for Knox unflavored gelatin instead of generic alternatives—or investing in good-quality acrylic varnish—can mean the difference between a document that stands the test of time versus one that fades and peels under stress. Careful selection at the outset pays off.
Another vital aspect of maintenance involves regular inspections of your waterproofed items. I recommend checking them every six months to ensure the coatings remain intact and effective. During these inspections, look closely for any signs of flaking or discoloration, which might signal that it’s time to reapply or reinforce your protective layer.
This practice not only prevents minor issues from escalating into larger problems but also provides an opportunity to become familiar with how each material performs over time.
Additionally, consider the necessity of reapplying coatings as part of your upkeep routine. Some methods, like wax coatings, are particularly susceptible to wear and tear from handling and exposure to air. This means they need refreshing periodically to maintain their waterproof qualities.
Not all protective sprays offer lasting effects; many require intentional follow-up applications to be most effective. By taking this extra step, you can be assured that your projects continue to thrive even when exposed to environmental elements.
Lastly, proper storage cannot be overstated when it comes to preserving your efforts in waterproofing. Store documents flat rather than stacked on top of each other or crammed into tight spaces, which can lead to cracks in materials like resin coatings.
Flat storage minimizes tension on the finish and helps avoid unsightly creases that can compromise the seal of the protective layers. Think of it like tucking a precious piece of art away—it deserves space and respect!
By incorporating these methods and tips diligently into your routine, you’ll extend the life of your documents and crafts well into the future. Regular care transforms what might just be paper into treasures that endure!
In maintaining these practices, you ensure that your hard work in waterproofing yields lasting protection for years to come.