
When you’re outdoors, whether hiking, camping, or just enjoying nature, something as simple as an emergency blanket can make a huge difference. Picture being caught in a sudden storm or getting lost during a chilly hike. Just having a lightweight blanket could mean the difference between feeling comfortable and risking hypothermia. Personally, I’ve faced my share of unexpected weather while out in the wilderness, and that’s when I realized how essential these blankets are. They not only help keep you warm but also serve various purposes that can aid your survival. Let’s dive into some easy ways to create your own homemade emergency blankets using materials that are both effective and accessible!
You can create effective homemade emergency blankets using reflective materials like Mylar space blankets, layering fabrics such as fleece with waterproof layers, or insulating with aluminum foil sandwiched between fabric for durability. These methods not only help retain warmth but also serve various essential functions in emergency scenarios, making them invaluable additions to your gear.

Why You Should Have an Emergency Blanket
Emergency blankets are indispensable when it comes to staying warm and safe in dire circumstances. They act like a protective cocoon that reflects up to 90% of your body heat, trapping warmth close to you during chilly nights or unexpected survival situations. The statistics speak for themselves. According to the CDC, hypothermia is responsible for over 1,300 deaths each year in the U.S., making the need for preparedness glaringly evident. Possessing an emergency blanket not only enhances your chances of survival but also equips you with a reliable resource that can save your life when every second counts.
Safety & Versatility
Beyond acting as a thermal barrier against the cold, emergency blankets offer remarkable versatility in various emergencies. For instance, if you’re stranded and waiting for rescue, their reflective surfaces can signal search and rescue teams from afar. Their bright colors catch attention easily, serving as a beacon in the barren wilderness or during inclement weather.
Reflecting on past experiences, I once found myself stranded during a winter hike after a sudden snowstorm rolled in. My emergency blanket not only provided warmth but was also instrumental as I fashioned it into a windbreaker for my shelter against biting winds. The blanket turned what could have been a dire situation into a manageable one.
Moreover, they can serve multiple roles: acting as a makeshift tent or windbreak while camping, increasing insulation under sleeping pads, or even wrapping around chilled limbs to foster quick warmth restoration after exposure to cold. Each of these applications highlights how one small piece of gear can significantly elevate your chances of navigating through harsh conditions safely.
With all these benefits in mind, assembling your own emergency blanket becomes more enticing—especially when you understand the materials needed to create one effectively.
Gathering Materials and Tools
A strong foundation begins with assembling your materials. You’ll want to collect items that not only provide warmth but also ensure durability in outdoor conditions.
Among the essential materials to gather, aluminum foil rolls make a great starting point. This lightweight, reflective material can trap body heat, enhancing your blanket’s efficiency. Alongside it, Mylar sheets, often referred to as space blankets, are superb for their ability to reflect thermal radiation; they are also compact and easy to pack.
Next up are the heavy-duty plastics and thick fabrics, both of which play a crucial role in your blanket’s insulation capabilities.
Essential Materials
-
Heavy-duty plastic serves as a waterproof barrier, protecting against moisture that can quickly sap warmth.
-
Thick fabric options like fleece or wool not only add comfort but also help retain body heat through insulation.
-
If you have old sleeping bags lying around, don’t hesitate to repurpose them; they are particularly effective due to their design specifically geared towards keeping warmth.
With your materials set, let’s focus on the tools necessary for crafting your blanket effectively.
You will need scissors for precise cutting, ensuring every piece fits snugly together. Duct tape is invaluable for securing edges and providing durability without fuss. A measuring tape ensures that each component of your blanket is cut to the correct size, while a sewing kit allows for an even more robust assembly when needed.
Each tool enhances the construction process, making it smoother and increasing the likelihood of a successful outcome.
Now that you’ve gathered everything you need for this DIY adventure, we can smoothly transition into exploring practical applications using reflective materials for insulation in survival situations.
Method 1: Aluminum Foil Insulation
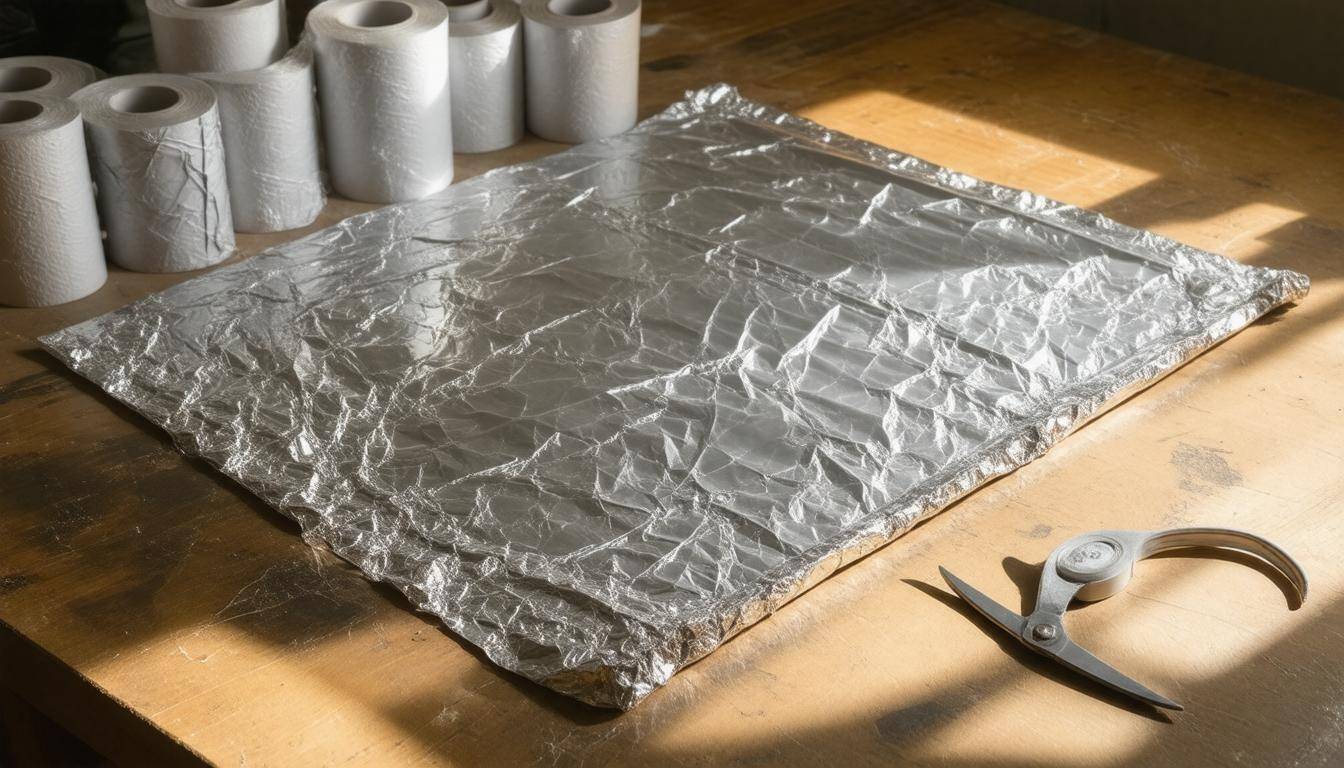
Aluminum foil is more than just a kitchen staple; it’s a lightweight marvel for the great outdoors. Its property of reflecting body heat makes it an ideal choice for creating homemade emergency blankets. While it may seem like a simple solution, its effectiveness lies in how you handle and layer it. In cold conditions, every small action contributes to your warmth, making this technique essential.
Step-by-Step Instructions
To create a comfortable and heat-retaining barrier against the chill, start by gathering your sheets of heavy-duty aluminum foil. Aim for sheets that are at least five feet long. The first step focuses on layering. By spreading out one large sheet, you prepare for additional protective layers that will follow. This initial sheet acts like a base that captures and reflects your body’s heat back towards you.
Next, to add durability, take a layer of plastic—something like a plastic tarp or even a sturdy garbage bag—and lay it over the aluminum foil. This prevents tears while providing a waterproof layer. Imagine being caught in unexpected rain or snow; that extra protection keeps you insulated rather than drenched and exposed to the elements.
Sealing the edges is where attention to detail pays off. Using duct tape, secure the edges of your aluminum foil and plastic layers together firmly. Make sure there are no gaps; this is crucial because any openings allow cold air to seep in while letting the heat escape. If you’ve ever been in a poorly insulated tent, you know what I mean—it’s never fun!
Some might argue that using just aluminum foil would suffice for warmth. While it may work temporarily, without those added layers and proper sealing, you’re setting yourself up for potential failure if the weather takes a turn for the worse.
A testament to this DIY approach’s effectiveness comes from real-life examples: A group of mountaineers found themselves trapped during an unexpected snowstorm. They crafted emergency blankets similar to this setup and reported significant heat retention thanks to their layered construction. It underscores just how critical these thoughtful steps can be when battling cold conditions.
With these insights into aluminum foil insulation in mind, let’s proceed to explore another effective method that combines flexibility with robustness in creating emergency blankets.
Method 2: Plastic and Mylar Sheets
Mylar sheets, often seen as those shiny survival blankets, are fantastic for not only reflecting body heat but also for creating a lightweight and highly portable shelter. When combined with plastic sheeting, they offer enhanced waterproofing, making them ideal for wet environments during camping or any survival situation. By harnessing the properties of both materials, you can create a versatile emergency blanket that ensures you remain dry while effectively retaining body warmth.
Step-by-Step Instructions
First off, let’s discuss how to combine these materials effectively. Lay your Mylar sheet flat onto the ground or a clean surface. Then, take a heavy-duty plastic sheet—this could be something like the plastic used in construction projects—and place it on top. This method provides an excellent balance: the Mylar reflects your body heat back towards you while the plastic keeps moisture from seeping through.
Next up is sealing the combination. Use clear packing tape to secure the edges of the Mylar and plastic together. It’s imperative to ensure that no air pockets exist between the two layers; bubbles or wrinkles can decrease the efficacy of your blanket by allowing cold air to penetrate. Flat and smooth edges are key to creating an effective barrier against the elements.
The outcome? A robust and efficient emergency blanket that not only offers insulation but can also be folded into a compact form for hassle-free storage in your backpack or emergency kit. This might seem simple yet it provides dual functionality by combining heat retention with water resistance—a crucial consideration when temperatures drop and conditions worsen.
Whether you’re facing unexpected rain or chilly winds during a camping trip, this layered design serves as a reliable refuge.
As we continue to build upon these ideas, let’s explore how incorporating additional fabrics can enhance your emergency blanket’s effectiveness while ensuring comfort against your skin.
Method 3: Layering with Fabric
When it comes to creating a homemade emergency blanket, utilizing multiple layers of fabric can significantly improve insulation and comfort. Fabrics like wool and fleece are known for their excellent thermal properties, providing a cozy shield against the cold. Wool’s natural ability to trap air makes it a phenomenal choice for retaining body heat, while fleece is lightweight, easy to handle, and soft against the skin. This combination allows you to maximize warmth without adding excessive bulk, making it a favorite among campers and outdoor enthusiasts.
Benefits of Fabric Layers
Have you ever felt the snug embrace of a wool sweater on a brisk winter day? That’s the kind of warmth you’re aiming for when layering fabrics in your emergency blanket. The breathable nature of these materials means that while they retain heat, they also allow for some moisture control—crucial in preventing that suffocating feeling which can come from condensation trapped in less breathable materials. It’s vital to remember that while staying warm is your goal, avoiding trapping sweat against your body is equally important; this can lead to chilling once temperatures drop further.
Step-by-Step Instructions
Preparing your fabric layers doesn’t require saying goodbye to fashion; instead, think of it as crafting an insulated cocoon for emergencies. Start by cutting two pieces of fabric into manageable lengths—about six feet long works perfectly for most uses. Wool excels in retaining heat, but if you’re looking for something lighter, fleece will do just fine while still offering commendable insulation.
1. Fabric Preparation
As you prepare your fabric pieces, select materials that resonate with both comfort and durability. Since wool provides excellent warmth retention even when wet, it’s often my go-to choice for creating cozy layers. However, pairing it with fleece offers added ease of use. Imagine wrapping yourself in both—it’s like having the best of both worlds at your fingertips.
2. Building Layers
Next comes the fun part: layering! Think of it as building a fort but with more intention. For optimal insulation, stack one layer of wool followed by one layer of fleece. This creates an impressive barrier against the cold while ensuring that the blanket stays lightweight enough to roll up neatly for storage in your emergency kit.
3. Securing the Edges
Once you’ve stacked those layers just right, it’s time to secure them together so they don’t fall apart when you need them most. Sewing along the edges is one option; however, if sewing isn’t your forte or resources are limited, fabric adhesive can provide a strong bond that holds well under pressure. By securing the edges properly, you ensure that each layer remains intact during use and maximizes its insulating potential.
4. Packing Tips
Finally, once you’ve crafted the perfect emergency blanket, consider how you’ll store it. Rolling the fabric tightly and securing it with straps not only saves space but also ensures that when you reach for this blanket during an emergency situation, it’ll be ready for action without fussing over tangles or damage.
Combining various fabrics offers incredible benefits for warmth; using reflective Mylar alongside these fabrics represents another effective method to amplify insulation further while keeping your emergency blanket light and portable.
Method 4: Reflective Mylar with Fleece

Combining reflective Mylar with fabric like fleece enhances the heat retention capability of the blanket significantly. The shiny surface of Mylar reflects body heat back towards you. With added insulation from fleece, known for its warmth and comfort, you create a barrier that helps maintain your body temperature even in harsh conditions. This combination is not just warm, but also lightweight and compact, making it an ideal choice for camping or emergency kits.
Step-by-Step Instructions
1. Combining Materials
Begin by laying a Mylar sheet flat on a clean surface. You’ll want it to be approximately 6×6 feet, offering ample coverage when wrapped around you. Take a fleece layer of the same size and place it directly on top of the Mylar. This two-layer setup utilizes the thermal efficiency of both materials; while Mylar reflects body heat, fleece traps it.
2. Bonding the Layers
To bond these layers, spray a fabric adhesive suitable for this purpose onto the Mylar side of the fleece. Ensure you’re working in a well-ventilated area because the adhesive can have strong fumes. Once you’ve applied the adhesive, carefully press the two layers together to eliminate air bubbles—this ensures maximum contact for effective heat retention.
3. Finishing Touches
For durability, stitch around the perimeter of the combined blanket to keep the layers from separating during use. This sewing not only fortifies your blanket but also provides a more finished look, making it easier to pack away neatly when you’re not using it.
Many users who tested this method at cold campsites reported enhanced warmth compared to single-layer blankets, claiming that this careful combination creates a truly insulated experience in frigid temperatures.
Armed with this knowledge, we’re now ready to explore how transforming everyday items can provide effective solutions for staying warm outdoors during chilly nights.
Method 5: Repurposing Old Sleeping Bags
Old sleeping bags can be a treasure trove of warmth and comfort when the outdoors turns cold. They often contain sufficient insulation materials and lining that make them ideal for transforming into emergency blankets. Whether you’ve worn out your favorite bag or simply have one lying around, repurposing it not only extends its life but also provides you with a lightweight and portable solution during emergencies.
Step-by-Step Instructions
The first step in this process is preparation. Lay your old sleeping bag flat on a clean surface; this gives you a clear view of what you’re working with. As you do this, check for any damaged sections. If found, cut those out carefully so that you’re left with durable material that retains its effectiveness. This is crucial because any weak spots could compromise the overall performance of your new emergency blanket.
Next comes adding reflective elements. Here, a Mylar sheet can truly enhance your blanket’s functionality. By inserting this reflective material into the inner lining of your sleeping bag, you create a thermal barrier that reflects body heat back towards you. This simple addition can significantly increase warmth retention, making your blanket essential for those frigid nights outdoors.
After incorporating the Mylar layer, it’s time to reinforce seams. Gather a needle and sturdy thread, and methodically sew the edges of the bag securely. Ensure you reinforce any vulnerable seams with additional stitching—this will help hold everything together during prolonged use. The integrity of your craft directly affects your safety in an emergency scenario.
Packing Tips
Once you’ve completed crafting your homemade emergency blanket, store it properly for quick access. Fold the repurposed blanket tightly, shaping it into a compact form for easy transportation. Utilize fasteners like Velcro straps or elastic bands to keep bundles tight within your survival kit. A neatly packed blanket ensures that it doesn’t take up much space yet is readily available whenever needed.
Having established how to create and prepare your emergency blanket effectively, it’s important next to assess its performance to ensure it meets safety standards for outdoor survival situations.
Testing Your DIY Emergency Blanket
Testing your homemade emergency blanket is a vital step to ascertain its effectiveness in real survival situations. Without this evaluation, you might be left unprepared during an unexpected cold snap or harsh weather conditions. You want to ensure that the selected materials work well together, so a few straightforward tests will help simulate actual conditions.
Field Test
To conduct a field test, wait for a cold night and wrap yourself in your DIY blanket outside. This not only allows you to feel its immediate warmth but also lets you move around.
Test the blanket’s durability while doing activities like walking or stirring—a bit of mobility can reveal whether the fabric shifts or tears easily.
During this test, use a thermometer to measure the temperature inside and outside the blanket. This provides an empirical way to evaluate how well your blanket retains heat. If there’s a significant difference between the two temperatures, it’s a good sign. If not, consider re-evaluating your materials or construction methods.
Submersion Test
The next essential test involves determining the waterproofing capabilities of your emergency blanket. Lightly spray water on the outer layer and then check for any moisture leaks into the inner layers.
This simulates rainy conditions where staying dry is essential for temperature regulation. Moisture can cause rapid heat loss, even when wrapped in fabric, so ensuring the inner layers remain dry is crucial.
Be vigilant about areas where water may seep through; take notes on weak spots and plan to reinforce them with additional layers or sealant as necessary.
Wind Resistance Test
Next, evaluate how well your blanket resists wind by positioning it against a strong fan to simulate windy conditions. This simple action can illustrate where the blanket might fail: strong gusts that penetrate gaps can compromise its ability to keep you warm.
Any places where wind passes through indicate where adjustments are necessary—whether by sealing gaps with tape or adding extra layers of material for better insulation.
By performing these tests systematically, you gain confidence that your homemade emergency blanket is prepared for real-life emergencies, offering both peace of mind and warmth when you’re out in nature’s unpredictable elements.
In crafting efficient emergency solutions, remember that preparation can make all the difference in survival situations. Ensure you test thoroughly so you’re ready for whatever conditions come your way.