
In uncertain times, having a reliable stash of preserved food can mean the difference between feeling panicked and staying prepared. Whether it’s for an impending storm or simply wanting to reduce trips to the grocery store, knowing how to properly preserve food at home can bring peace of mind. The methods we’ll explore, like canning, freezing, drying, and fermenting, offer practical solutions for keeping your favorite ingredients safe and delicious for the long haul. After spending time testing these techniques and gathering insights from various sources, I’m excited to share essential tips that make preserving food both simple and rewarding. Let’s dive into the world of homemade food preservation together and discover how you can easily transform your kitchen into a resourceful haven!
The Homemade Emergency Food Preservation: Methods Guide covers essential techniques such as canning, freezing, drying, and fermenting. Each method includes detailed steps, pros and cons, and important safety considerations to help you effectively preserve food for emergencies while maintaining quality and flavor.
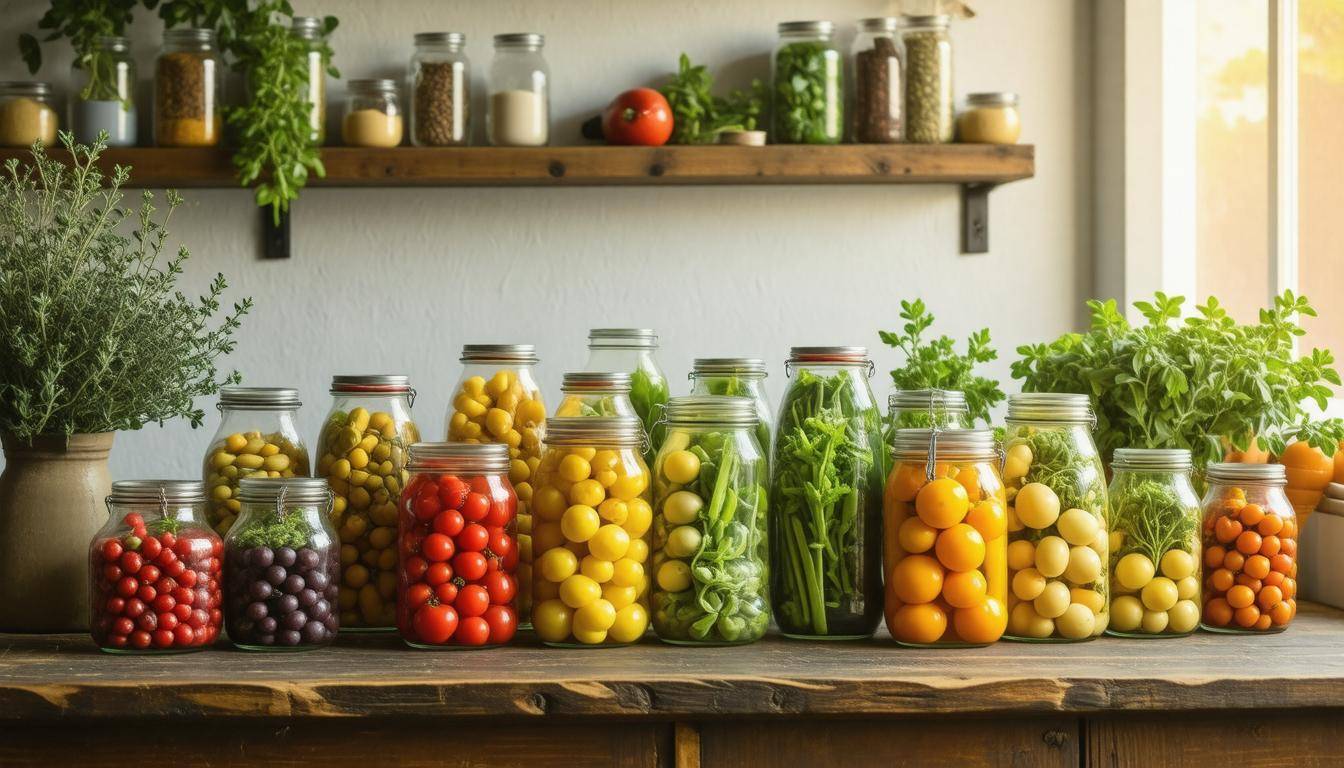
Best Methods for Homemade Food Preservation
When it comes to food preservation, each method brings something unique to the table. Whether you’re trying to keep your harvest from the garden or stocking up for unforeseen circumstances, the right technique can enhance flavors while extending shelf life.
For instance, canning is fantastic for fruits and vegetables as it seals them in jars while heating to eliminate harmful bacteria. This method allows the vibrant tastes of summer fruits to shine through even in winter, making a jar of homemade peach preserves feel like sunshine on a cold day.
On the other hand, freezing is ideal for meats and prepared meals because it effectively halts bacterial growth. Imagine tossing your leftover chili into freezer-safe bags, knowing that in a month’s time, dinner will only be a microwave away. However, remember that freezing requires electricity; a power outage could mean spoilage of those lovingly prepared meals.
Another incredibly useful method is dehydrating. This technique is effective with herbs and snack foods such as apple chips or jerky. By removing moisture, dehydrated foods become lightweight while offering long shelf lives without needing refrigeration. Picture being able to grab snacks on hiking trips or adding dried herbs to your dishes, knowing they were harvested from your own garden.
Lastly, we have fermenting, which not only preserves food but elevates it with health benefits and distinctive flavors. Fermentation transforms ordinary vegetables into tangy delights—think sauerkraut or pickles—that last longer and contribute probiotics to your diet. While this method might not appeal to every palate at first, those who embrace its distinct taste often find it hard to go back to commercially made versions.
Here’s a brief comparison of these preservation methods:
| Method | Best For | Pros | Cons |
|---|---|---|---|
| Canning | Fruits, Vegetables | Long shelf life (up to a year or more), retains flavor | Requires equipment; can be time-consuming |
| Freezing | Meat, Prepared Meals | Quick and easy process; retains nutrients | Dependent on electricity; limited storage time |
| Dehydrating | Herbs, Snacks | Lightweight and long shelf life | Requires storage space |
| Fermenting | Vegetables | Adds nutrients and unique flavors | Taste isn’t for everyone |
Each method serves its purpose uniquely. The choice ultimately depends on personal preference, available resources, and how each method aligns with your emergency food supply strategy. Transitioning now brings us into the realm of preserving with precision and skillful techniques that ensure safety and enjoyment.
Essential Canning Techniques
Canning is an art that combines science and tradition, allowing you to enjoy seasonal produce throughout the year. At its core, it involves preserving food by creating a sealed environment that prevents spoilage. Understanding the two primary methods of canning—water-bath canning and pressure canning—is crucial for maintaining food safety and quality. High-acid foods, like fruits and jams, thrive under water-bath canning, while low-acid foods, such as vegetables and meats, require pressure canning to eliminate harmful bacteria.
Step-by-Step Guide
Preparation
First things first: preparation is key. Wash your fruits or vegetables thoroughly to remove any dirt or pesticides. A gentle scrub might be a good idea for tougher skins. Then peel and slice them according to your recipe’s requirements. But there’s another vital step—sterilizing your jars. This can be done by boiling them in water for about ten minutes or running them through a dishwasher on the sterilize cycle. Sterilization is essential because any lingering bacteria can lead to spoilage even after sealing.
Once everything is prepped and your jars are sparkling clean, we move on to the next stage: filling those jars.
Filling
The filling process might seem straightforward, but it’s where careful attention to detail pays off. Start packing your prepared food into the jars while leaving about half an inch of headspace at the top. This space is necessary because food expands during processing. Additionally, air bubbles can sneak in between pieces of food, potentially compromising the seal; that’s why you’ll need a non-metallic spatula to gently remove these bubbles from the sides of the jar.
With your jars packed and bubble-free, it’s time to seal them up.
Processing
Sealing those jars properly is critical for food safety. Carefully place the lids on top and screw on the metal bands until they’re fingertip-tight—too tight can prevent air from escaping during processing! Then choose your method: place the jars in a boiling water bath for high-acid foods or in a pressure canner for low-acid ones. Remember, using precise timings is essential here; follow guidelines to ensure you’re reaching temperatures adequate enough to kill off dangerous bacteria, particularly botulism in low-acid foods.
Processing times may vary depending on food type and altitude; make sure to consult tested recipes for accuracy!
After processing comes the cooling phase—an often overlooked yet important step in the canning process.
Cooling and Storage
After you’ve finished processing your jars, it’s time to let them cool. Place them on a clean towel away from drafts so they cool slowly—a quick temperature change could cause them to crack. You’ll want to check each jar’s seal by pressing down in the center of the lid; if it pops back up, it hasn’t sealed properly, and refrigeration is necessary. Store successfully sealed jars in a cool, dark place away from sunlight—this prolongs their shelf life dramatically!
With these essential techniques under your belt, you’ll be ready to transform surplus seasonal produce into lasting staples that keep you nourished during emergencies or any time you crave home-cooked goodness.
As we explore further storage techniques designed for optimal freshness, let’s discover how vacuum sealing plays a pivotal role in protecting your food from air and moisture.
Vacuum Sealing for Air-Tight Storage
Vacuum sealing is a game-changer when it comes to preserving food. It functions by drastically reducing the amount of air around your food, which in turn helps extend its shelf life and maintain its quality. Imagine this: you have a pot roast that you plan to store for a special occasion months down the line. With a vacuum sealer, you can package that roast in an airtight bag, effectively halting the clock on freshness and flavor. Now, you can enjoy that delicious piece of meat well after it was first cooked.
Advantages
One of the best aspects of vacuum sealing is how it prevents oxidation. When air sits around food, it can cause the flavors to dull, textures to change, and nutrients to dissipate. By effectively eliminating this oxygen-rich environment, vacuum sealing keeps your food’s quality intact. However, it’s critical to remember that while vacuum sealing protects against aerobic bacteria and spoilage, it cannot replace refrigeration or freezing for long-term storage. In fact, combining vacuum sealing with these methods provides potent protection from spoilage.
A significant aspect often overlooked is how vacuum sealing helps maintain the integrity of flavors and textures over time. For example, dried herbs maintain their potent aroma much longer when vacuum sealed compared to traditional storage methods. You can use this technique not just for meats but also for delicate items like herbs or freshly baked goods.
Practical Use
Now let’s talk about practical applications: vacuum sealing beans, pasta, and nuts not only protects them against pests but also keeps moisture at bay. The frustration of opening a bag of flour only to find bugs doing a backstroke is one avoided when you opt for vacuum-sealed packaging; it provides a formidable barrier against those unwanted invaders. If you’re someone who enjoys bulk buying foods such as grains or legumes, vacuum sealing allows you to store larger quantities without worrying about spoilage or waste.
Furthermore, vacuum-sealed bags can be frozen or stored in the fridge without compromising food quality. This is particularly useful for fragile items like meats; for instance, if you’re buying in bulk from a local farm—vacuum seal those steaks before freezing them.
Investing in effective preservation techniques opens up exciting possibilities for your cooking adventures and ensures that your pantry remains stocked with safe and flavorful ingredients.
Effective Dehydration and Freeze-Drying
To understand the importance of these methods, let’s clarify what they involve. Dehydration is a straightforward process that removes moisture from food using heat. In contrast, freeze-drying is a more complex technique where food is first frozen, and then its moisture is removed under a vacuum, allowing it to preserve its nutrients and flavors remarkably.
Dehydration Process
The dehydrating process requires precision and care to ensure that food retains as much of its original quality as possible. You should start by cleaning and slicing your food items evenly. This uniformity is key because it facilitates even drying; when pieces are too thick or inconsistent, they won’t dry properly, leading to spoilage in some areas. If you have fruits or vegetables, aim for slices about 1/4 inch thick.
Once prepped, the next step involves arranging those slices on drying racks, making sure they don’t touch each other. This spacing ensures that air can circulate freely around each piece, promoting optimal drying.
For the actual drying process, you’ll want control over temperature and time. A dehydrator set at 140°F works wonderfully for most foods; however, your oven’s lowest setting can also be a suitable alternative if you don’t have a dehydrator. Keep in mind that drying times vary significantly based on the food type—the denser the item (think apples versus spinach), the longer it will take!
Freeze-Drying Process
Moving on to freeze-drying: this innovative preservation method can be a tad pricier due to specialized equipment, but it’s worth it for long-term storage. A freeze dryer can keep your food edible for an astounding up to 25 years, making it ideal for emergencies or extended trips.
The process begins with placing your already frozen food into the machine. The magic unfolds as the freeze dryer creates a vacuum around it. As the pressure drops, the dryer slowly warms the contents just enough so that the frozen moisture sublimates—turning directly from ice to vapor without passing through a liquid state.
This intricate balance of freezing and warming within a vacuum is what helps retain not just the structure but also flavor and nutrients better than conventional heating methods might allow.
Whether you choose dehydration or freeze-drying ultimately depends on your needs and resources. Both methods unlock incredible potential for preserving high-quality food while maintaining their delicious attributes for years to come. Next, we will examine how to pick containers that best suit your preservation efforts.
Selecting Suitable Containers
Choosing the right container is paramount when it comes to food preservation. It’s not just about aesthetics; it’s about ensuring the longevity and safety of your stored food. The container acts as a barrier between your food and environmental factors that can lead to spoilage, like air, moisture, and light. A good container should protect its contents while providing peace of mind that your efforts in preserving such valuable resources aren’t wasted.
Factors to Consider
-
Material: The type of material used significantly impacts food storage. Glass jars are inert and won’t react with acidic foods, making them excellent for canning. They are also airtight when properly sealed, helping maintain freshness. In contrast, food-grade plastic containers are lightweight and often convenient for bulk items. However, always ensure they are labeled BPA-free to avoid chemical leaching into your food.
-
Size: Container size matters more than you might think. Opting for smaller jars or bags can help prevent waste by allowing you to open only what you need. Think about how much of a particular item you’ll use at once; if you’re storing broccoli florets, a pint-sized jar may be just right—saving leftovers from going bad before you finish them.
-
Seal: An airtight seal is essential in any container you choose. Look for options that either have a rubber gasket or a vacuum seal feature to keep air out since oxygen introduces moisture and can lead to spoilage over time. For instance, while glass mason jars work wonderfully for canned goods when sealed correctly, mylar bags coupled with oxygen absorbers work beautifully for freeze-dried foods as they further enhance shelf life.
When considering these factors, it’s important to remember that each preservation method might have its preferred types of containers. For example, using glass mason jars for canning preserves not just taste but texture and nutritional value, whereas mylar bags excel in protecting dry goods from oxygen and moisture effectively.
As you prepare to store your carefully preserved foods, there are several useful strategies that can further optimize your emergency supplies for accessibility and longevity.
Practical Emergency Food Storage Tips
Effective storage plays a pivotal role in the overall success of your emergency food preservation efforts. A well-organized storage system not only keeps your food fresh but also allows for easy access during times of uncertainty. Start with stock rotation as one of the most crucial practices. By adhering to the FIFO (First In, First Out) method, you ensure that the oldest supplies get used first, effectively minimizing spoilage and waste. This means labeling your containers with dates as you fill them—it’s an extra step that leads to significant benefits when you’re craving that homemade strawberry jam you canned last summer.
Imagine opening a jar only to find it past its prime. Such a situation is completely avoidable with proper organization.
Another cornerstone of effective storage is the environment where you keep your food.
Temperature control cannot be overlooked. Many don’t realize that food quality can quickly decline if not stored properly. A cool, dark, and dry area is ideal for preserving the integrity of your emergency provisions. This might mean utilizing a less frequented pantry or even investing in an insulated chest to moderate temperatures better than standard kitchen cabinets.
Picture this: during an unexpected heatwave, while others scramble to salvage their spoiling goods, your meticulously stored preserves are just fine, quietly waiting until you need them.
As we think about temperature, fluctuations often accompany disasters; sometimes it’s power outages that force you into panic mode. Therefore, maintaining consistency is vital in keeping everything optimal while also knowing how temperature alters food safety.
Now, let’s talk about the location aspect of your food storage strategy.
It’s wise to diversify your storage locations rather than placing all your eggs—or rather, jars—in one basket. By distributing your supplies across multiple places—be it a basement, an attic, or even a garage—you can alleviate the risk of total loss due to unforeseen events like flooding or pest infestations. When you spread out your food stock, it’s much harder for a single disaster to wipe out everything you’ve worked hard to preserve.
With these practical strategies in mind, the next step is enhancing those preserved goods into delightful meals that make use of all your hard work.
Tasty Recipes for Preserved Foods

Preserved foods don’t have to be bland or monotonous; they can serve as the foundation for incredibly flavorful dishes that your family will love. Imagine whipping up strawberry jam from canned strawberries or creating a hearty vegetable soup using dehydrated ingredients. Cooking with preserved foods not only brings back memories of summer harvests but also assures you that you’re prepared for any situation—without sacrificing taste.
Recipe: Homemade Vegetable Soup
Let’s explore a crowd-pleaser that pairs well with crusty bread and a side salad: Homemade Vegetable Soup. This recipe showcases how versatile preserved ingredients can be when assembled thoughtfully. Gather the following ingredients:
- 1 cup dehydrated carrots
- 1 cup dehydrated peas
- 1 cup canned tomatoes
- 4 cups vegetable broth
To embark on this culinary adventure, start by rehydrating those dehydrated vegetables. Soaking them in water for about an hour helps revive their textures and flavors, making them more pleasant in your final dish. After they’ve had their soak, combine all your ingredients in a large pot.
As you stir everything together, you’ll catch a symphony of colors and aromas that signal something delicious is on the way.
Bring the pot to a simmer and let those flavors meld together for about 30 minutes. This gentle cooking allows the essence of each ingredient to infuse into the broth, creating a rich and savory experience that warms both the body and soul. Serve hot, and feel free to sprinkle fresh herbs atop each bowl to elevate the dish even further.
Preserving food doesn’t just mean putting it aside for emergencies; it means creating opportunities for joyful meals even when resources might be limited.
The beauty of using preserved foods lies in their versatility; you can mix and match according to what you have on hand. Perhaps you have some leftover beef jerky? Adding it can transform the vegetable soup into a protein-packed meal. Or, if you’re feeling adventurous, consider spicing things up with additional herbs or spices you might normally reserve for fresh dishes. Your approach will not only enhance flavor but also inspire creativity in your cooking routine during challenging times.
Explore various recipes utilizing your preserved food stash; this practice stretches your culinary skills while ensuring your emergency supplies are wisely used and enjoyed fully. With these considerations in mind, we now turn our attention to essential gear that will make your preservation efforts easier and more efficient.
Equipment You’ll Need
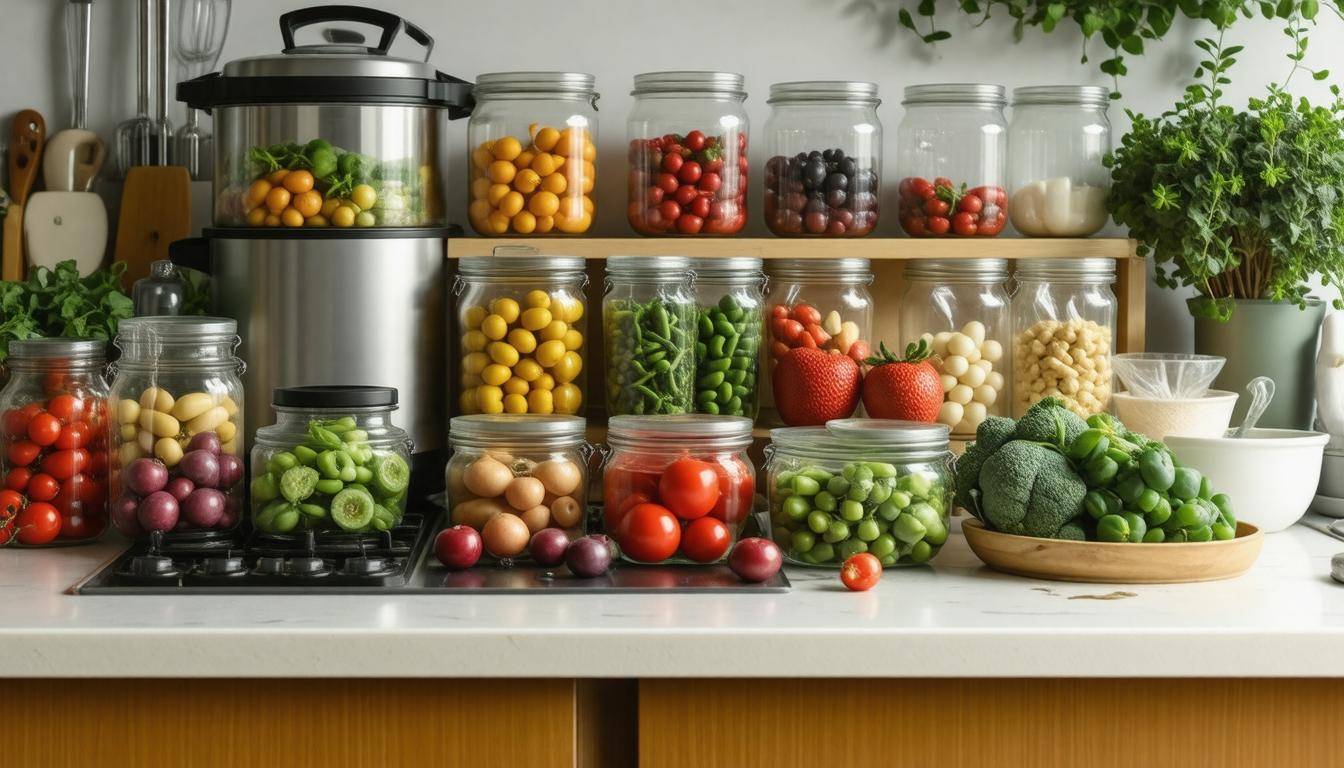
Proper equipment not only streamlines the food preservation process but also ensures that your efforts are safe and effective. Investing in high-quality tools can seem daunting at first, but it pays dividends in both time and safety. Imagine standing in your kitchen with all the right gadgets, your shelves soon filled with bright, preserved fruits, vegetables, and homemade jams—what a rewarding sight!
Essential Tools
First off, pressure canners are invaluable for low-acid foods such as meats and certain vegetables. Unlike boiling water canning methods, pressure canning uses high temperatures to eliminate bacteria while sealing the jar tightly. This method is vital for safely preserving foods like green beans or beef stew.
Next up are water bath canners, perfect for high-acid foods like fruits and jams. These work by submerging jars of fruit preserves in boiling water, creating a vacuum seal as they cool down. Using a proper water bath setup is crucial; it reduces the risk of botulism—something no one wants to think about when enjoying homemade peach jam!
If you’re leaning towards drying foods, consider investing in dehydrators. These devices remove moisture from fruits, vegetables, and meats while retaining most of their nutrients. I remember making apple chips with my dehydrator; the aroma filled my kitchen and produced a snack superior to store-bought options without preservatives.
One tool that often gets overlooked is the vacuum sealer. This sleek gadget creates an airtight seal around your dry goods, keeping out moisture and air that lead to spoilage. Whether it’s nuts, grains, or dried fruits, vacuum sealing helps preserve freshness and flavor longer than traditional storage methods. Consider how much you save in preventing waste—it’s practically an investment!
As many homemakers will testify: investing in quality equipment is well worth it!
Conducting thorough research before purchasing these items will pay off greatly in the long run. Each piece of equipment works together to help you create a pantry stocked with nutritious preserved foods ready for emergencies or everyday enjoyment.
Armed with these essential tools, you’ll be better prepared to preserve your favorite foods safely and effectively.
Incorporating these methods ensures that you’re not just prepared for emergencies but also able to enjoy your home-preserved creations year-round.
What common mistakes should I avoid when preserving food at home?
When preserving food at home, avoid common mistakes such as not properly sterilizing jars and utensils, neglecting to follow precise recipes for canning, and overlooking the importance of using high-quality ingredients. Failing to sterilize can lead to bacteria growth, with statistics showing that improper canning contributes to over 60% of foodborne illness cases related to home preservation. Additionally, not measuring acidity or sugar levels accurately can result in spoiled or unsafe products, so following tested guidelines is crucial for safety and quality.
What are the most effective methods for preserving food at home?
The most effective methods for preserving food at home include canning, freezing, drying, and fermenting. Canning seals food in airtight containers, which can last for years if done correctly, with a reported shelf life of up to 1-5 years depending on the type of food. Freezing retains nutrients and flavor and allows for long-term storage; vegetables can be frozen for 8-12 months without significant quality loss. Drying removes moisture, inhibiting bacterial growth and results in lightweight snacks like dried fruits that can last for years. Fermentation not only preserves but also enhances the nutritional value of foods, with probiotic benefits. Collectively, these methods allow households to effectively sustain their food supplies during emergencies.
What are the differences between dehydration, freezing, and pickling as preservation techniques?
Dehydration removes moisture from food to inhibit bacterial growth and can preserve items for 1-5 years, making it efficient for lightweight storage; approximately 90% of water is extracted. Freezing, on the other hand, retains flavor and nutrients while significantly slowing down spoilage—frozen food generally lasts 8-12 months if properly stored. Pickling involves preserving food in a vinegar or brine solution, which adds acidity that helps prevent spoilage; pickled foods can last up to several years unopened. Each method has unique benefits: dehydration is great for portability, freezing offers superior taste retention, and pickling provides distinct flavors along with long shelf life.
How can I safely jar or can fruits and vegetables for long-term storage?
To safely jar or can fruits and vegetables for long-term storage, ensure you use a pressure canner for low-acid foods (like vegetables) and a water bath canner for high-acid foods (like fruits). Sterilize jars and lids before filling them with prepared produce, leaving appropriate headspace to allow for expansion. Process times vary depending on the food type, but following USDA guidelines is crucial; for instance, processing green beans in a pressure canner typically takes around 20-25 minutes. Properly canned foods can last over a year when stored in a cool, dark place, reducing spoilage risks by up to 90% compared to improper methods.
How do I ensure that my preserved foods maintain their nutritional value over time?
To ensure that your preserved foods maintain their nutritional value over time, store them in a cool, dark place and use airtight containers to prevent exposure to light, air, and moisture. Foods stored at room temperature can lose up to 50% of their nutrients after just one year; hence, proper techniques like canning or freezing can significantly reduce nutrient loss. Moreover, blanching vegetables before freezing can help preserve vitamins, resulting in up to 25% more retained nutrients compared to unblanched options.