
Water damage can be a nightmare for homeowners, often striking when you least expect it. Whether it’s from a sudden storm, a broken pipe, or even a small leak left unchecked, the aftermath can leave you feeling overwhelmed and uncertain about where to start. Don’t panic! With the right knowledge and approach, you can tackle water damage restoration on your own. This article guides you through effective DIY methods and practical tips for assessing damage, drying out affected areas, and making repairs—all aimed at helping you return your home to its former state without incurring hefty professional bills. Let’s dive in and get started on restoring your space!
Effective DIY methods for water damage restoration include quickly removing standing water with pumps or wet/dry vacuums, drying out the area using fans and dehumidifiers, and monitoring moisture levels with hygrometers. It’s also essential to address potential mold growth by thoroughly disinfecting affected areas and replacing severely damaged materials such as drywall if necessary.
Evaluating Water Damage in Your Home
The first step in assessing the impact of water intrusion involves a thorough inspection to determine how far the water has spread and what materials have been affected. This initial examination often reveals visible signs—like damp spots, discoloration, or even mold growth—but it’s equally important to look beyond the surface. For instance, hidden leak areas might show no external signs yet are wreaking havoc within walls and floors. It’s like an iceberg where only a small portion is visible above water but what lies beneath could be much more significant.
When examining your home, start by identifying any noticeable leaks or dampness. Look at walls, ceilings, and floors for water stains; these can be your first indicators of a problem. Check plumbing fixtures and appliances carefully as they are common sources of water damage. Remember that the longer you wait before addressing a problem, the worse the damage becomes.
Always remember, prompt assessment can significantly minimize potential long-term damage.
Next comes assessing the moisture content using a moisture meter — an essential tool in your evaluation arsenal. According to guidelines, acceptable moisture levels vary: 10-15% for wood and 5-10% for drywall. If you find higher readings during your inspection, that indicates trouble. Unchecked moisture levels lead to complications such as mold growth and structural integrity issues.
If you’re unsure where to begin, start from the source of your water exposure—be it plumbing lines or settled pooling—to figure out what may be causing the moisture build-up.
Once you’ve verified areas with excessive moisture, it’s time to inspect them carefully for structural integrity.
Structural damage is key to your assessment. Just because an area appears dry doesn’t mean it’s safe; look for soft spots in floors or walls that may indicate rotting materials underneath. Check around windows and doors too; these spots often reveal hidden damage if proper sealing was compromised due to persistent moisture exposure. Cracks in foundations should not go unnoticed either, as they can signal severe underlying issues.
Lastly, don’t forget to evaluate personal belongings affected by water damage. Furniture, electronics, and decor can harbor moisture and contaminants that make them unsalvageable if not addressed quickly. Create an inventory list to categorize items as salvageable or unsalvageable; this can assist in insurance claims while also helping you decide what can potentially be restored.
Following this meticulous approach helps shape a clearer picture of what repairs will be necessary and what resources—be it time, labor, or materials—you’ll need moving forward in your restoration journey. Your timely actions may mean that some items can be saved rather than discarded.
With a thorough understanding of the extent of damage and necessary assessments completed, you can now pivot towards outlining the next practical steps in repairing your home effectively.
Prioritizing Repair Efforts
When dealing with water damage, understanding which repairs to tackle first can save both your property and your sanity. As daunting as it may seem, this process begins with quick and decisive actions aimed at stopping further damage from occurring. Remember, every moment counts when it comes to mitigating risks associated with excess moisture.
The first and most crucial step is to stop the water source if possible. If a pipe has burst, shut off the main water supply immediately. This requires a little foresight since finding the shut-off valve could save you from being knee-deep in worse problems just moments later. By stemming the flow of water, you can better manage what you’re able to keep dry.
Next on your list should be electrical safety. Turn off all electrical circuits in affected areas; this step is non-negotiable due to the risk of electrocution when water meets electricity. Safety always comes first, even before making assessments about damage.
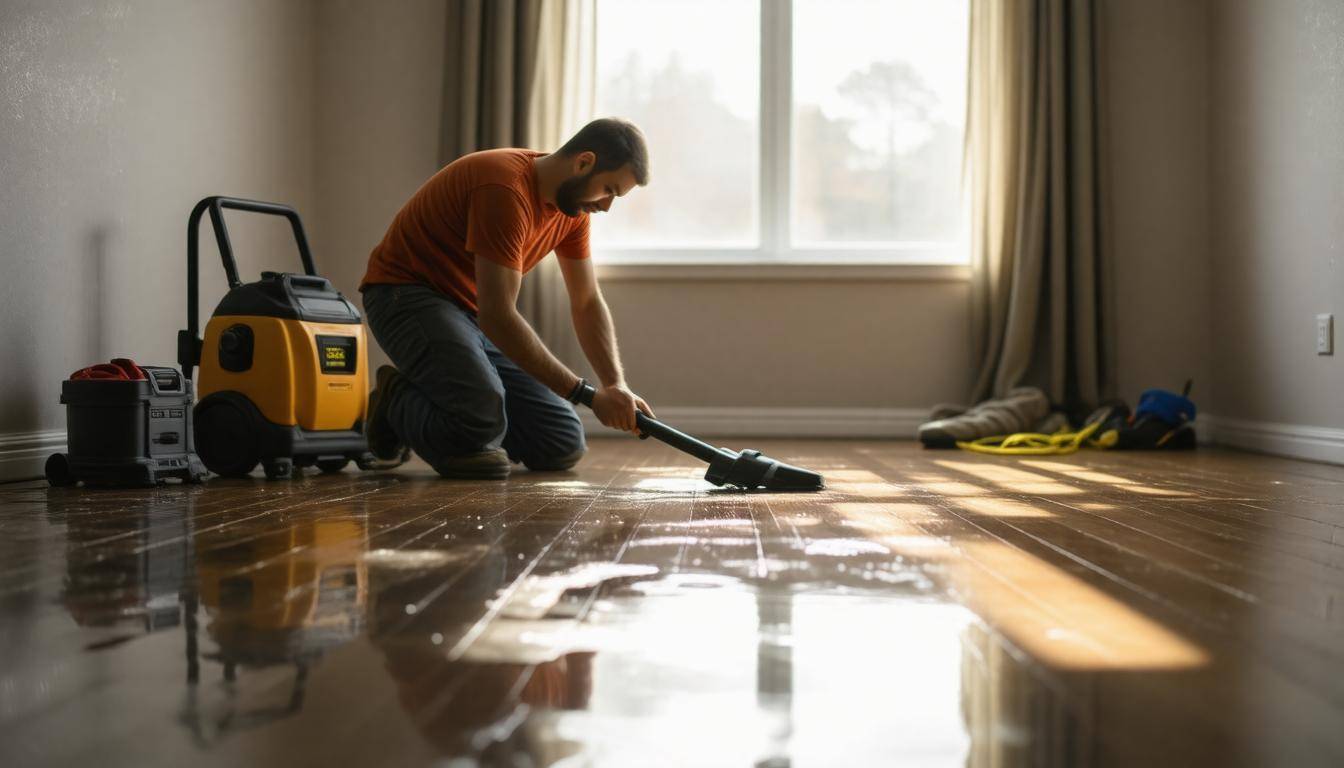
Once the immediate dangers have been addressed, it’s time to tackle those wet areas. Use towels and mops to soak up standing water as best as you can. Sometimes, having a wet/dry vacuum can expedite this process significantly, allowing you to eliminate water faster than traditional methods.
Ventilation plays an important role here. Open as many windows and doors as possible; fresh air enhances airflow and helps promote drying. This might mean living with some discomfort temporarily but it’s well worth it in preventing mold growth—a sinister threat that thrives in damp conditions.
Relocating valuables is also a key step: ensure that furniture, electronics, and any important documents are safeguarded from the wet area. Even if they’re not currently submerged, repeated soakings can cause irreversible damage over time.
A great way to visualize your repair priorities is to think of potential hazards. For instance, if you notice that a ceiling is sagging due to water weight, addressing it should be high on your list—safety concerns like structural integrity should trump other repairs down the line. After managing the most critical risks, you can gradually move on to less urgent repairs, such as cosmetic updates or replacing small items that were damaged.
With these initial steps completed, it’s essential to have the right tools at your disposal for effective drying and restoration. Understanding what equipment is needed will facilitate an even smoother repair process.
Essential Equipment for Drying
Drying out your home after water damage can feel daunting, but with the right tools, this process can be both efficient and effective. Every piece of equipment plays a vital role in ensuring that you’ve covered all bases and safeguarded your space against further issues, such as mold or structural damage.
Important Tools
Pumps are frontline defenders against standing water. They come in various sizes depending on the amount of water you need to remove. For instance, submersible pumps are particularly handy in basements where water might accumulate quickly. They are usually powered by electricity but offer robust performance, making them ideal for heavy-duty jobs. If you find yourself facing a flooded area, having a pump can spare you from hours of mopping and help prevent extensive damage.
After the bulk of the water has been cleared away, it’s time to focus on expediting the drying process.
This brings us to blower fans, which accelerate airflow within the space. High-velocity fans are not just any average household appliance; they move air at an impressive speed. This increased air circulation is crucial because it helps evaporate moisture more quickly than passive air drying would allow. Strategically placing these fans around the affected areas can lead to a noticeable decrease in drying time, helping your surfaces return to normal considerably faster. As an added bonus, many blower fans operate quietly compared to other machinery, allowing for a more pleasant working environment.
With moisture now efficiently circulating and being absorbed, you’ll need a tool to help address any lingering humidity.
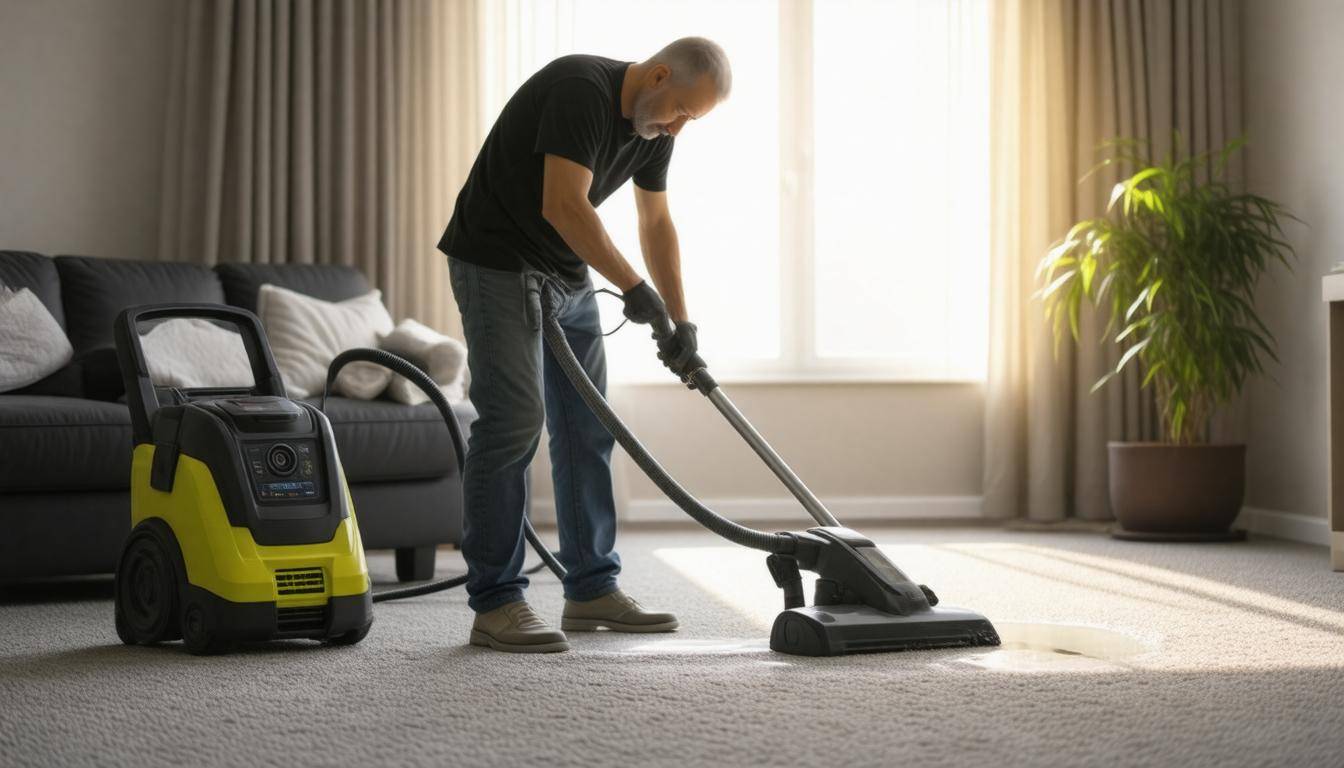
Enter dehumidifiers—the unsung heroes in the battle against mold and mildew. These devices draw moisture from the air and help bring humidity levels down to safer thresholds. Not only do they protect your belongings from water damage, but they also safeguard your health by preventing the potential for mold growth. In an area that is prone to dampness or when drying extensive spaces like carpets and walls, a dehumidifier is indispensable.
By using a combination of pumps, blower fans, and dehumidifiers effectively, you can drastically reduce drying time and minimize damage significantly. Each piece of equipment complements the others in function and purpose—first pumping out excess water, then blowing air to dry surfaces while reducing humidity levels concurrently.
While acquiring these tools may seem straightforward, their proper use and positioning play an equally important role in achieving optimal results during the restoration process. Understanding how to utilize these essential devices will pave the way as we explore materials needed for cleaning and repair tasks.
Cleaning and Repair Materials
When faced with water damage, it’s essential to arm yourself with the appropriate cleaning and repair materials for a thorough recovery. Consider this: just as a craftsman wouldn’t approach a project without the right tools, a homeowner shouldn’t tackle water damage without having quality cleaning supplies at their fingertips. This preparation can make all the difference in your ability to mitigate long-term damage and ensure a safe environment.
Mild detergents serve as the cornerstone of your cleaning arsenal. They’re versatile enough to clean both non-porous surfaces like tile and glass as well as porous materials such as wood and drywall. Not only do they help lift away dirt and grime, but they also play a significant role in removing lingering odors often associated with moisture damage.
As you move along the line of necessary materials, disinfectants become equally important.
Disinfectants are your frontline defense against bacteria that thrive in damp environments. By applying these powerful substances, you can significantly reduce the risk of infections and help keep mold spores at bay. Especially useful in bathrooms or kitchens, using disinfectants effectively is essential; just be sure to read the labels to choose products specifically designed for the surface you’re tackling.
On more severe mold or mildew issues, you’ll find that bleach comes into play.
Bleach, specifically designed for mold remediation, can eliminate even stubborn fungal growths. However, it’s crucial to use bleach carefully; ensure that you’re working in a well-ventilated area and protecting your skin with gloves to avoid irritation.
Protecting undamaged areas during a restoration process is critical. This is where plastic sheeting proves invaluable. Covering furniture or flooring with plastic sheeting allows you to work freely in affected zones without worrying about cross-contamination. It keeps safe spaces protected from dust and debris kicked up during your cleanup efforts.
Following up on initial cleaning needs, you may very well find yourself needing replacement materials. Water-damaged drywall, insulation, or flooring simply needs to go; knowing what materials you’ll need ready for immediate repair—like extra sheets of drywall or rolls of flooring—can save critical time when it’s most needed. Keeping these at hand means you’re prepared for any emergency clean-up that requires rapid action.
The experience shared by others further emphasizes how vital being prepared can be.
“After my basement flooded, having a stock of these materials on hand made the cleanup process faster and less stressful,” said homeowner Jenna Ortiz. Her story reinforces how vital it is to anticipate damages; preparedness turns potential chaos into manageable order.
Thus, never underestimate the power of properly chosen cleanup supplies when addressing water damage. These items are not just practical—they’re imperative for ensuring your home returns to its former state while minimizing future risks related to mold or structural decay.
With these essentials in mind, we now turn our focus towards practical approaches to restoring your home from water damage effectively.
DIY Water Damage Restoration Methods
Tackling water damage yourself can appear daunting, yet it can be navigated smoothly with the right techniques and resources. The first step is the initial assessment. This isn’t simply a glance over the area; you need to really evaluate the extent of the damage. Identify where the water has spread and categorize it into one of three types: Category 1 (clean water), Category 2 (gray water), or Category 3 (black water). Understanding this will guide your cleanup efforts and safety precautions—after all, you certainly don’t want to wade through contaminated water without proper protection.
Once you have determined the category of water damage, it’s time to roll up your sleeves and begin the removal process.
For water removal, the approach varies based on volume. If faced with significant flooding, renting professional-grade pumps can expedite the process dramatically. On the other hand, for smaller spills, a shop vacuum works perfectly to suck up excess water. Regardless of your method, ensure that you safely unplug any electrical devices in the area before starting this work.
After clearing out standing water, it’s crucial to shift focus to drying.
This stage is paramount. Utilizing blower fans and dehumidifiers makes a huge difference in preventing mold growth—a common consequence of lingering moisture! Ideally, keep these running for 24 to 48 hours to provide ample time for complete drying. You may also consider using hygrometers during this stage to check moisture levels, as ensuring every nook is dry is essential for preventing future issues.
With everything dry, we move on to cleaning, which often dictates how well things will turn out in the end.
Here, a simple solution of mild detergent mixed with disinfectants becomes your best ally. Use these solutions on surfaces that have been affected by water intrusion—it’s vital not just to clean visible dirt but also to kill off emerging bacteria or mold spores. As you scrub surfaces down, remember to wear gloves and perhaps even a mask, especially if you’re working with gray or black water. It’s always preferable to err on the side of caution.
Now that everything is clean, it’s time for repairs.
For replacing damaged materials like drywall, insulation, or flooring, having extra supplies on hand speeds up repairs tremendously. If you’re already aware that you’ve sustained serious damage, consider buying those extra hardwood boards beforehand—it will save both time and stress later on when you need them urgently. During replacement discussions, weigh your options carefully: Often cheaper materials are available but they may not hold up as well long-term.
Following these steps diligently allows for greater confidence and control over what could otherwise feel like an overwhelming situation.
Navigating through these methods takes patience and attention; don’t rush through any part, as thoroughness today means fewer headaches tomorrow and ensures that your home stays safe from further damage down the line.
As each phase wraps up, we can look more closely at how to tackle specific structural elements within your home that may need attention after such an incident.
Repairing Walls and Floors
Restoring walls and floors involves more than just basic repairs; it requires a thoughtful approach to ensure long-lasting results. When dealing with water damage, it’s essential to evaluate the extent of the impairment carefully before jumping into any repair actions.
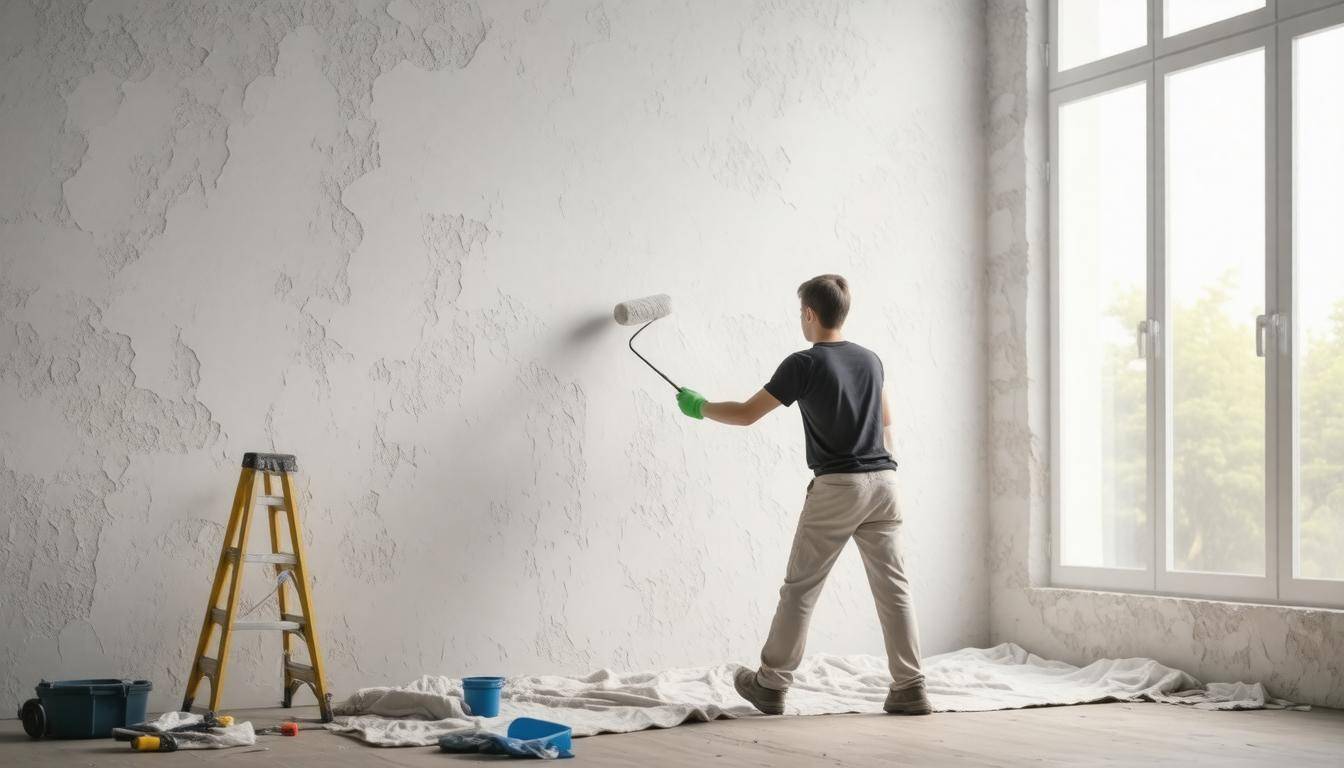
For instance, if you find drywall that has soaked up moisture and developed a soft feel, be prepared for an inevitable replacement. Using a utility knife, measure out the affected area and cut out the damaged sections. Afterward, secure new drywall sheets—preferably ones with a thickness of 1/2 inch, which is standard for most interior applications—to replace what was lost. It’s important to ensure these new pieces sit flush against surrounding materials, creating a seamless integration into your home.
Applying joint compound over seams not only smoothens out the transitions but also strengthens the surface for future paint applications. Remember to let it dry completely before sandpapering it to achieve that perfectly smooth finish.
But what about flooring? The quality of your floors may shift dramatically following water exposure, especially if they are wooden or laminated.
Floor Repairs
Just as with walls, addressing floor damage begins with a thorough assessment. If you notice warping or bubbling in wood or laminate planks, quick action is paramount. The key here is patience: allow the subfloor to dry completely before proceeding with any replacements. You might want to use specialized hygrometers to check moisture levels; they can provide guidance on whether it’s safe to proceed. Once sure of dryness, you can start replacing warped planks with new ones that match the existing flooring as closely as possible.
Here’s an insider tip: it’s always wise to keep a few extra boards on hand, as this not only facilitates quicker repairs but also ensures consistency in appearance should another incident arise in the future.
According to the National Association of Home Builders, acting swiftly within 24-48 hours on water-damaged wooden floors can significantly increase your chances of recovery and reduce long-term costs associated with replacement.
While tackling these repairs can feel daunting, taking them one step at a time makes the process manageable and rewarding.
Safety Considerations
Throughout this process, don’t forget about safety! Always work wearing gloves and possibly N95 respiratory masks—this prevents exposure to mold spores that can thrive in damp environments. Also make sure the workspace is well-ventilated; fresh air helps facilitate drying and reduces any lingering fumes from materials like joint compound or adhesives.
By handling wall and floor repairs as outlined above, you’re not just mending physical structures; you’re ensuring a healthier environment for yourself and your family while enhancing the beauty of your home in the process.
With these essential repairs underway, it’s equally important to focus on how to restore other vital aspects of your living space effectively.
Cleaning and Restoring Furniture
When your furniture has been soaked, the clock is ticking for effective restoration. The reason for urgency lies in the fact that moisture creates a ripe environment for mold and mildew, which can lead to serious health hazards. It’s not just about getting that wet sofa dry again; it’s about keeping your living space safe while also retaining your treasured pieces.
Techniques
To start, immediate drying is crucial. Quickly moving furniture to a well-ventilated area is key; however, if you notice dampness still lingering, consider using fans or a dehumidifier to remove the remaining moisture efficiently. This not only speeds up the drying process but helps prevent that tell-tale musty smell too. Depending on how wet the fabric is, you might need to change its position often to ensure even airflow can reach all parts.
After addressing the immediate drying needs, pay special attention to upholstery care. Cleaning fabric surfaces with a solution of white vinegar and water—combined at a ratio of 1:1—can effectively eliminate both stains and smells. Just remember to always do a patch test first! You want to make sure your cleaning solution doesn’t cause further discoloration or damage to the material.
When it comes to wood furniture, a gentle approach is critical. Begin by mixing mild detergent with warm water. Using a soft cloth, apply this solution carefully, avoiding soaking the wood as excessive moisture can warp delicate finishes. Following this initial cleaning phase, applying a quality polish will help restore sheen while providing a protective barrier against future damage.
A water-damaged couch can often be saved by removing and washing cushion covers, but remember: once deep saturation occurs, professional cleaning may be your best bet for complete restoration.
Now we should consider additional details that enhance our restoration efforts by focusing on some important tips and precautions.
Maintaining an eye on humidity levels during and after your cleanup is vital; ideally, indoor humidity should remain below 60%. Utilizing tools like hygrometers can provide insight into your home’s moisture status, allowing you to adjust your dehumidifiers accordingly. For those who prefer hands-on techniques, simple pressure applied to swollen areas of wood furniture can encourage fibers to return to their original shape.
As you progress through restoring furniture:
- Inspect every few days for signs of mold or mildew.
- Allow adequate drying time — generally at least 24-48 hours in a well-ventilated area.
- Store extra hardwood boards if possible; they make quick replacements if necessary down the road.
Maintaining these methods not only improves the chances of saving your favorite pieces of furniture but also ensures a clean and healthy environment as you move forward in your home restoration journey.
With an understanding of effective restoration strategies now established, let’s shift focus towards crucial measures aimed at keeping your living space safeguarded from future mishaps.
Safety and Prevention Tips
Ensuring your safety during water damage restoration is paramount; therefore, it should never be overlooked. It’s essential to equip yourself with practical safety tips while also adopting preventive measures to avoid future incidents.
Starting with safety, one of the most basic yet often neglected aspects is protective gear. When faced with cleanup efforts, wearing rubber gloves and boots is crucial to safeguard against contaminants that may lurk in the water. This simple addition isn’t just about comfort; it’s about preventing serious health issues from exposure to polluted water.
Once you’ve got your protective gear sorted, let’s talk about another crucial element: ventilation.
Keeping the area well-ventilated is vital. Think of it as opening the windows on a warm spring day; fresh air encourages a healthy environment, especially when dealing with mold spores that thrive in stagnant conditions. To send these unwanted particles packing, open windows and doors if weather permits or utilize fans to help circulate the air. Good ventilation protects your health and hastens the drying process—a critical step in preventing mold growth.
Now, although it might be tempting to plunge headfirst into a flooded room, it’s critical to avoid electrical areas when standing water is present.
If you’re standing in a room with pooled water, do not enter if electricity is on—this creates a life-threatening risk of electrocution. It might seem like common sense, but in emergencies, emotions can run high, causing lapses in judgment. Always prioritize your well-being: turn off power sources at the main breaker before proceeding.
Moving beyond immediate cleanup, let’s explore pivotal prevention techniques.
Prevention Tips
One fundamental method for averting water damage disasters involves regular maintenance checks throughout the house. Establishing a routine to inspect plumbing fixtures and drainage systems for leaks can save homeowners significant headaches down the line. Make it part of your seasonal chores—just like changing batteries in smoke detectors—with consistent reviews leading to early detection of potential issues.
In addition to periodic checks for leaks, another wise investment is to install sump pumps in basements prone to flooding.
These devices serve as lifesavers by automatically removing excess water during heavy rains or rapid snow melts. Sump pumps are particularly effective in areas known for poor drainage or where groundwater frequently rises. Think of it like having an insurance policy against water damage; however, they require monitoring—so regular testing ensures they function correctly when you need them most.
Finally, don’t underestimate the importance of sealing cracks within walls and foundations.
Water is relentless once it finds its way into crevices around your home; thus, taking proactive measures is imperative. Clear caulking should be applied wherever walls meet floors and along window seals to create a watertight barrier that prevents moisture intrusion. Inspecting outside drains and gutters also helps keep your home dry—make sure they’re clear so rainwater flows easily away from the foundation!
A homeowner named Bill Harper shared his experience: “Routine checks saved our home from potential water disasters multiple times.” His story illustrates how these small yet consistent actions can lead to substantial benefits over time.
By weaving these safety and prevention strategies into your home care routine, you empower yourself and ensure lasting protection against unforeseen water damage. With diligence and proper planning, you can mitigate risks effectively and maintain a safe living environment.
**Thoroughly drying the affected area** using fans and dehumidifiers.
Thoroughly drying the affected area is crucial in water damage restoration, as it helps prevent mold growth and further structural damage. Utilizing fans and dehumidifiers can reduce moisture levels significantly; studies show that keeping humidity below 60% can inhibit mold development. In fact, mold can begin to grow within 24-48 hours if materials remain damp, highlighting the importance of prompt and effective drying methods for a successful DIY repair.
What tools and materials are necessary for a successful DIY water damage restoration?
To successfully tackle DIY water damage restoration, you’ll need essential tools such as a wet/dry vacuum, dehumidifier, fans for air circulation, and protective gear like gloves and masks. Materials include moisture-resistant drywall, sealing compounds, and mold inhibitors to prevent future growth. According to the Institute of Inspection, Cleaning and Restoration Certification (IICRC), timely intervention can reduce overall repair costs by as much as 30%, highlighting the importance of having the right tools on hand to prevent further damage.
What are the common signs that indicate the need for immediate DIY intervention in water damage?
Common signs that indicate the need for immediate DIY intervention in water damage include visible mold growth, peeling paint or wallpaper, damp odors, and warped flooring. It’s crucial to act quickly as mold can begin to develop within 24-48 hours of water exposure, posing health risks and further structural damage. According to the Environmental Protection Agency (EPA), mold can cause allergic reactions and asthma in some individuals, highlighting the importance of prompt action in addressing water damage issues.
**Sealing leaks and preventing future water intrusion** by identifying cracks in walls or roofs.
To effectively seal leaks and prevent future water intrusion, it’s crucial to regularly inspect your walls and roofs for any visible cracks or gaps. According to the American Society of Home Inspectors, over 30% of reported water damage claims stem from roof leaks and improper drainage. Using high-quality sealants and caulking to fill in these cracks can significantly reduce the risk of water intrusion. Additionally, ensuring proper grading around your home and maintaining gutters can further protect against potential leaks, ultimately preserving your property’s integrity and saving you from costly repairs down the line.
**Cleaning and disinfecting** surfaces with a mixture of bleach and water or a specialized cleaner to prevent mold.
Cleaning and disinfecting surfaces with a mixture of bleach and water (commonly a ratio of 1 cup of bleach to 1 gallon of water) or using specialized mold cleaners is essential for preventing mold growth after water damage. According to the CDC, mold can begin to grow within 24 to 48 hours in damp environments, making prompt action critical. Regularly disinfecting affected areas not only helps eliminate existing mold spores but also reduces the risk of future infestations, ultimately protecting the health of your home and its occupants.
How can I determine whether to tackle water damage restoration myself versus hiring a professional?
To decide whether to handle water damage restoration yourself or hire a professional, assess the extent of the damage and your own skills. If the damage is isolated (like small leaks or minor surface issues) and you’re handy, a DIY approach can save you money and be manageable. However, if the damage involves structural concerns, mold growth, or requires specialized equipment, hiring a professional is advisable. Statistics indicate that 70% of homes with severe water damage lead to mold within 48 hours, which can pose health risks; thus, in complex situations, it’s often better to rely on experts for thoroughness and safety.
Are there any safety precautions I should take when performing DIY water damage restoration?
Yes, safety precautions are crucial when performing DIY water damage restoration. Always wear protective gear such as gloves, masks, and goggles to prevent exposure to mold and harmful contaminants that can thrive in damp environments; according to the CDC, mold can affect up to 50% of homes in some areas. Ensure proper ventilation to avoid inhaling toxic fumes from cleaning agents, and be cautious of electrical hazards—unplugging appliances that may be near water is vital. Lastly, if the damage is extensive or involves sewage contamination, it’s advisable to consult professionals for safety reasons.
**Removing damaged materials**, such as drywall or insulation, that cannot be restored.
When dealing with water damage, it’s crucial to remove irreparable materials like drywall and insulation promptly to prevent mold growth and structural issues. According to the EPA, mold can develop within 24 to 48 hours of water exposure, making timely removal essential for health and safety. Use a utility knife to cut away damaged drywall, ensuring you wear protective gear and dispose of the materials properly. This proactive approach not only protects your home but also saves on potentially costly repairs down the line.
What long-term maintenance practices can help prevent future water damage in my home?
To prevent future water damage in your home, regularly inspect and maintain your roof, gutters, and downspouts to ensure proper drainage. Additionally, seal windows and doors to keep moisture out, and address any plumbing leaks immediately to avoid costly repairs down the line—statistics show that 14,000 people experience a water damage emergency daily in the U.S., highlighting the importance of proactive maintenance. Consider installing a sump pump if you live in a flood-prone area and ensure your home’s grading directs water away from the foundation.
**Using absorbent materials**, like towels or sponges, to soak up excess water regularly before larger efforts are deployed.
Using absorbent materials such as towels and sponges to regularly soak up excess water is an effective first step in water damage restoration. This method not only helps to limit the spread of moisture—reducing the risk of mold growth, which can begin within 24 to 48 hours—but also minimizes the need for extensive repairs later on. According to studies, immediate response using such absorbent materials can reduce total repair costs by up to 50%, making it a crucial component of DIY home repair.